Bending Light To Fit Technology

Solar power is an excellent way of generating electricity, whether that’s for an off-grid home or for the power grid. With no moving parts maintenance is relatively low, and the downsides of burning fuel are eliminated as well. But as much as it’s revolutionized power generation over the last few decades, there’s still some performance gains to be made when it comes to the solar cells themselves. A team at Stanford recently made strides in improving cell efficiency by bending the properties of sunlight itself.

In order to generate electricity directly from sunlight, a photon with a specific amount of energy needs to strike the semiconductor material. Any photons with higher energy will waste some of that energy as heat, and any with lower energy won’t generate electricity. Previous methods to solve this problem involve using something similar to a prism to separate the light out into colors (or energies) that correlate to specific types of cells calibrated specifically for those colors. This method does the opposite: it changes the light itself to an color that fits the semiconductor material. In short, a specialized material converts the energy from two lower-energy photons into a single higher-energy photon, which then strikes the solar panel to create energy.

By adding these color-changing materials as a layer to a photovoltaic solar panel, the panel can generate more energy with a given amount of light than a traditional panel. The major hurdle, as with any research, is whether or not this will be viable when produced at scale, and this shows promise in that regard as well. There are other applications for these materials beyond photovoltaics as well, and the researchers provide an excellent demonstration in 3D printing. By adding these color-change materials to resin, red lasers can be used instead of blue or ultraviolet lasers to cure resin in extremely specific locations, leading to stronger and more accurate prints.

New Drivers For Ancient Webcam

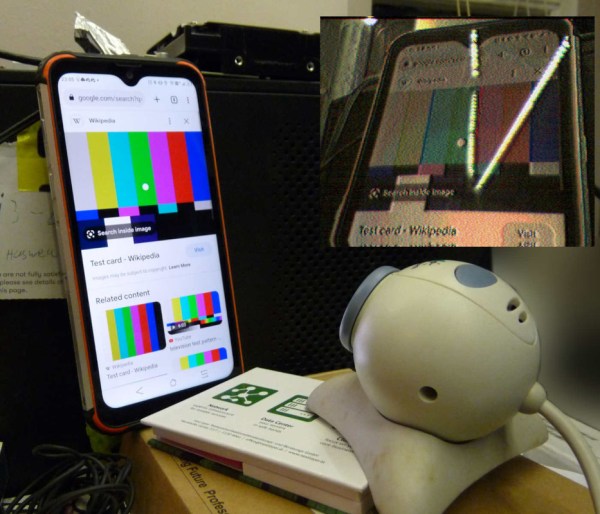
For those of us who are a little older, the 90s seem like they were just a few years ago. The younger folks might think that the 90s were ancient history though, and they might be right as we’ve been hearing more bands like Pearl Jam and The Offspring playing on the classic rock stations lately. Another example of how long ago the 90s were is taking a look at the technological progress that has happened since then through the lens of things like this webcam from 1999, presuming you load up this custom user space driver from [benjojo].

Thankfully the driver for this infamous webcam didn’t need to be built completely from scratch. There’s a legacy driver available for Windows XP which showed that the camera still physically worked, and there’s also a driver for Linux which was used as a foundation to start working from. From there a USB interface was set up which allowed communication to the device. Not a simple task, but apparently much easier than the next steps which involve actually interpreting the information coming from the webcam. This is where a background in digital signal processing is handy to have. First, the resolution and packet size were sorted out which led to a somewhat recognizable image. From there a single monochrome image was pieced together, and then after deconstructing a Bayer filter and adding color, the webcam is back to its former 90s glory.

[benjojo] has hosted all of the code for this project on a GitHub page for anyone who still has one of these webcams sitting around in the junk drawer. The resolution and color fidelity are about what we’d expect for a 25-year-old device that predates Skype, Facebook, Wikipedia, and Firefox. And, while there are still some things that need to be tweaked such as the colors, white balance, and exposure, once that is sorted out the 90s and early 00s nostalgia is free to flood in.

Before You Sudo Rm -rf /, Take Some Precautions

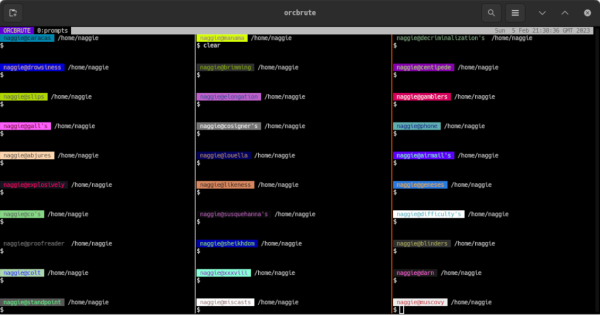
Maintaining or administering a computer system remotely is a common enough task these days, but it’s also something that can go sideways on you quickly if you aren’t careful. How many of us are guilty of executing a command, having it fail, and only then realizing that we weren’t connected to the correct computer at all? [Callan] occasionally has this issue as well, but in at least one instance, he deleted all of the contents of the wrong server by mistake. To avoid that mistake again, he uses color codes in the command line in a fairly unique way.

The solution at first seems straightforward enough. Since the terminal he’s using allows for different colors to be displayed for the user and hostname on the bash prompt, different text and background colors are used for each server. The only problem with this is that his friends also have access to these servers, and one of them is red/green colorblind, which led to another near-catastrophic mix-up. To ensure no edge cases are missed, [Callan] built a script which runs on every new server he spins up which selects two random colors, checks that they contrast well with each other, don’t create problems for the colorblind, and then applies them to the bash prompt.

For a problem most of us have had at some point or another, it’s a fairly elegant solution that helps ensure we’re sending the right commands to the right computer. This adds a layer of automation to the process and, while some color combinations do look similar, there are enough to help out most of us in some way, especially since he has released the source code on his GitHub page. For other helpful server administration tips, we’d recommend the Linux-Fu article about deploying your own dynamic DNS.

Low-Cost Display Saved By RP2040

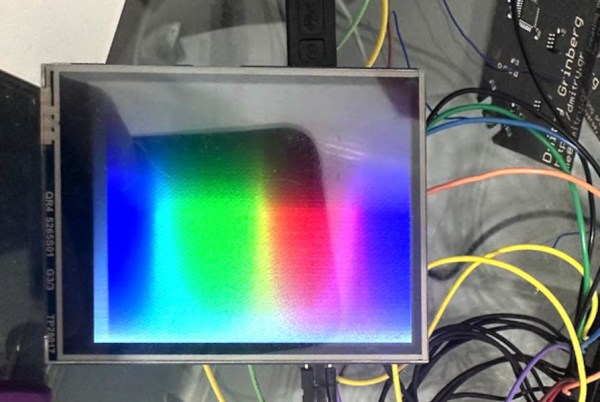
Anyone looking for components for electronics projects, especially robotics, microcontrollers, and IoT devices, has likely heard of Waveshare. They are additionally well-known suppliers of low-cost displays with a wide range of resolutions, sizes, and capabilities, but as [Dmitry Grinberg] found, they’re not all winners. He thought the price on this 2.8-inch display might outweigh its poor design and lack of documentation, and documented his process of bringing it up to a much higher standard with a custom driver for it.

The display is a 320×240 full-color LCD which also has a touchscreen function, but out-of-the-box only provides documentation for sending data to it manually. This makes it slow and, as [Dmitry] puts it, “pure insanity”. His ultimate solution after much poking and prodding was to bit-bang an SPI bus using GPIO on an RP2040 but even this wasn’t as straightforward as it should have been because there are a bunch of other peripherals, like an SD card, which share the bus. Additionally, an interrupt is needed to handle the touchscreen since its default touch system is borderline useless as well, but after everything was neatly stitched together he has a much faster and more versatile driver for this display and is able to fully take advantage of its low price.

For anyone else attracted to the low price of these displays, at least the grunt work is done now if a usable driver is needed to get them up and running. And, if you were curious as to what [Dmitry] is going to use this for, he’s been slowly building up a PalmOS port on hardware he’s assembling himself, and this screen is the perfect size and supports a touch interface. We’ll keep up with that project as it progresses, and for some of [Dmitry]’s other wizardry with esoteric displays make sure to see what he’s done with some inexpensive e-ink displays as well.

Pushing Crates In 8-bit Color

Moore’s law isn’t strictly holding anymore, but it is still true that most computing systems are at least trending towards lower cost over time, if not also slightly smaller size. This means wider access to less expensive hardware, even if that hardware is still an 8-bit microcontroller. While some move on to more powerful platforms as a result of this trend, there are others still fighting to push these platforms to the edge. [lcamtuf] has been working to this end, stretching a small AVR microcontroller to not only play a classic video game, but to display it on a color display. Continue reading “Pushing Crates In 8-bit Color”

All Your Pixels Are (Probably Not) Belong To Pantone

There’s a piece of news floating around the open IP and allied communities at the moment which appears to have caused some consternation. It comes from Adobe, who have announced that due to an end of their licensing deal with Pantone LLC, PSD images loaded into Photoshop will have pixels containing unlicensed Pantone colours replaced with black. What, Pantone owns colours now? Are we expected to pay a royalty every time we take a picture of a blue sky? It’s natural to react with suspicion when hearing a piece of news like this, but for once we think this might not be the unreasonable intellectual property land grab it may first appear. To illustrate this, it’s necessary to explain what Pantone does, and what they don’t do. Continue reading “All Your Pixels Are (Probably Not) Belong To Pantone”

Mechanical Color Picker Types Hex Codes For You

Hex codes are a simple, unambiguous way to designate colors in digital media. However, going from a color in your head to a hex code can be difficult for the unpracticed. [Guy Dupont] built a little gadget by the name of the Dial Toner to do it for him (Nitter).

The Dial Toner has two dials for each color channel – Red, Green, and Blue. By turning the dials, one can choose a given color in the 8-bit RGB color space, and that color is then displayed on the device’s included RGB LED. Once selected, the button can be pressed to type the selected color’s hex code into a text box. The Dial Toner runs on a Xiao RP2040 microcontroller board, and is coded in CircuitPython.

[Guy] hopes to sell the Dial Toner on Etsy in future, and is even working on a CMYK version for print addicts. We’ve featured [Guy]’s work here before, too, in the form of his extended-play HitClips cartridges. Video after the break.

Continue reading “Mechanical Color Picker Types Hex Codes For You”