Getting SPI On A Router

router

Cheap routers such a s the TP-LINK 703n and the TP-LINK MR3020 (seen above) can be used for much more than just connecting your laptop to your cable modem. They’re actually very small Linux boxes and with OpenWRT, you can control every aspect of these tiny pocket-sized computers. It’s frequently been suggested that these routers are awesome substitutes for the usual methods of getting Internet on a microcontroller, but how do you actually do that? The onboard serial port is a great start, but this also dumps output from the Linux console. What you need here is an SPI connection, and [ramcoderdude] has just the solution for you.

Linux already has a few SPI modules, but these are only accessible with kernel drivers. Traditionally, the only way to access SPI is to recompile the kernel, but [coderdude] created a kernel module that allows any device running the Attitude Adjustment OpenWRT image to dynamically allocate SPI busses.

He’s already submitted this patch to the OpenWRT devs, and hopefully it will be included in future updates. Very cool, we think, and something that can open a whole lot of doors for hacking up routers very easily.

Xbox 360 Light Right And RF Module Connected To Raspberry Pi

rpi-connected-to-xbox-lightring

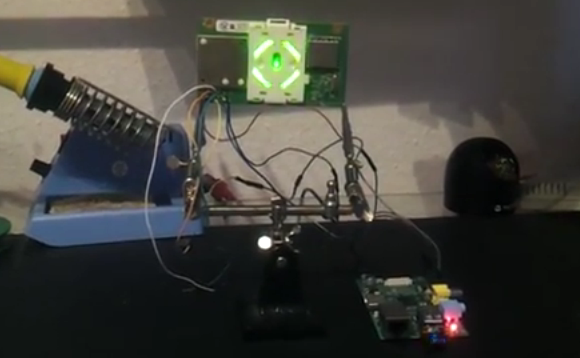
If you want to mess around with your Xbox 360 controllers on a computer Microsoft would be happy to sell you a USB dongle to do so. But [Tino] went a different route. The board that drives the Xbox 360’s status light ring also includes the RF module that wirelessly connects the controllers. He wired this up to his Raspberry Pi using the GPIO header.

The module connects via an internal cable and is treated much like a USB device by the Xbox motherboard. The problem is that it won’t actually handle the 5V rail found on a USB connector; it wants 3.3V. But this is no problem for the RPi’s pin header. Once a few connections have been made the lights are controlled via SPI I2C and [Tino] posted some example code up on Github to work with the RF module. He plans to post a follow-up that interfaces the module with a simple microcontroller rather than an RPi board. If you can’t wait for that we’re sure you can figure out the details you need by digging through his example code.

Programming Microcontrollers With A Raspi

rasduino

The advent of the Arduino brought the world of microcontrollers to hobbyists, students, and artist the world over. Right now we’re in the midst of a new expansion in hobbyist electronics with the Raspberry Pi, but we can’t expect everyone to stay in the comfortable, complex, and power-hungry world of Linux forever, can we? Eventually all those tinkerers will want to program a microcontroller, and if they already have a Raspberry Pi, why not use that?

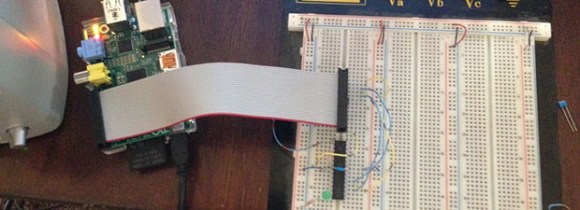
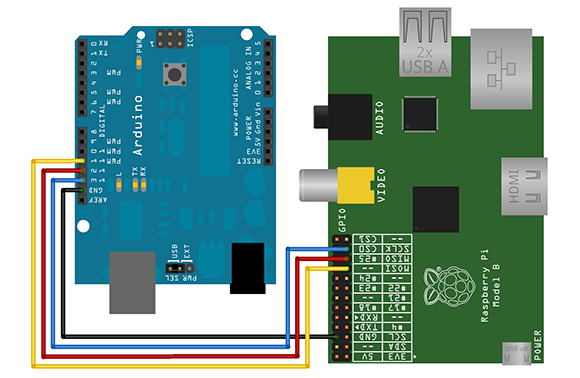
[Kevin] wanted to turn his Raspi into an AVR development workstation, without using any external programmers. He decided to use the Raspi’s SPI port to talk to an AVR microcontroller and was able to make the electrical connections with just a few bits of wire an a handful of resistors.

For the software, [Kevin] added support for SPI to avrdude, available on his git. Theoretically, this should work with any AVR microcontroller with the most popular ATMegas and ATtinys we’ve come to love. It doesn’t support the very weird chips that use TPI programming, but it’s still extremely useful.

Tamagotchi ROM Dump And Reverse Engineering

tamagotchi-rom-dump-and-reverse engineering

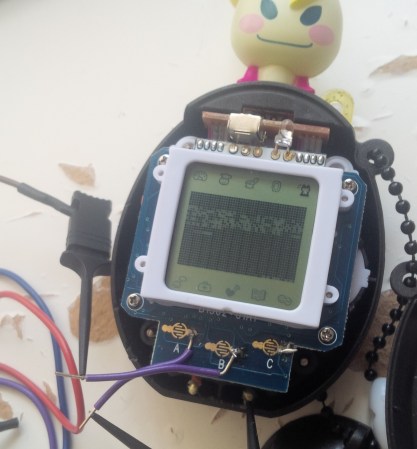
Often the true key to success is persistence and that holds true for this project which dumped the ROM from the current generation of Tamagotchi toys. If you’re a fan of learning the secrets built into consumer electronics — and you know we are — you’ll want to go back and watch the 24-minute lecture on Tamagotchi hacking which [Natalie Silvanovich] gave a 29C3 last year. She had made quite a bit of headway hacking the playable pods, but wasn’t able to get her hands on a full ROM dump from the General Plus chip on board processor. This update heralds her success and shares the details of how it was done.

As we learned form the video lecture it was a huge chore just to figure out what processor this uses. It turned out to be a 6502 core with a few other things built in. After prowling the manufacturer’s website she found example code for writing to Port A. She was then able to execute her own code which was designed to dump one byte of ROM at a time using the SPI protocol.

[Natalie] posted her code dump if you’re interested in digging through it. But as usual we think the journey is the most interesting part.

[Thanks Itay]

Analog Input Expansion Boards For Raspberry Pi

analog-input-rpi-add-on

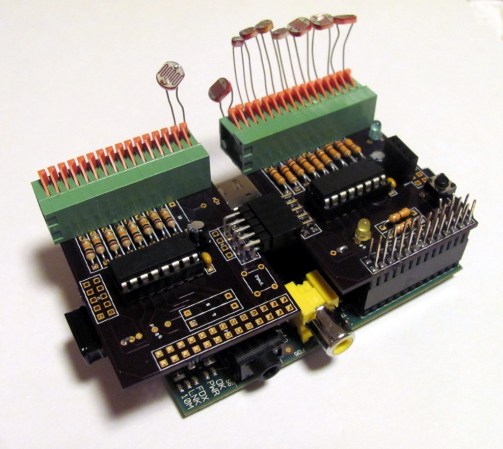
[Ken Olsen] needed a bunch of analog inputs for his model railroad project. He wanted to use the Raspberry Pi board, but alas there are no analog inputs available on the GPIO header. But there is SPI. So he used an online service to design his on Analog input expansion boards.

He mentions that Eagle can be a bit of a pain to work with. For this project he decided to give circuits.io a try. This is an in-browser PCB layout tool which we looked at in a links post some time ago. The service lets you order directly from your in-browser design without the need to run gerber files or the like (boards are made using the OSH Park service). He’s very happy with the boards he got back. They feature a footprint for a connector to interface with the RPi.

The design uses MCP3008 Analog to SPI chips. Each has eight channels but [Ken] needed more than that. Since the service provides three copies of the board he made them modular by adding end connectors which chain the SPI and power rails from one board to the next. Don’t miss his full demo in the video after the break.

Continue reading “Analog Input Expansion Boards For Raspberry Pi”

Hardware SPI With Python On A Raspberry Pi

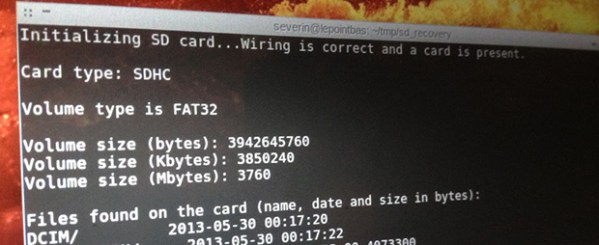
While the Raspberry Pi has very good support for an I2C bus, a lot of very cool chips – including the in system programmer for just about every ATtiny and ATmega microcontroller – use an SPI bus. [Louis] sent in a tutorial for getting hardware SPI on his Raspi, and even though it’s rather limited right now, it’s a step in the right direction.

Previously, [Brian Hensley] put up a tutorial for using the Linux SPI drivers with the Raspi. [Louis] wanted to play with SPI in Python, so he added a C extension to the spidev.c file (available here) that allows him to open an SPI connection, initialize, transfer, and close the connection.

After connecting an Arduino to the MOSI, MISO and SCK pins of his Arduino, [Louis] was able to transfer data from his Raspi over an SPI bus. It should be noted that a level shifter would be a really good idea here, but this is an excellent project if anyone would ever want to port AVRDude to Python.


The Band’s Name In Lights, RGB LEDs To Be Exact.

A few of [michu]’s friends formed a band named Kalikut Now and needed an awesome stage show. The band made a few 80cm-high letters of their band name, cut a few pieces of acrylic, and wired them up with a few LED modules. The work of connecting these letters to a computer and programming them fell on [michu], and we’ve got to say he did a pretty good job.

You may remember [michu] from his StripInvaders and PixelInvaders projects, basically a few RGB LED modules that can communicate with an Arduino over an SPI interface. With these huge letters, [michu] ran into a problem: he had 11 meters of cabling between the clock and data lines, far beyond the maximum recommended length for any datasheet.

[michu] looked around the Internet for common problems with SPI interfaces and found a lot of good advice from a lot of very smart people. The issue with the SPI bus was eventually solved by correctly wiring the grounds of his LED modules, building a few dead-simple SPI buffers, and reducing the clock speed of the SPI bus.

After countless hours, the band’s name is in lights, and RGB LEDs to boot. Everything can be controlled with Abelton Live, and looks absolutely fantastic as seen in the video after the break.

Continue reading “The Band’s Name In Lights, RGB LEDs To Be Exact.”