Illustrated Kristina with an IBM Model M keyboard floating between her hands.

Keebin’ With Kristina: The One With All The Espionage

[Ziddy Makes] describes this cute little guy as a biblically-accurate keyboard. For the unfamiliar, that’s a reference to biblically-accurate angels, which have wings (and sometimes eyes) all over the place. They’re usually pretty scary to behold. Don’t say I didn’t warn you.
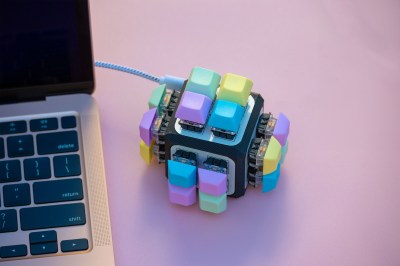
A cube keyboard with adorably vibrant pastel keycaps.
Image by [Ziddy Makes] via GitHub
But this? This is the opposite of scary. Sure, there are keys everywhere. But it’s just so darn adorable. You know what? It’s those keycaps.

This 16-key macro cube uses a Pro Micro and a system of PH2 5p ribbon cables to connect the four four-key sisterboards to the main board. A 3D-printed base holds all the boards in place. Out of all the switches in the world, [Ziddy] chose Otemu Blues. Clack!

Although it may take some getting used to, this seems like it would be a fun way to input macros. I can see the case for putting some rubber feet on the bottom, otherwise it might scoot around on the desk. That might be cute, but only the first couple of times, you know?

Continue reading “Keebin’ With Kristina: The One With All The Espionage”

Preserving Floppy Disks

Time is almost up for magnetic storage from the 80s and 90s. Various physical limitations in storage methods from this era are conspiring to slowly degrade the data stored on things like tape, floppy disks, and hard disk drives, and after several decades data may not be recoverable anymore. It’s always worth trying to back it up, though, especially if you have something on your hands like critical evidence or court records on a nearly 50-year-old floppy disk last written to in 1993 using a DEC PDP-11.

This project all started when an investigation unit in Maryland approached the Bloop Museum with a request to use their antique computer resources to decode the information on a 5.25″ floppy disk. Even finding a floppy disk drive of this size is a difficult task, but this was further compounded not just by the age of the disk but that the data wasn’t encoded in the expected format. Using a GreaseWeazle controlled by a Raspberry Pi, they generated an audio file from the data on the disk to capture all available data, and then used that to work backwards to get to the usable information.

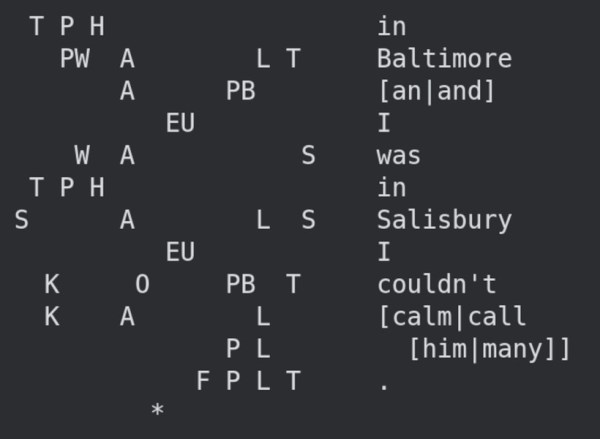
After some more trials with converting the analog information to digital and a clue that the data on the disk was not fragmented, they realized they were looking at data from a digital stenography machine and were finally able to decode it into something useful. Of course, stenography machines are dark magic in their own right so just getting this record still requires a stenographer to make much sense out of it.

Stenography (Yes, With Arduinos)

What’s the fastest keyboard? Few subjects are as divisive in the geek community. Clicky or squishy? QWERTY or Dvorak? Old-school IBM or Microsoft Natural? The answer: none of the above.

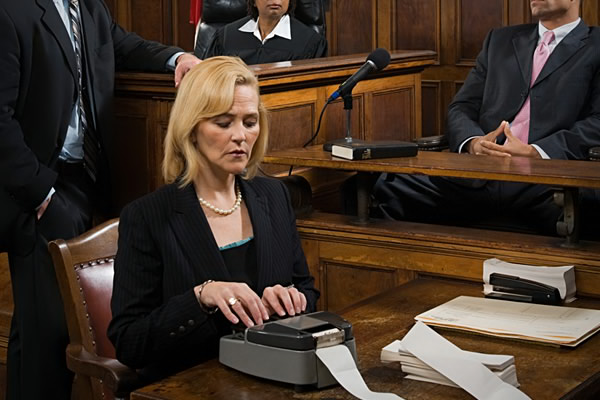
danger-court-reporter-tyingThe fastest normal-keyboard typists (Dvorak or Qwerty) can get around 220 words per minute (wpm) in bursts. That sounds fast, and it’s a lot faster than we type, but that’s still below the minimum speed allowable for certified court reporters or closed captioners. The fastest court reporters clock in around 350 to 375 wpm for testimony. But they do this by cheating — using a stenotype machine. We’ll talk more about stenography in a minute, but first a hack.

The Hack

[Kevin Nygaard] bought a used Stentura 200 stenotype machine off Ebay and it wasn’t working right, so naturally he opened it up to see if he could fix it. A normal stenotype operates stand-alone and prints out on paper tape, but many can also be connected to an external computer. [Kevin]’s machine had a serial output board installed, but it wasn’t outputting serial, so naturally he opened it up to see if he could fix it. In the end, he bypassed the serial output by soldering on an Arduino and writing a few lines of code.

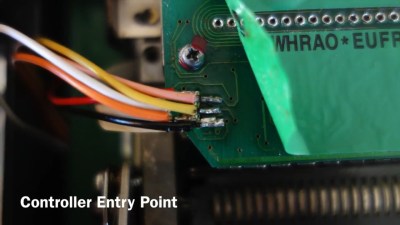
shot0001The serial interface board in [Kevin]’s machine was basically a set of switches that made contact with the keys as they get pressed, and a few shift registers to read the state of these switches out over a serial connection. [Kevin] tapped into this line, read the switch state out into his Arduino, and then transmitted the correct characters to his computer via the Arduino’s serial over USB. (Video demo) As hardware types like to say, the rest is a simple matter of software.

Continue reading “Stenography (Yes, With Arduinos)”

Hackaday Space: Transmission 3 Puzzles Explained

transmission-3-puzzles-explained

Yesterday we did a run down of Transmission 2 as part of a series of posts covering the ARG that we ran throughout April. Today I’m going to reveal all the details in Transmission 3, how we put it together and what the answers were.

In classic Hackaday fashion we hadn’t planned any of this, so by this point all our initial ideas we already used up and we were now running out of creativity so it was a real slog to get Transmission 3 out the gate. However we somehow managed it and opened Transmission 3 by posting a series of 5 images of space telescopes:

Continue reading “Hackaday Space: Transmission 3 Puzzles Explained”

Hackaday Space: Transmission 2 Puzzles Explained

transmission-2-explanation

So yesterday we gave you a round up of Transmission 1 which went out on April 1st. We quickly went from having to put something fun together for April 1st to running a full month-long ARG making things very very hectic at SupplyFrame HQ. Let’s take a look at what pearls of data were hidden in the week 2 offerings of the Alternate Reality Game. In case you’ve been stuck somewhere without Internet for a couple of days, the game was a lead up to announcing The Hackaday Prize.

Transmission 2 started with the following video appearing at the top of the Hackaday blog:

Continue reading “Hackaday Space: Transmission 2 Puzzles Explained”