Hackaday Prize Entry: It’s Like Apple Pay, But For Receipts

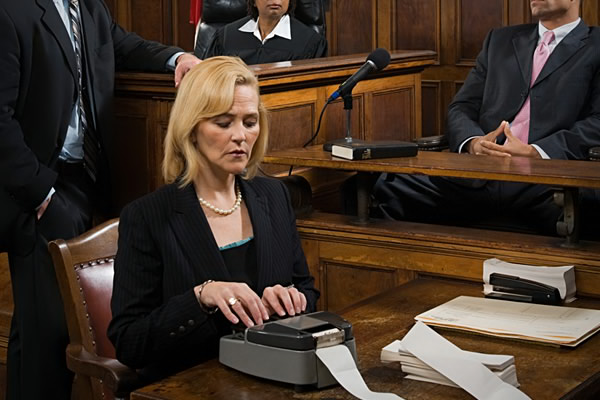
There’s Apple Pay, Samsung Pay, Google Wallet, and a host of other ways to pay for stuff with your phone. What about receipts, though? Do you really need to carry around little bits of paper to prove to incredulous friends you have, indeed, bought a donut? The proof is back home, in the file. Under D, for donut.

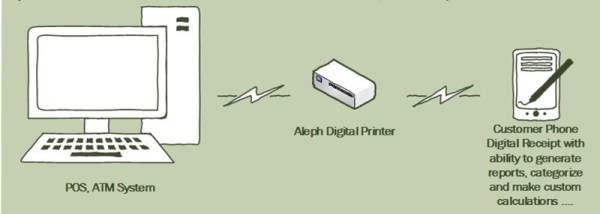
[Hisham] is working on a very interesting system for the Hackaday Prize. It’s effectively the the opposite side of every point of sale transaction that Apple Pay, Samsung Pay, and Google Wallet are working on. Instead of handling payment, [Hisham]’s Aelph handles receipts.

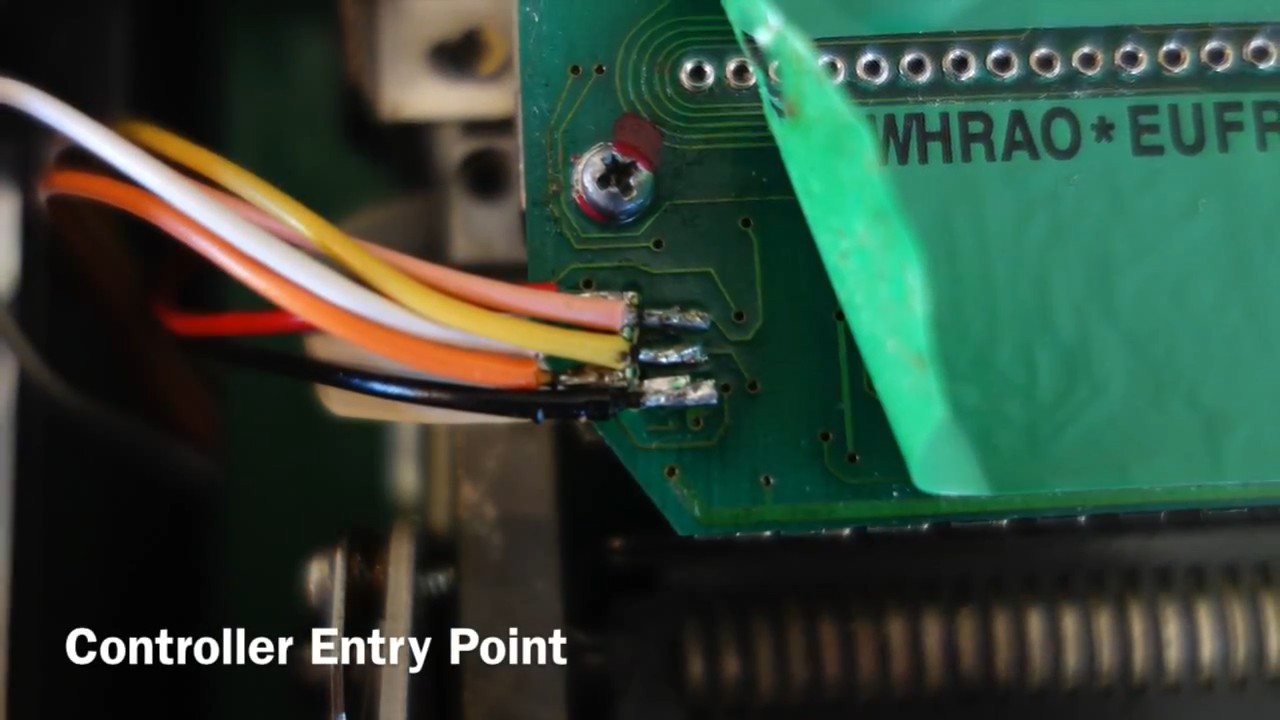
[Hisham]’s project is hardware, with a small device that plugs into a point of sale terminal. This device transmits a receipt to the Aleph app (or a third party app), and uploads a PDF copy of the receipt to a server. Other than a small hardware box, there’s no additional software required for a POS terminal. For retailers, it’s as easy as plugging in a box, and for consumers, it’s as easy as downloading an app.

The hardware was prototyped on a TI LaunchPad featuring a TIVA C microcontroller. This, along with the NFC eval kit give Aleph more than enough power to connect to a company LAN and spit out a few PDFs. You can check out one of [Hisham]’s demo videos below.

There are a lot of benefits to a electronic receipts; if you ever need a receipt, odds are you’ll scan it anyway – a dead tree receipt is just inefficient. There’s also some nasty chemicals in thermal receipt paper. You only need to Google ‘BPA receipt’ for that evidence. Either way, it’s a great idea, and we long for the day that our wallets aren’t stuffed to Costanzaesque proportions, and a time where we won’t need a scanner to complete an expense report.

The 2015 Hackaday Prize is sponsored by:

Continue reading “Hackaday Prize Entry: It’s Like Apple Pay, But For Receipts”

Doom on Raspberry Pi

Writing Doom For The Raspberry Pi

We’ve all seen Doom played on the Raspberry Pi before… but this isn’t a port of the game. No, this was a school project at the Imperial College of London — writing the game in bare assembly. They wrote it from scratch.

bare metal doom thumbnail
Complete with a custom home made controller connected directly to the GPIO pins!

Yep. There’s not even an operating system on the Pi. It’s 9800 lines of bare metal ARM assembly. If that doesn’t hurt your brain we dunno what does!

They are using the official textures from the game, and it’s not quite a perfect replica — but it’s pretty darn close.

Part of the project was to build an emulator to make it easier to test the game, but it didn’t work out the greatest — so most of the actual game development was performed on the actual hardware. Yikes!

Stick around after the break to see Doom in all its former glory. Top notch work guys!

Continue reading “Writing Doom For The Raspberry Pi”

UController Code Profiler Debugs Your Microcontroller

When working on digital circuits that operate at high frequencies it helps to have some special tools on hand. Things like oscilloscopes and logic analyzers are priceless when something isn’t working right. Another great tool would be this hardware-based profiler that [Mike] came up with while he was working on another project.

The profiler connects to USB and shows up as a serial port. Normally [Mike] used a set of LEDs to get information about how his microcontrollers work, but for this project that wasn’t enough. The uController Code Profiler can provide the main loop running time, time functions and sections of code, keep track of variables, and a few other tasks as well, all with nanosecond resolution.

The source code isn’t provided but a hex file is available, along with a schematic and an include file, if you want to try this one out on your next project. Like this homemade logic analyzer, this could be a powerful tool in your microcontroller arsenal. Simply include the file with various pieces of your code to get it up and running!

Restoring An Espresso Machine To The 21st Century

[Rhys Goodwin] has a wonderful Italian espresso machine, a Brasilia ‘Lady’. But the electronics in it are a bit outdated. So he decided to give the entire thing an overhaul, while keeping it as original as possible!

As far as espresso machines go, this model is pretty simple. It uses a 300mL brass boiler with a 3-position solenoid valve. The thermostat is one of those simple bimetallic button thermostats which sadly, aren’t even that accurate — you couldn’t build a simpler machine, there’s not even a microcontroller in it. [Rhys] had his work cut out for him.

Arduino. PID controller. LCD display. New custom machined components, including a polished aluminum face plate for the LCD! He didn’t skimp out on this restoration. He even designed his own custom PCB to house the Arduino and provide the outputs for his new electronics, impressive!

Continue reading “Restoring An Espresso Machine To The 21st Century”

Stenography (Yes, With Arduinos)

What’s the fastest keyboard? Few subjects are as divisive in the geek community. Clicky or squishy? QWERTY or Dvorak? Old-school IBM or Microsoft Natural? The answer: none of the above.

danger-court-reporter-tyingThe fastest normal-keyboard typists (Dvorak or Qwerty) can get around 220 words per minute (wpm) in bursts. That sounds fast, and it’s a lot faster than we type, but that’s still below the minimum speed allowable for certified court reporters or closed captioners. The fastest court reporters clock in around 350 to 375 wpm for testimony. But they do this by cheating — using a stenotype machine. We’ll talk more about stenography in a minute, but first a hack.

The Hack

[Kevin Nygaard] bought a used Stentura 200 stenotype machine off Ebay and it wasn’t working right, so naturally he opened it up to see if he could fix it. A normal stenotype operates stand-alone and prints out on paper tape, but many can also be connected to an external computer. [Kevin]’s machine had a serial output board installed, but it wasn’t outputting serial, so naturally he opened it up to see if he could fix it. In the end, he bypassed the serial output by soldering on an Arduino and writing a few lines of code.

shot0001The serial interface board in [Kevin]’s machine was basically a set of switches that made contact with the keys as they get pressed, and a few shift registers to read the state of these switches out over a serial connection. [Kevin] tapped into this line, read the switch state out into his Arduino, and then transmitted the correct characters to his computer via the Arduino’s serial over USB. (Video demo) As hardware types like to say, the rest is a simple matter of software.

Continue reading “Stenography (Yes, With Arduinos)”

50 Winners Using Texas Instruments Parts

For the last few weeks we’ve been celebrating builds that use parts from our manufacturer sponsors of the 2015 Hackaday Prize. Today we are happy to announce 50 winners who used Texas Instruments parts in their builds. Making the cut is one thing, but rising to the top is another. These builds show off some amazing work from those who entered them. In addition to the prizes which we’ll be sending out, we’d like these projects to receive the recognition they deserve. Please take the time to click through to the projects, explore what has been accomplished, and leave congratulations a comment on the project page.

Still Time to Win!

We’re far from the end of the line. We’ll be giving roughly $17,000 more in prizes before the entry round closes in the middle of August. Enter your build now for a chance in these weekly contests! This week we’re looking for things that move in our Wings, Wheels, and Propellers Contest.

One voter will win $1000 from the Hackaday Store this week as well! Anyone is welcome to vote in Astronaut or Not. Vote Now!

Continue reading “50 Winners Using Texas Instruments Parts”

A Perfect San Francisco For Hackaday Prize Worldwide

Whew, that was a perfect day. Seriously. A few weeks back, on Saturday June 13th PCH International opened their doors for the Hackaday Zero to Product workshop. I don’t live in California, so having two huge glass garage doors making up one entire wall of your office is odd to me. But on a perfect day like this one it was something miraculous.

We opened the Workshop at 9:30am and those lucky enough to get a free ticket before the event was full streamed in. The topic at hand was a transfer of knowledge on professional level PCB design and once again [Matt Berggren] didn’t disappoint. A former Altium veteran, experienced hardware start-up-er-er, and all around circuit design guru, [Matt] has a natural and satisfying way of working with the many questions that arise while also following his epic talk framework. There must be around a hundred slides in his presentation that covers the bases from component selection, to signal routing, to material selection (substrate, copper density, solder mask material) and a lot more.

The day ran in segments…. sign-in followed by coffee and bakery goods and a talk on Open Hardware from [Ryan Vinyard]. He is the Engineering Lead at Highway1, the well-known hardware startup accelerator which provided a space for the event in the PCH Innovation Hub building. From there we dropped into the first segment of Zero to Product and started riffing on all things PCB design.

A break for salad and pizza three hours later lead into the final two sessions that are broken up by a social pause. Thanks to our Hackaday Prize Sponsors (Atmel, Freescale, Microchip, Mouser, and Texas Instruments) we had plenty of time to discuss the builds each person is planning and to connect them with sponsor-supplied dev boards to help with the prototyping.

We have an album up so that you can check out all the pictures from this event. We’ve held the Zero to Product workshop in Los Angeles, and Shenzhen as well in the recent weeks. Keep watching Hackaday to learn of future opportunities to take part in events in your area!

The 2015 Hackaday Prize is sponsored by: