A stack of PCB business cards that can play Snake on an 8x8 LED matrix.

2024 Business Card Challenge: Snakes On A Business Card

Once [Lambert the Maker] saw the Arduboy, he knew the thing was ripe for remixing into a business card with an 8×8 LED matrix instead of an OLED screen. [Lambert] already has a PCB business card for work, but it looks like it doesn’t do anything. So this Snake-playing card is for their personal information.

The brains of this operation is an STM32F0, which required a bit of finesse when it came to programming the LEDs. According to the datasheet, the max current through a given GPIO pin is 30 mA. The LEDs are running at 20 mA through the limiting resistor, so the code only turns on one LED at a time and makes sure the previous one is off first. The whole screen is updated every 125 ms, and persistence of vision takes care of making the animation look right.

In the short videos after the break, you’ll see a preview followed by brief videos on versions one and two. The prototype was built in 2020, when the board house only offered green PCBs with their assembly service. Fast forward to 2024, when the board house is now offering colors other than green.

Version two is actually thinner than a credit card, and features tiny buttons instead of cap-sense pads for input. [Lambert] also added a floating ADC pin that acts as a random number generator, placing the apple in a new location every time the game is powered on.

Continue reading “2024 Business Card Challenge: Snakes On A Business Card”

Badge From Diamond Age Comes To DEF CON

We’re huge fans of [Neal Stephenson’s] work and are usually looking to assign some of his vision to the gear that pops up in the real world. But there’s no stretching or squinting necessary with this one. [Kerry Scharfglass] has built a functioning Drummer’s Badge from the foundational Sci-Fi novel The Diamond Age.

The badge is called Sympetrum, which is a genus of dragonfly. In explaining what the badge is and does, [Kerry] instructs you to go and read the book first and we couldn’t agree more. This isn’t recommended reading; if you’re a geek you need to read this book.

The dragonfly badges are from a portion of the book that gets pretty weird, but the gist is that rod-logic (machines build from microscopic carbon nanotubes) is so pervasive that at all times you’re covered in mites that are actually machines. At a party, one of the characters notices everyone is wearing dragonfly pins that begin to pulse with the music and synchronize with each other. They’re actually indicators of what the mites within the wearers’ bodies are doing — synchronizing people with other people.

This badge is a working recreation of that, presumably without the billions of mites controlling people (but who knows, it is DEF CON). At the center of the badge is an STM32 driving ten APA102 modules. Interactivity is based on IR signaling. The badge will cycle random color animations when alone. But each badge also projects clock sync and metadata over infrared, so put some of them in the same room and they’ll tend to synchronize.

Simple, beautiful, and a great geeky backstory. This example of Badgelife proves that hardware badges don’t need to be packed with features, or have a huge BOM cost. If done well, you can do an awful lot with just a little hardware and strong dose of inspiration. It also makes hand-assembly a lot more approachable, which is what you can see in the images above. Thanks [Kerry] for giving us an early look at this badge, can’t wait to see them at the CON.


We’ll be looking for this and all other #Badgelife offerings at DEF CON 25. Join us for a Hackaday meetup on Sunday morning as we once again do Breakfast at DEF CON

Template For Building STM32F0-Discovery Project In GCC

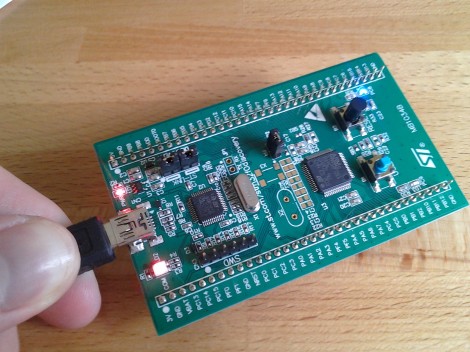
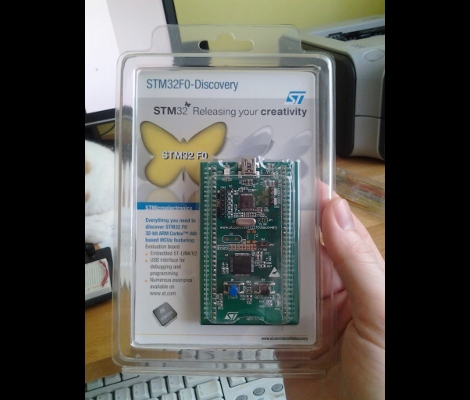
Yep, that blue light is blinking and I made it happen. I’ve been hard at work since I got my free STM32F0-Discovery board in the mail. Most recently I put together a starting template for building STM32F05x project on Linux. You’ll still need to install your own tool chain (I’m using the Code Sourcery G++: Lite Edition), but this makes it a snap to compile your projects with support for STM’s peripheral libraries.

As for programming, you may remember that I added support for writing to RAM in the stlink project. I’ve wasted spent a ton of time trying to get support for writing to Flash into that project. It’s just less of a hassle to use stlink than it is to work with OpenOCD. But I’ve really hit a wall getting the flash loader code to work. If you want to check out what I’ve done so far in that area I committed a very messy branch (see the commits for what code changes I’ve made).

In the mean time you can use OpenOCD to write images compiled with the template to your device. I included the ‘make program’ option in the Makefile to do this from command line. If you need help compiling OpenOCD check the readme in the template repository.

New STM32 Discovery Board Can Now Be Programmed On Linux

Last Wednesday I posted a video review of the new STM32F0-Discovery board which is built around an ARM Cortex-M0 chip. I speculated that it should work with the open source project aimed at programming these discovery boards. I tested it out and a connection could be made, but no code could be flashed. So I spent a few hours over the weekend and added support.

My updates are already in the stlink repository. After cloning the code, you can use three commands to compile the software (./autogen.sh, ./configure, make). That’s assuming you have all of the necessary dependencies (I had to install libusb-1.0-0-dev) and that you add the udev rule suggested in the documentation (also found in the repository). The program st-util connects to the board and provides a listening port for an ARM debugger (I’m using arm-none-eabi-gdb from CodeSourcery G++ Lite).

When I first started testing, the chip id was reporting as 0. It turns out the register address polled for this information was wrong. After finding that in the almost-900 page reference manual I went through the painstaking process of finding the hex values necessary to properly memory map the device. From there I also updated the blink example to generate an ELF file compatible with the Cortex-M0 chip. So out of the gate you should be able to use an ARM cross compiling toolchain to compile the example, connect to the board with this utility, then use the debugger from the toolchain to connect and flash that example to RAM.

There’s lots more to be done. To fully utilize the chip it is necessary to use a startup file and linker script when compiling. I’ve done nothing in this area, but I hope to work on some tutorials as I get further along. Of course if you have your own successes developing for this board using a Linux machine we want to hear about it!

Video Review: STM32F0-Discovery Board

The STM32 Discovery boards are nothing new, we’ve looked at them several times. But the newest sibling in the line might be just the thing to make the leap from your steadfast 8-bit projects. We got our hands on it and recorded a video review.

The STM32F0-Discovery gives you a programmer and ARM Cortex-M0 chip all on one convenient board. The top portion is the ST-Link V2 programmer, and includes jumpers and a programming header which let it easily program off-board chips.

The included microcontroller is an STM32F051R8T6 which includes 64kb of program memory and 8kb of RAM. Coming in at $1.80-3.77 in single units and in a hand-solderable LQFP package this raises an eyebrow for our future projects. It has an 8 MHz internal oscillator with 6x PLL which means you can run at 48 MHz without an external crystal (check out [Kenneth Finnegan’s] PLL primer if you don’t know what this is).

The only thing holding us back is the development environment. ST provides everything you need if you’re on Windows, but we want a Linux friendly solution. We know other Discovery boards have worked under Linux thanks to this project. This uses the same ST-LINK V2 so it should work as well. If you want one of your own head over the ST page to see if they’re still giving away samples. There should be a button labeled “Register for your FREE KIT”.