Reverse-Engineering A Wireless BBQ Thermometer

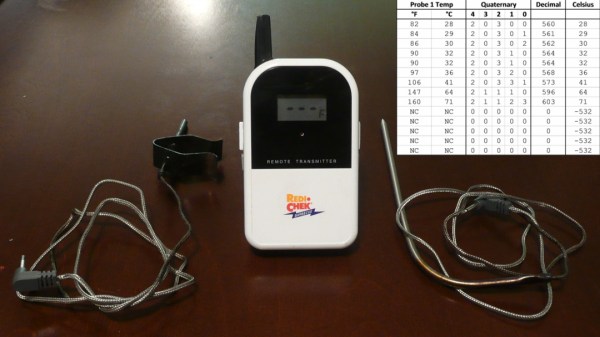
[Bob] has his own smoker and loves to barbecue, but doesn’t like spending all day checking on his smoker’s temperature. He thought about building his own wireless thermometer setup, which would have been pretty awesome, but then he had a better idea: why not hack an existing wireless barbecue thermometer? [Bob] purchased an off-the-shelf wireless BBQ thermometer and reverse-engineered its wireless protocol to make his own wireless thermometer setup.

The first problem [Bob] encountered was figuring out the frequency of the transmitter. Thankfully [Bob] had access to a spectrum analyzer, where he discovered the transmitter was running at 433.92MHz (a cheap RTL-SDR dongle would also get the job done). Next, [Bob] started digging into the manufacturer’s FCC filings and found that it actually called out the transmit frequency, which matched the transmit frequency he measured. He also found a ton of other helpful information in the filing, like a block diagram and full transmitter schematic.

[Bob] used a Radiometrix RF module to receive the thermometer’s signal. He hooked up the output to his logic analyzer to start decoding the protocol. After a quick visual analysis, [Bob] found that the signal was a preamble followed 13 bytes of Manchester-encoded data being transmitted at 2kbps. He started collecting data with known temperatures, created a table of the data, and began looking for patterns. After quite a bit of searching [Bob] was successfully able to find and parse the temperature values out of the data stream. [Bob] did a great job of documenting his process and results, so check out his writeup if you want to try it out yourself.

Modular Arduino Based Infrared Thermometer

IRTemperature

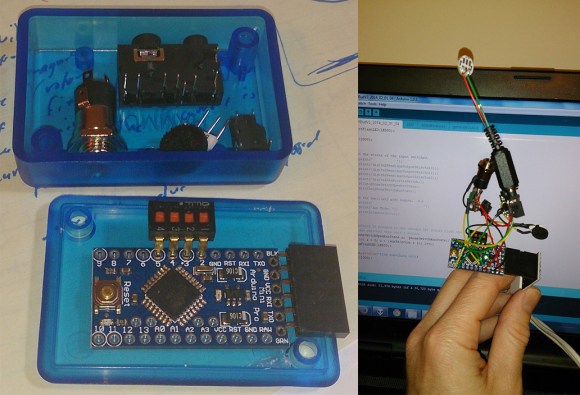
[Brian] started out with a clear and concise goal, “allow a regular human to associate an audible tone with a temperature from an infrared contactless thermometer.” With his latest project, the ESPeri.IRBud, he has achieved this goal.

One of our favorite parts of [Brian’s] post is his BOM. Being able to easily see that the IR temperature sensor costs $26 at DigiKey is unbelievably helpful to readers. This specific sensor was chosen because others have successfully interfaced it with the Arduino. Not having to reinvent the wheel is good thing! For the build, [Brian] decided to hook up the IR temperature sensor to a re-purposed flexible iPhone headset wire. Having used headphone sockets to connect to the sensor and speakers, the actual device is quite modular. Hearing this thing in action is quite cool, it almost sounds like old-school GameBoy music! Check it out after the break.

Have you used an IR temperature sensor in one of your projects? Let us know.

Continue reading “Modular Arduino Based Infrared Thermometer”

Building A Tool To Measure Melting Point

melting-point-apparatus

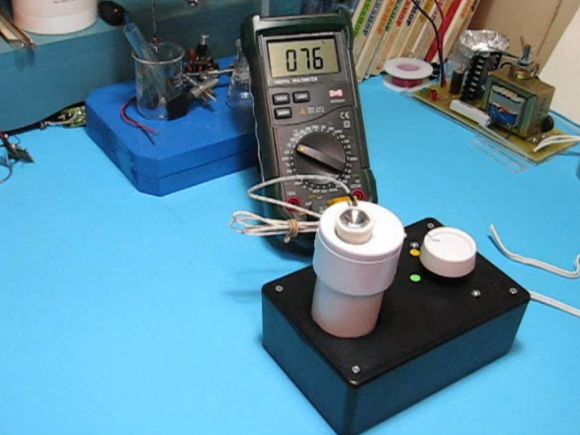
When working with chemical reactions it may be necessary to test the purity of the components you’re using. This is especially true with hobby chemists as they often acquire their raw materials from the hardware store, garden center, or pool supply. [Ken] figured out how to get around the $500 price tag of a commercial unit by building this DIY melting point test apparatus.

In this image he’s using a thermocouple to monitor the temperature of the melting surface, but mentions that you can do this with an inexpensive dial thermometer and will still have great results. That melting surface is the hexagonal head of a bolt which he drilled out to provide a concave surface for the test compound. Inside the PVC pipe is the heating element from a 40W hot glue gun. He wrapped it in fiberglass fabric which is sold in the plumbing supply to protect the area around pipe joints during soldering. The rotary light dimmer feeds the electricity to the element, allowing for adjustments to the ramping speed.

Nixie Tube Thermometer

nixie_therm

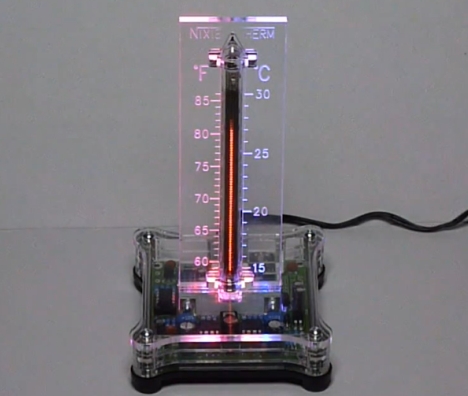
After seeing a picture of a thermometer using a bargraph style nixie tube in place of a mercury column, [Juergen Grau] decided he wanted to build his own. Dubbed the “Nixietherm”, his replica looks even better than the original. He used an IN-9 Nixie tube mounted on top of a custom plastic case, all powered by a 5v USB connection. He points out that his version does not use a PIC or any other sort of processor – it is built entirely from analog circuits. There are some RGB LEDs embedded in the plastic case that make for a cool effect, but they seem to simply cycle through the colors rather than represent how warm or cold the temperature is at any given time.

[Juergen] does not give a lot of details regarding the build as far as PCB layout or a parts list is concernred, but most of that can be extrapolated from the wiring schematic he provided. He also mentions that he will be making kits available in the near future. Be sure to keep reading to see the thermometer in action.

Thanks [Brian]

Continue reading “Nixie Tube Thermometer”

Thermos Temperature Meter

[youtube=http://www.youtube.com/watch?v=UXsxtEmKgbw]

We’re always a little surprised by how well a vacuum thermos works, but eventually the contents will cool down (or warm up depending on what’s in there). [Gamesh_] added a temperature meter to his thermos using an Arduino and a temperature sensor. The original post is in Portuguese but [Bruno] republished it in English.

The temperature sensor has been repurposed from a digital thermometer meant for taking your temperature. Holes for the LEDs making up the indicator bar were melted in the side of the plastic housing. When the hot liquid is poured out at about 0:45 into the video you can glimpse the Arduino hanging our on the other side of the pot and a power cord running off behind the laptop. It would be nice to see this migrated over to a less powerful chip and run from a small coin cell, but we like the concept.

Better Temperature Readings Using An Aspirated Thermometer

Unlike regular thermometers that can get incorrect readings because of the sun’s heat, shading, and airflow, aspirated thermometers isolate the temperature sensor from precipitation and the sun, while providing constant air circulation. Take ten 1-wire T2SS boards and combine them with DS18B20s and you’ve got yourself the start of an aspirated thermometer. A foot of PVC pipe, fans, and the above mentioned parts and you’ll have accurate temperature readings in no time.

[Dave] made his to control a natural gas boiler, pumps, and 11 gas-fired unit heaters for a combined output of 5.3 million BTUs per hour – keeping his greenhouse nice and toasty.

Update: Thanks Firetech for pointing out our silly typo.

Meat Thermometer Using Predictive Filtering

meatthermoafteradjustment

The guys over at NerdKits put together a really informative video on a meat thermometer using predictive filtering which is viewable below. The video, supplemental text, and code is available on their website. The thermometer is constructed of a LM34 temperature sensor attached to a piece of 12 gauge solid copper wire. The thermometer signal is processed on an ATmega168 microcontroller and visualized using the pygame library for python. The real gem in this project is their excellent explanation of predictive filtering, which could easily be utilized for a large number of projects.

Continue reading “Meat Thermometer Using Predictive Filtering”