[NatureTM] used part of the Thanksgiving holiday to get composite video output working with an MSP430 microcontroller. He’s using one of the chips that came with the TI Launchpad, which is a big hardware limitation because of the relatively small code memory and RAM. The chip displays one still image at a resolution of 192×40 pixels. Still, this is a great way to learn about composite video signals, as a lot of other projects use a TVout library to save you the headaches. All you’ll need is a TI Launchpad, a 16 MHz crystal oscillator, two resistors, and an RCA jack. Dig through the code and see what a great job [NatureTM] did of offloading as much work onto the chip’s peripherals as possible.
ti101 Articles
Moving A Resistor For EvalBot Power When Programming
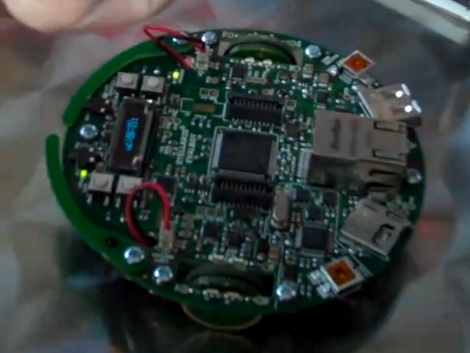
[Riley Porter] posted a picture of his EvalBot USB power hack. In the photo above we’ve put a box around D6 and D7. The development board ships with a 0 Ohm resistor in the D7 location, patching in power from the USB-B connector labeled USB DEVICE. He found that by moving that resistor to D6 he can power the board from the USB-B connector labeled ICDI.
That connector is the In-Circuit Debug Interface. TI sent us an EvalBot bundle so we pulled it out and tried it ourselves. If you plug in the ICDI it doesn’t power the board, and no USB devices register. Shorting the D6 pads changes this and the following USB device registers:
Bus 002 Device 062: ID 0403:bcd9 Future Technology Devices International, Ltd Stellaris Evaluation Board
So it looks like you need to have two USB connections or be using batteries in order to program the board via USB. The uC/OS-III hardcover book that ships with the EvalBot bundle includes board schematics. We took a look and were surprised to see that they show diodes installed on both pads. Rev A of the online schematics have been corrected, showing an omitted diode on D6 and the 0 Ohm resistor on D7. Images of both schematics are included after the break.
It would have been nice to see a selector switch installed here to give you a little more flexibility when prototyping.
Continue reading “Moving A Resistor For EvalBot Power When Programming”
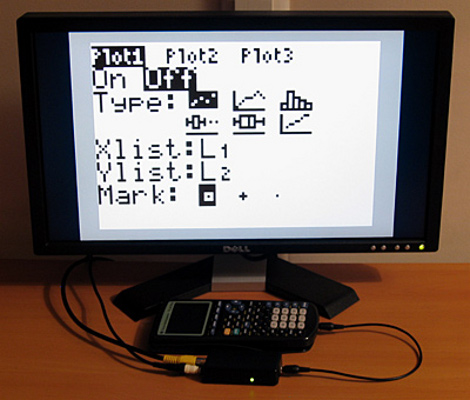
TV Out For TI Calculators Using The Link Port
Do people enjoy wasting 300$ on a bulky convoluted system, that only works for special “Teacher Edition” calculators, and is several years out of date; E.G. the TI-Presenter? [Benryves] certainly does not. So instead of purchasing a TI-Presenter, he made his own TV out system for the TI brand of calculators by using an ATmega168, a few passive components, and some clever code. The only draw backs being: you save 280$, it fits in your pocket, and it works for almost any TI calculator. Bias aside, the system does actually have a few caveats compared to the commercial edition, but the pros far outweigh the cons.
EvalBot: Arrival And Assembly
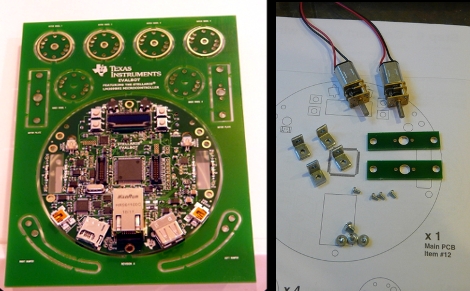
[Chris Muncy] just received his EvalBot from TI and took some pictures of the assembly process. He was one of the lucky folks that picked up the kit for just $25 using a short-lived coupon code. Seeing the kit makes us wish we had ordered one. There is some assembly required but as you can see, it’s pretty much just mechanical assembly of the wheels and the front bumper arms.
We think the wheel design is quite good. It consists of two small gearhead motors mounted on the rectangular PCB parts that you can see on the right portion of the image above. Those mount to the circular mainboard using metal L brackets. The wheels themselves are three circular pieces of PCB, one with a smaller diameter sandwiched in between its two larger cousins. This creates a channel that is perfect for a neoprene O-ring to give the wheel traction. The main board uses an optical sensors and a hole through all three parts to function as a rotation counter.
It’s a fancy piece of hardware and we can’t wait to see what you can do with it! If you’ve got one, we want to hear about your adventures.
$125 Off The Evalbot Is A Steal
When you see $125 off something you probably assume it cost several times that to start with. Nope, this drastic discount leaves just $25 plus shipping. Use coupon-code: 2JLP-R4XRT3 when ordering the little rover. There’s a quick video snippet of it embedded after the break.
What you’ll get is a Stellaris ARM Cortex-M3 microcontroller on a board with a bunch of goodies.
- MicroSD slot
- USB host and device connectors
- I2C audio with speakers
- Ethernet connector
- 96×6 OLED display
- Motors
- Optosensors
- Bump detectors
As always, we want to hear about the hacks you come up with once you have this little guy in hand.
[update, the code is now expired]
[final update — Someone from TI explains what is going on.]
—- from the comments.
As some posts already note, the coupon code is only available to ESC Boston attendees. That said, we’re psyched about all of your interest and understand there seems to have been some confusion, so TI plans to fulfill all of the finalized orders to date. We’re working on some logistics in getting the code up and running again for ESC Boston attendees, but proof of ESC registration will be required. Stay tuned.
We hear you about the e-store and are working as quickly as possible to avoid issues in the future. Thanks for your patience.
Bottom line – we’re glad to see the excitement around EVALBOT and look forward to checking out your projects! We encourage you to share them on our e2e Forums at http://e2e.ti.com/
-Jean Anne Booth, Texas Instruments
——-
Launchpad Not Limited To Value Line Chips
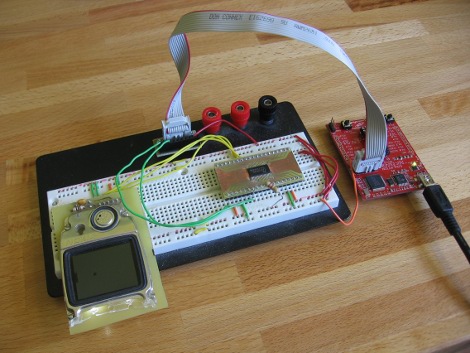
Wanting to use my TI Launchpad as more than just a development board I thought I’d do a few experiments using it as an in-system programmer. After a few tripping points I was able to get it working and then some. It seems that the device is not limited to just the value line of microcontrollers it was intended to support. In the image above I’m using it to program an MSP430F2272 which is a pretty powerful little chip with 32 KB of program space. Click through the break for more information on the setup.
Continue reading “Launchpad Not Limited To Value Line Chips”
Meter Clock Using The TI Launchpad
Here’s an analog meter clock using an MSP430G2211 microcontroller. [Doug Paradis] chose this processor because it is the lesser of the two that come with the TI Launchpad. The parts count is fairly low too; a clock crystal, two analog meters, a few buttons, and a voltage regulator.
He’s done a nice job putting this together. We challenge you to give this a try yourself and build on [Doug’s] features. We really liked the calibration subroutine in [Alan’s] multi meter clock. It would be fun to implement that functionality and store the calibration code in the MSP’s flash memory. You can use our ported garage door opener code if you need an example of how to store data in flash.