Make Carbon Fiber Tubes With An Open Source Filament Winder

Result of winding a carbon fiber tube. (Credit: Andrew Reilley)

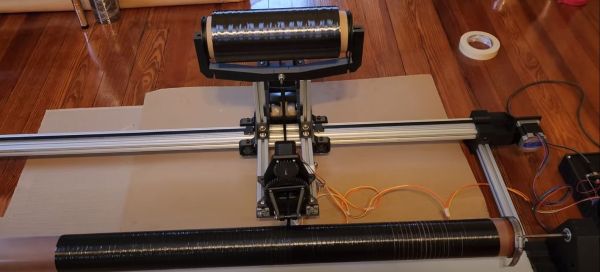
Carbon fiber (CF) is an amazing material that provides a lot of strength for very little weight, making it very useful for a lot of applications, ranging from rods in CoreXY 3D printers to model- and full-sized rockets. The model rocketry hobby is the reason why [Andrew Reilley] developed his own CF tube winding machine called Contraption. A tutorial video (also embedded below) shows how this machine is prepped for a winding run, followed by the winding progress and finalizing before admiring the result.

The entire machine’s design with 3D printed parts and off-the-shelf components is open source, as is the TypeScript and NodeJS-based Cyclone software that creates the toolpath specifying the parameters of the tube, including number of layers and the tow angle.

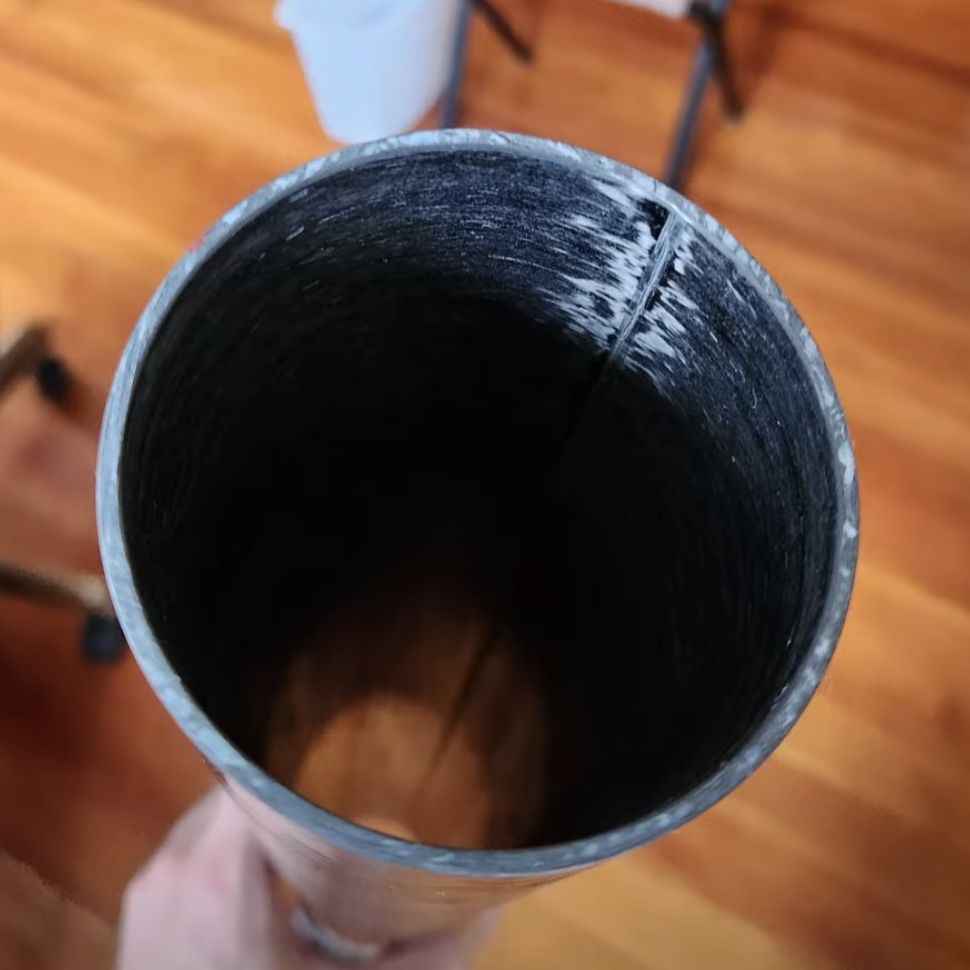
As a wet winding tow machine, the carbon fiber strands are led through the liquid resin before being wound onto the prepared mandrel. During winding some excess resin may have to be removed, and after the winding has been finished the tube is wound with shrink tape. This is followed by a heat gun session to shrink the tape and letting the resin cure. Following curing, the tape and mandrel are removed, resulting in a rather fancy looking CF tube that can find a loving home in a lot of applications, except perhaps ones that involving crushing outside pressures like those found deep below the ocean surface.

Continue reading “Make Carbon Fiber Tubes With An Open Source Filament Winder”

Old-School Video Switching Levels Up With Modern USB Control

Video effects and mixing are done digitally today, but it wasn’t always so. When analog ruled the video world, a big switch panel was key to effective results.

VIdeo like this was the result of combining different analog feeds with different effects. The better the hardware, the more was possible.

Devices like [Glen]’s Grass Valley Series 300 Crosspoint Switch Panel were an important part of that world. With tools like that, a human operator could set up a composited preview feed in true WYSIWYG style, and switch to live on cue. All done with relatively simple CMOS ICs and buttons. Lots and lots of buttons.

[Glen] reverse engineers the panel to show how it works, and most of the heavy lifting is done by the MC14051B analog multiplexer/demultiplexer, and the MC14532B 8-bit priority encoder. Once that’s figured out, the door is open to modernizing things a little by using a microcontroller to drive the device, turning it into a USB peripheral.

With a little design work, [Glen] builds a PCB around the EFM8UB2 8-bit microcontroller to act as a USB peripheral and control the switch panel, taking care of things like key scanning and lamp control. The last step: a GUI application for monitoring and controlling the panel over USB.

This isn’t [Glen]’s first time interfacing to vintage video mixing and switching, and as many of us know it’s sometimes tricky work to interface to existing hardware. We covered his earlier video switcher project using hardware that was not nearly as easy to work with as this one.

Raspberry Pi Simulates The Real Analog TV Experience

If you’ve laid hands on a retro analog TV, have the restoration bug, and you plan to make the final project at least somewhat period-correct, you face a bit of a conundrum: what are you going to watch? Sure, you can serve up just about any content digitally these days, but some programs just don’t feel right on an old TV. And even if you do get suitably retro programming, streaming isn’t quite the same as the experience of tuning your way through the somewhat meager selections as we did back in the analog days.

But don’t worry — this Raspberry Pi TV simulator can make your streaming experience just like the analog TV experience of yore. It comes to us from [Rodrigo], who found a slightly abused 5″ black-and-white portable TV that was just right for the modification. The battery compartment underneath the set made the perfect place to mount a Pi, which takes care of streaming a variety of old movies and shorts. The position of the original tuning potentiometer is read by an Arduino, which tells the Pi which “channel” you’re currently tuned to.

Composite video is fed from the Pi’s output right into the TV’s video input, and the image quality is just about what you’d expect. But for our money, the thing that really sells this is the use of a relay to switch the TV’s tuner back into the circuit for a short bit between channel changes. This gives a realistic burst of static and snow, just like we endured in the old days. Hats off to [Rodrigo] for capturing everything that was awful about TV back in the day — Mesa of Lost Women, indeed! — but still managing to make it look good.

Continue reading “Raspberry Pi Simulates The Real Analog TV Experience”

Wire race bearing

Adding Wire Races Improves 3D-Printed Bearings

Like a lot of power transmission components, bearings have become far easier to source than they once were. It used to be hard to find exactly what you need, but now quality bearings are just a few clicks away. They’re not always cheap though, especially when you get to the larger sizes, so knowing how to print your own bearings can be a handy skill.

Of course, 3D-printed bearings aren’t going to work in every application, but [Eros Nicolau] has a plan for that. Rather than risk damage from frictional heating by running plastic or metal balls in a plastic race, he uses wire rings as wear surfaces. The first video below shows an early version of the bearing, where a pair of steel wire rings lines the 3D-printed inner and outer races. These worked OK, but suffered from occasional sticky spots and were a bit on the noisy side.

The second video shows version two, which uses the same wire-ring race arrangement but adds a printed ball cage to restrain the balls. This keeps things quieter and eliminates binding, making the bearing run smoother. [Eros] also added a bit of lube to the bearing, in the form of liquid PTFE, better known as Teflon. It certainly seemed to smooth things out. We’d imagine PTFE would be more compatible with most printed plastics than, say, petroleum-based greases, but we’d be keen to see how the bearings hold up in the long term.

Maybe you recall seeing big 3D-printed bearings around here before? You’d be right. And we’ve got you covered if you need to learn more about how bearings work — or lubricants, for that matter.

Continue reading “Adding Wire Races Improves 3D-Printed Bearings”

Electroplating Carbon Fibers Can Have Interesting Results

Typically, electroplating is used to put coatings of one metal upon another, often for reasons of corrosion protection or to reduce wear. However, other conductive materials can be electroplated, as demonstrated by [Michaɫ Baran].

Finer details are sparse, but [Michaɫ’s] images show the basic concept behind producing a composite metal material hand sculpture. The initial steps involve 3D printing a perforated plastic shell of a hand, and stuffing it with carbon fibers. It appears some kind of plastic balls are also used in order to help fill out the space inside the hand mold.

Then, it’s a simple matter of dunking the plastic hand in a solution for what appears to be copper electroplating, with the carbon fiber hooked up as one of the electrodes. The carbon fibers are then knitted together by the copper attached by the electroplating process. The mold can then be cut away, and the plastic filling removed, and a metal composite hand is all that’s left.

[Michaɫ] has experimented with other forms too, but the basic concept is that these conductive fibers can readily be stuffed into molds or held in various shapes, and then coated with metal. We’d love to see the results more closely to determine the strength and usefulness of the material.

Similar techniques can be used to strengthen 3D printed parts, too. If you’ve got your own ideas on how to best use this technique, sound off below. If you’ve already done it, though, do drop us a line!

[Thanks to Krzysztof for the tip]

A MetaSense joystick

3D-Printing Complex Sensors And Controls With Metamaterials

If you’ve got a mechatronic project in mind, a 3D printer can be a big help. Gears, levers, adapters, enclosures — if you can dream it up, a 3D printer can probably churn out a useful part for you. But what about more complicated parts, like sensors and user-input devices? Surely you’ll always be stuck buying stuff like that from a commercial supplier. Right?

Maybe not, if a new 3D-printed metamaterial method out of MIT gets any traction. The project is called “MetaSense” and seeks to make 3D-printed compliant structures that have built-in elements to sense their deformation. According to [Cedric Honnet], MetaSense structures are based on a grid of shear cells, printed from flexible filament. Some of the shear cells are simply structural, but some have opposing walls printed from a conductive filament material. These form a capacitor whose value changes as the distance between the plates and their orientation to each other change when the structure is deformed.

The video below shows some simple examples of monolithic MetaSense structures, like switches, accelerometers, and even a complete joystick, all printed with a multimaterial printer. Designing these structures is made easier by software that the MetaSense team developed which models the deformation of a structure and automatically selects the best location for conductive cells to be added. The full documentation for the project has some interesting future directions, including monolithic printed actuators.

Continue reading “3D-Printing Complex Sensors And Controls With Metamaterials”

3D-Printed Press-Forming Tools Dos And Don’ts

Press-forming is a versatile metal forming technique that can quickly and easily turn sheet metal into finished parts. But there’s a lot of time and money tied up in the tooling needed, which can make it hard for the home-gamer to get into. Unless you 3D-print your press-form tooling, of course.

Observant readers will no doubt recall our previous coverage of press-forming attempts with plastic tooling, which were met with varying degrees of success. But [Dave]’s effort stands apart for a number of reasons, not least of which is his relative newbishness when it comes to hot-squirt manufacturing. Even so, he still came up with an interesting gradient infill technique that put most of the plastic at the working face of the dies. That kept print times in the reasonable range, at least compared to the days of printing that would have been needed for 100% infill through the whole tool profile.

The other innovation that we liked was the idea to use epoxy resin to reinforce the tools. Filling the infill spaces on the tools’ undersides with resin resulted in a solid, strong block that was better able to withstand pressing forces. [Dave] didn’t fully account for the exothermic natures of the polymerization reaction, though, and slightly warped the tools. But as the video below shows, even suboptimal tools can perform, bending everything he threw at them, including the hydraulic press to some extent.

It sure seems like this is one technique to keep in mind for a rainy day. And hats off to [Dave] for sharing what didn’t work, since it points the way to improvements.

Continue reading “3D-Printed Press-Forming Tools Dos And Don’ts”