If you were lucky enough to own one of the crop of 1980s 8-bit computers, did you ever pause to consider how its graphics worked? Maybe the really expensive ones had dedicated CRT controller subsystems akin to the graphics cards you’d have found on a PC a few years later, but most of the affordable models would have stopped what they were doing every TV line interval period to allow access to their memory for their graphical output to be created.
The RC2014 retrocomputer dodges all this, by using a serial port as an interface and expecting your serial terminal to handle the screen. But what if it could produce its graphics directly as the machines of old did? [Rob Dobson] set out to achieve this, and not only did he succeed but he also found a way to directly emulate some classic machines along the way.
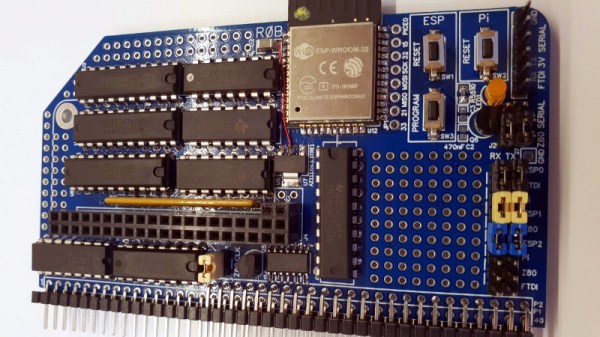
His RC2014 card which he calls the Bus Raider started as an attempt to use a Raspberry Pi to commandeer the RC2014 memory and read it via its GPIO lines, interpreting the graphics for its own screen. But even with bare metal Pi programming he couldn’t achieve the complex timing required for that, so he took an alternative approach. He ended up with an ESP32 that emulates a custom part of the RC2014 memory map and generates a display from there. Having created a custom memory map and hardware emulator for his RC2014, he then had the revelation that he could emulate any memory map, and thus he could make the retrocomputer perform natively as though it were any of a selection of classic micros. So far as well as a straight serial terminal he has a Sinclair ZX Spectrum and a Radio Shack TRS-80 running, as well as his own custom Z80 environment. And since the ESP32 also has WiFi, he can even connect to it through that medium.
Retrocomputers are something in which you might think that everything possible would already have been done, but projects like this one never cease to amaze us with their ingenuity. If you’d like to read more about the RC2014, we reviewed an earlier model back in 2016.


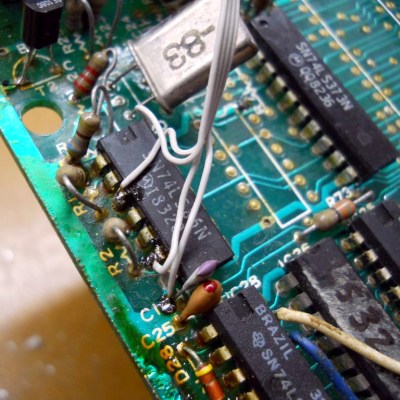 Before he could do any of this, he first had to debug and fix the TK-85 which seemed to be having several age related issues. After swapping out several deteriorating IC sockets, he was able to get it running. He soldered wires directly to one of the logic chips that had the video and sync signals present on them, along with the +5V and GND connections and hooked them up to a breadboard. He then tested his circuit consisting of the TTL multiplexer, DIP switches and resistors. This worked, but not as expected, and after some digging around, he deduced that it was due to the lack of the back porch in the video signal. From Wikipedia, “The back porch is the portion of each scan line between the end (rising edge) of the horizontal sync pulse and the start of active video. It is used to restore the black level (300 mV.) reference in analog video. In signal processing terms, it compensates for the fall time and settling time following the sync pulse.”
 The Hackaday Retro Edition is our celebration of old computers doing something modern, in most cases loading


