Use A Big Magnet To Set The Time

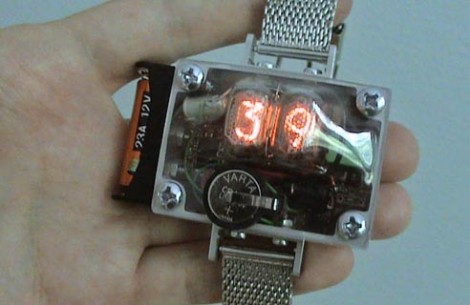
This bulky package is a Nixie tube wristwatch. We still like [Woz’s] watch better but this one has a few nice tricks of its own. Notably, there aren’t any buttons to set the time. Instead, a large magnet is used to actuate a magnetic switch inside the body. Speaking of enclosures, the case is aluminum and the face plate is polycarbonate but looks like it’s been vacuum formed. Check out the clip after the break.

Continue reading “Use A Big Magnet To Set The Time”

Tube Preamp With A Dazzling Wood Case

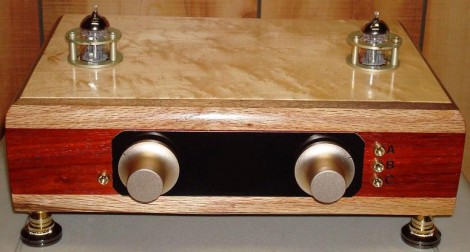
It’s been a while since we’ve looked in on the world of vacuum tube audio equipment. [Bruce] just finished documenting a tube preamp he built. He actually made a couple of these with slightly different cases but they use the same circuit design. We found his discussion of common errors made when tying into ground quite interesting. It seems that many folks struggle with noise in their circuits because of ground loops. There’s some details about isolating the signal ground from a metal chassis, and also an admonition about not connecting the input or output jacks directly the chassis.
If you like this, don’t miss on of our favorite tube projects, [Bruce’s] Poddwatt.

Ice Tube Clock GPS

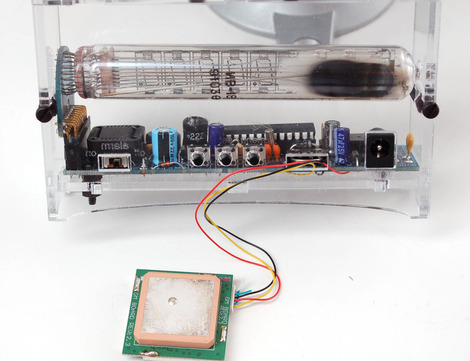
Our favorite Soviet-Era display that found its way into a present-day kit now displays time from orbiting satellites. A GPS module patched into an Ice Tube Clock with modified firmware will be able to provide a satellite-synced time. The firmware, modified by yours truly, parses the GPS module’s NMEA RMC sentences for the time and date information and then updates the clock’s time and date. Fun was had making sure the alarm went off at the correct times when the time was updated by the GPS. Overall, it was a fun project and we look forward to seeing additional Ice Tube Clock hacks.

Making Nixie Tubes At Home

[Aleksander Zawada] makes vacuum tubes in his home. One of the most challenging builds he has taken on is to produce a working Nixie tube. He describes the process in a PDF (Internet Archive, updated 2024), covering his success and failure. It seems the hardest part is to get the tube filled with the proper gas, at the proper pressure, and firmly seal it. In the end he managed to make a tube with three digits (0, 1, and 2) that worked for about 700 hours before burning out.

[Aleksander] joins [Jeri Ellsworth] on the short list of hackers who can pull off extreme industrial manufacturing at home. Kudos.

[Thanks Duncan]

Nixie-display Brings More Wiring Madness

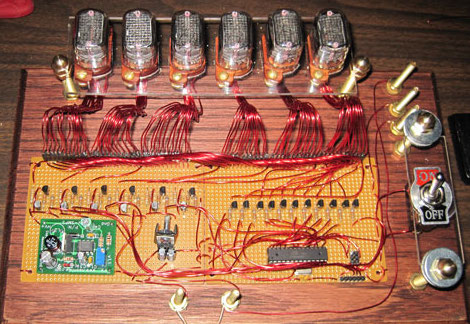
[Tim Anderson] whipped up this nixie tube display using epoxy-coated wires. He’s certainly giving the wire-wrapped LED display a run for its money. He ground the epoxy off the end of each wire using a Dremel before soldering them. We thought you could solder right through the epoxy but maybe not. Was this easier than wire wrapping would have been? We’d bet that because of the voltages wire wrapping wasn’t an option here. That board on the left is the 180V power supply for the tubes with an AVR chip running the Arduino bootloader to the right. After the break there’s a brief demo of data being pulled down over a serial connection. [Tim] also has some plans to add an atomic clock module to this setup sometime down the road.

Headphone Tube Preamp Kit

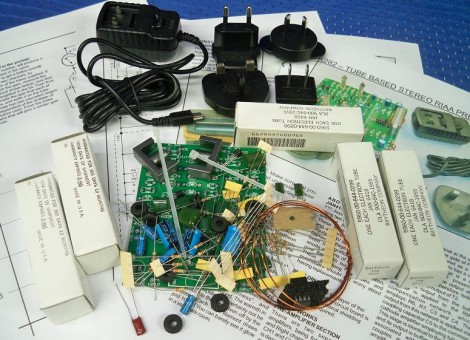
If you’re curious about tube amps but don’t have a firm enough knowledge base to dive right in you might want to try a kit. [Mark Houston] reviewed one such kit and we enjoyed reading about his experiences. It comes with everything you need save soldering tools, an enclosure, and the final connectors ([Mark] used RCA connectors). There is a full schematic available and the assembly instructions take you through tube matching and using that piece of copper coil you see in the picture to wind your own inductor. Consider trying this primer before you jump into building a single tube, multiple tube, or an amplifier of your own design.

[Thanks Gio]