DIY Ultrasonic Plastic Welding

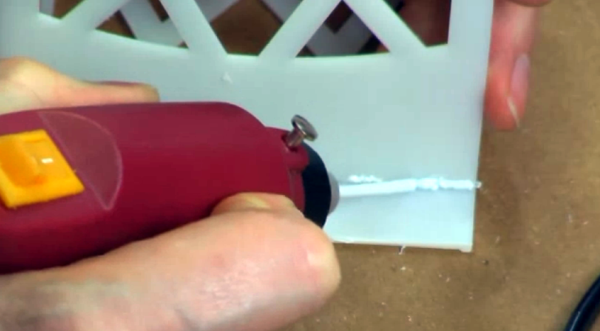
Here’s something that may be of interest to all the reprappers, vacuum formers, and other plastic fabbers out there: ultrasonic welding of plastics. If you’ve ever wanted to join two pieces of plastic without melting them together with acetone or screwing them together, [circuitguru] is your guy.

Ultrasonic welder setups are usually reserved for companies that don’t mind spending tens of thousands of dollars on a piece equipment. There are smaller versions made for heat staking – melting plastic pillars into rivets on the work piece – and [circuitguru] was lucky enough a somewhat reasonable price.

Because the heat staking gun was a handheld unit, a rotary tool drill press was put to work. The end result is a relatively inexpensive way to join two plastic parts without screws, glue, or solvents. The bond is pretty strong, too. Check out the video after the break to see [circuitguru] join two pieces of a plastic enclosure and try to tear them apart.

Continue reading “DIY Ultrasonic Plastic Welding”

A Bicycle Built For… Siamese Twins?

This project really puts an end to arguing over who has to ride in the back of the tandem bicycle. We challenge you not to smile while viewing the maiden voyage that [Carlos] and his daughter take on this side-by-side bicycle. The video can be found after the break.

It certainly makes a bit more sense than an over-under tandem, and the fabrication process is really quite manageable. This requires alterations to the seat, handle bars, and pedals, but the majority of the bike (frame, gearing, fork, wheels) is unaltered.

The cranks have been replaced by a custom welded cam mechanism that reminds us of how the pedals on a paddle boat work. Both riders must pedal at the same time and rate. To give each a place to sit the seat post was converted into a T bar to host saddles to the right and left of the frame. Finally, the handle bars are the most complicated of all. Extra framing was welded onto both sides for the front tube to provide a place to mount two pair of handle bars. One of them is fixed in place, the other can be turned, using a lever mechanism to steer the front fork.

It looks a bit awkward to get started, but once both riders are up it seems quite stable.

Continue reading “A Bicycle Built For… Siamese Twins?”

Chainless Bicycle Will Turn A Few Heads

Someone let [Tane] play around with welding equipment and bicycle parts and look what happened! He built a diminutive velocipede. Now that’s just a term for a human-powered land vehicle, but the term fits a bit better as this is missing most of the stuff you’d expect to see on a bicycle.

He started with a mountain bike and a kick scooter, then went to work on both with a hack saw. A bit of welding and angle grinding left him with what you see above. It’s still steerable, but missing are the cranks, chain, and brakes. That’s okay though, the bike is low enough for your legs to reach the ground – you start it up and come to a stop Fred-Flintstone-Style.

[Tane] originally meant to add electric propulsion but didn’t quite get around to it. There’s always the option to add a hub motor to the rear wheel if he has the time and motivation.

Entrust You Kid’s Life To A Homemade Roller Coaster?

So you fancy yourself as an amateur engineer? Been working on those welding skills for a while? The real test is to trust your children’s lives on a roller coaster you’ve designed and built (translated).

Now we’re not talking some tired old carnival ride like the teacups. This is a full-blown roller coaster, complete with an upside-down loop. The ride starts off with a chain-lift to the top of the garage/barn roof. From there it’s off and away on the single-rider train. We’d recommend keeping your hands and feet inside the car… if there was a car. The ride utilizes an automobile seat, but you’ll have to settle for a lap-belt as there’s no shoulder restraint here. We’re a bit wary of the track footings – we’d bet they’re not well anchored in the ground – but the fact that the entire length of track has been painted makes us think that [John Ivers] might have known at least a little bit about what he was doing. Don’t forget to catch the video below the fold.

Update: Much better video now embedded after the break thanks to [Tom 101’s] link in the comments.

Update: Source link changes to the original thanks to [Mike’s] comment.

Continue reading “Entrust You Kid’s Life To A Homemade Roller Coaster?”

Fabricating A Music-controlled Stoplight

[Andrew] built himself a stoplight that flashes along with the music. Unlike the traffic signal we checked in on a year ago, this one’s not a reused municipal fixture. [Andrew] imported a 3D model into Sketchup, printed out the results, and traced them onto Bristol board to make his templates. He cut out the parts, used a brake for the bending, then a combination of spot and MIG welding to complete the housing. Off to his school’s spray booth for priming, baking, and painting for a perfect finish.

The internals are what you’d expect. Each light source is made up of a cluster of LEDs controlled by an Arduino. Music synchronization is handled by a Processing script that [Andrew] wrote, which you can see in action after the break.

Continue reading “Fabricating A Music-controlled Stoplight”

Building A Recumbent Trike From Old Parts

This recumbent trike was built using parts from three salvaged bikes and without welding. These bikes are a bit easier on the back and neck than the traditional riding position. This one also allows for a shorter pedal crank which was a concern for the creator, [Barry Millman]. Not only did he do a fantastic job of making the thing, but he shared the project in verbose detail.

It’s a good build. It won’t win a prize for light-weight design as it includes a big chunk of plywood. But it is worth the weight hit if welding is not an option. For your viewing pleasure you’ll find a short parking lot test-drive of the finished recumbent after the break.

Oh, and if you want a more dangerous cycling build, try this over-under tandem.

Continue reading “Building A Recumbent Trike From Old Parts”

Beefing Up A Cheap Drill Motor

[Rob] just finished reinforcing a cheap drill motor. He picked up the tool at Harbor Freight and ditched the case. The plastic retaining ring was replaced with a thick metal washer which he machine The washer uses three bolts to attach to the mounting plate that he welded together. We’re not exactly sure what he’s got in mind as he only mentioned that this will be used with a robot. We wouldn’t mind having one of these as a bench motor but there must be hundreds of uses now that it can be attached to just about anything. It seems Harbor Freight has become popular as hacking’s raw material source. The last example we saw of this was a welding table made from a utility cart.