Christmas Light Controller

We get a lot of tips about Christmas light controllers but rarely do they contain the kind of juicy detail that [Vince Cappellano] included with his setup. His video explaining the controller he built is embedded after the break and it’s not to be missed.

We think there’s a lot of good design invovled in this porject. First off, he’s got eight physical channels, each with optisolation and a triac for 256 levels of power control. But he was able to double the control to sixteen virtual channels if you’re using LED lighting. That’s because on those strings half of the LEDs are reverse biased compared to the rest. By adding sensing circuitry to the incoming AC, he can switch the triacs to only send positive or negative voltage through the LED strands, which produces the additional virtual channels. And did we mention that he did all this using wire wrapping and point-to-point soldering?


Continue reading “Christmas Light Controller”

Building A Security Access Panel

It turns out that hacking together a security keypad is remarkably simple if you know what you’re doing. [Don] needed to add a keypad with an RFID reader on it. He had previously built a USB RFID reader and thought he could integrate those concepts into the new unit.

He once again started with a serial to USB converter and removed the voltage converter IC for later use since he doesn’t need TTL levels for this project. The keypad is a USB product and it turns out there’s a hub inside. With plenty of space inside for the serial converter PCB and a blank spot at the top where he mounted the RFID reader, he adding a few passive components to wire it up and connect it to the hub. The only connection is the original USB cord but the PC will detect both the keypad and the converter.

Shutter Remote For RICOH Cameras

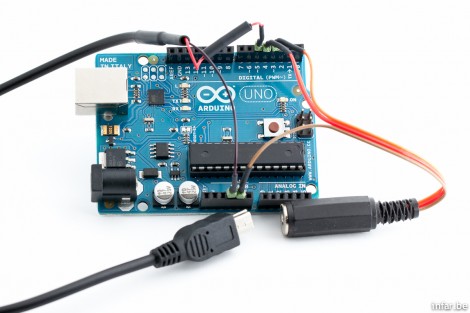
[Toby] wanted to have a remote shutter trigger for his RICOH GR III camera. This brand doesn’t have a dedicated port for remote operation but a bit of research allowed him to build his own trigger. The camera’s USB port is used for triggering but not using the USB protocol. Instead, a pulse pattern on the 5V line identifies the half-press, full-press, and release states of the shutter button. From there it was just a matter of wiring up a circuit centering around an Arduino that leaves room for a lot of expansion into realms like photo automation.

Arduino EMF Sensor

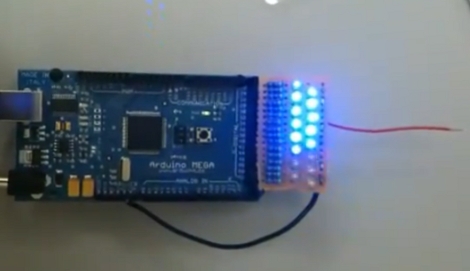
As a biomedical equipment technician [Adam Outler] equipment needs to be in top working condition. The emergency room staff were complaining about erroneous noise on the electrocardiogram and it’s his job to fix it. He suspected EMF interference so as a quick first step he decided to throw together an EMF detector using an Arduino. It uses a bank of LEDs as an indicator bar to reflect the EMF picked up by the red antenna. In the video after the break [Adam] checks a room for possible sources of interference, treating the recharging circuit from the emergency lights as the most likely culprit. Since the ECG is many times more sensitive to EMF than the Arduino, this turns out to be a quick and easy way to make sure he’s not barking up the wrong tree.

Continue reading “Arduino EMF Sensor”

Fabricating A Music-controlled Stoplight

[Andrew] built himself a stoplight that flashes along with the music. Unlike the traffic signal we checked in on a year ago, this one’s not a reused municipal fixture. [Andrew] imported a 3D model into Sketchup, printed out the results, and traced them onto Bristol board to make his templates. He cut out the parts, used a brake for the bending, then a combination of spot and MIG welding to complete the housing. Off to his school’s spray booth for priming, baking, and painting for a perfect finish.

The internals are what you’d expect. Each light source is made up of a cluster of LEDs controlled by an Arduino. Music synchronization is handled by a Processing script that [Andrew] wrote, which you can see in action after the break.

Continue reading “Fabricating A Music-controlled Stoplight”