Screenshot of the blog post, showing how you can optimize your battery level measurement resistor dividers, among many other things

Making Your Wireless Keyboard Truly Low-Power

The basics of keyboard design are tried and true at this point, but there are still a few aspects yet unconquered. One of them is making your keyboards wireless. You might think it’s easy, but if you just slap a wireless-enabled microcontroller onto your board, you’ll soon be left with a dead battery. Rejoice – [Pete Johanson], creator of ZMK, tells all that you want to know about making your keyboard low-power.

In a lengthy blog post, he goes through everything that a typical keyboard consists of, and points out factor after factor that you never knew could cause a spike in power consumption. Are you using muxes or config options that will force your MCU to always stay alert? Is your voltage regulator’s quiescent current low enough, and can the same be said about other parts you’re using? Does your MCU have to work extra hard transmitting bytes because you’ve put a copper fill under its antenna? Most importantly, is the firmware you’re using designed to optimize power consumption at its core?

If you’ve ever thought about designing low-power keyboards, hell, any low-power device, you seriously should read this post – it will set you at ease by giving you a checklist of things to do, and it also links to quite a few other useful resources, like the ZMK power profiler. Perhaps, if you’re building a wireless keyboard or just creating battery-powered device, you should consider ZMK, as it sure seems to be written with energy efficiency in mind.

Want to learn more about what it takes to build a low-power device? Our 2023 Low-Power Contest attracted a wide range of entrants, and they’ve shared a flurry of methods and tricks you can use to build any sort of battery-juice-sipping gadget.

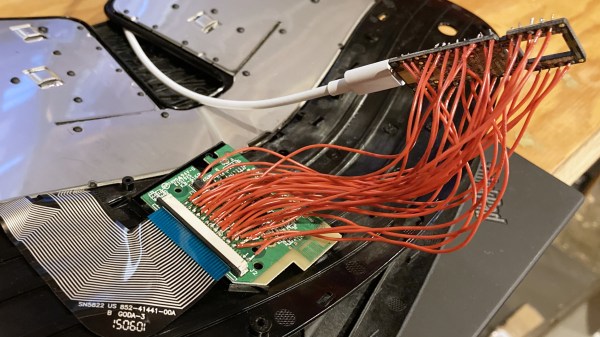
chadaustin's sculpt keyboard test pads wired to protonC

Tether Tames Temperamental Typing

[chadaustin] has a favorite keyboard with a great ergonomic shape, key travel distance, and size, but after switching to Windows 10, the wireless connection introduced a terrible delay. Worse yet, the receiver is notoriously susceptible to interference from USB 3.0 hubs. To provide 128-bit AES encryption, the receiver is paired with the keyboard at the factory and cannot be replaced. If you lose that, you gain a highly ergonomic paper-weight. The solution for [chadaustin] was tethering the keyboard and receive several crash-courses in hardware hacking along the way. As evidenced by the responses to this project on ycombinator, many long-time fans of the Microsoft Sculpt Ergonomic Keyboard, introduced in 2013, suffer similar issues.

chadaustin's sculpt keyboard USB board layout
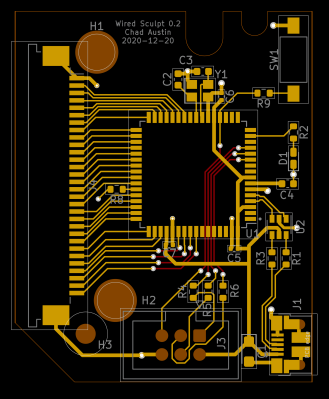
KiCad USB controller board layout

We really appreciate that [chadaustin] took an incremental approach, tackling one problem at a time and getting help from others along the way for first attempts at many complex steps. The proof-of-concept involved hand-soldering each lead from the keyboard matrix’s test pads to a QMK Proton C, which worked but couldn’t fit inside the keyboard’s case. For a more permanent and tidy solution, [chadaustin] tried a ribbon-cable breakout board and other microcontrollers, but none of those were compact enough to fit inside the case either. This required a custom PCB, another first for [chadaustin].

After a one-day intro to KiCad, [chadaustin] dug into the datasheets, completed a schematic for the board, and generously shared the process of choosing components and creating the layout. [chadaustin] ordered a board and found the mounting holes’ placement needed to be shifted.

With the full matrix mapped by [johnmilkspill], flashing QMK onto the AT90USB1286 controller went fairly smoothly. [chadaustin] chose to map both sides of the split spacebar back to the space key but did add a feature by repurposing the battery indicator LED to Caps Lock. And the results?

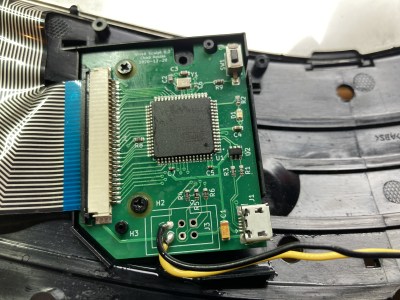
chadaustin's sculpt keyboard USB controller fit into case
USB controller fits into the plastic case, wires added to ISP for bootloader button

According to testing done with Is It Snappy?, the latency dropped from the wireless 78 ms down to 65 ms over USB. More importantly, this latency is now consistent, unaffected by USB hubs, and there is no receiver to lose. Of course, [chadaustin] has ideas for future improvement, including regaining the multimedia function keys, as these kinds of hacks are never really done; they are just in the current revision. No word on the fate of the detached number pad, but that likely needs its own tether and is a project for another day.

Thanks for the tip [Linus Söderlind]

Turn Your Wireless Keyboard Into A MAME Controller!

For those of you that have a wireless keyboard laying around, you might be tempted to turn it into something else, like a wireless MAME controller. For those not familiar with it, MAME stands for “Multiple Arcade Machine Emulator” and is generally used to run older arcade games on a computer.

Encoders are available for this purpose, however, intending to save some money, and having an unused wireless keyboard, I decided to try to make one myself.  As far as I know there are no wireless encoders available for this purpose, so that was part of the motivation for trying this.

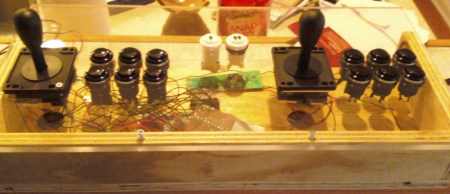
In this post I go over my mechanical design for the cabinet as well as the electrical process of going from keyboard to MAME controller. I did eventually get the thing working, but if more than a couple buttons were pressed simultaneously, some presses were omitted. The conclusion I eventually came to was that it was better to use an encoder to control everything. Not wireless, but much more reliable. If I absolutely needed a wireless controller in the future, I would think modding an actual wireless controller (or two) in a similar manner would have worked better for my purposes.