Probably The Simplest Radiation Detector You Already Own

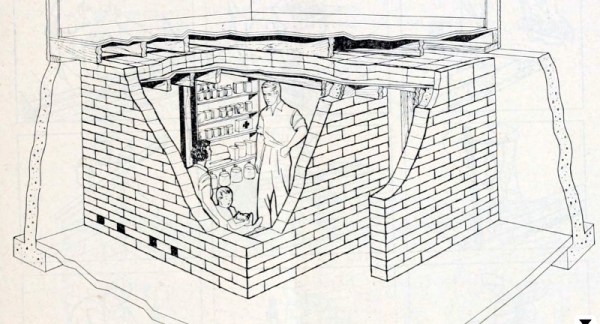
Over the years we’ve featured quite a few radiatioactivity detectors, which usually include a Geiger-Muller tube, or perhaps a large-area photodiode. But in the event of radiation exposure from a nuclear attack, how does the man in the street gauge the exposure without owning a dedicated instrument? This was a question of note at the height of the Cold War, and it’s one that [Dr. Marshall Brucer] answered in a 1962 paper entitled “When Do You Leave A Fallout Shelter“. The full paper is behind a paywall but the part we’re interested in is on the freely available first page.

Dr. Brucer‘s detector is simplicity itself, and it relies on the erosion of a static electric charge by radiation. Should you rub a plastic comb in your hair it will accumulate enough charge to pick up a small piece of paper, and under normal background radiation the charge will ebb away such that it will drop the piece of paper after about 15 seconds. His calculation is that once the field reaches around 10 roentgens per hour it will be enough to erase the charge and drop the paper immediately. There’s a comtemporary newspaper report (Page 7, just to the left of the large advertisment) which tells the reader that since the exposure limit is 100 roentgens (one sievert), this test failing indicates that they have nine hours to create a better shelter. For obvious reasons we can’t test this at the Hackaday bench, but those of us who remember the days when such topics were a real concern will be searching for a handy comb anyway.

Thanks [Victor Matthew] for the tip.

Food Irradiation Detector Doesn’t Use Banana For Scale

How do the potatoes in that sack keep from sprouting on their long trip from the field to the produce section? Why don’t the apples spoil? To an extent, the answer lies in varying amounts of irradiation. Though it sounds awful, irradiation reduces microbial contamination, which improves shelf life. Most people can choose to take it or leave it, but in some countries, they aren’t overly concerned about the irradiation dosages found in, say, animal feed. So where does that leave non-vegetarians?

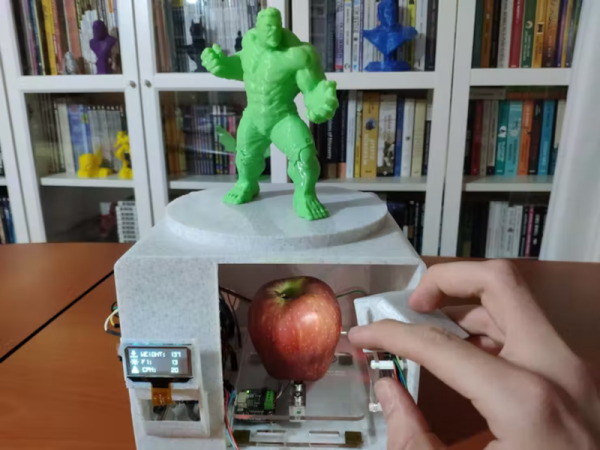
If that line of thinking makes you want to Hulk out, you’re not alone. [kutluhan_aktar] decided to build an IoT food irradiation detector in an effort to help small businesses make educated choices about the feed they give to their animals. The device predicts irradiation dosage level using a combination of the food’s weight, color, and emitted ionizing radiation after being exposed to sunlight for an appreciable amount of time. Using this information, [kutluhan_aktar] trained a neural network running on a Beetle ESP32-C3 to detect the dosage and display relevant info on a transparent OLED screen. Primarily, the device predicts whether the dosage falls into the Regulated, Unsafe, or just plain Hazardous category.

[kutluhan_aktar] lets this baby loose on some uncooked pasta in the short demo video after the break. The macaroni is spread across a load cell to detect the weight, while [kutluhan_aktar] uses a handheld sensor to determine the color.

This isn’t the first time we’ve seen AI on the Hackaday menu. Remember when we tried those AI-created recipes?

A Trio Of Photodiodes Make A Radiation Detector

The instinctive reaction when measuring nuclear radiation is to think of a Geiger counter, as the low-pressure gas tube detectors have entered our popular culture through the Cold War. A G-M tube is not the only game in town though, and even the humble photodiode can be pressed into service. [Robert] gives us a good example, with a self-contained radiation detector head that uses a trio of BPW34s to do the job.

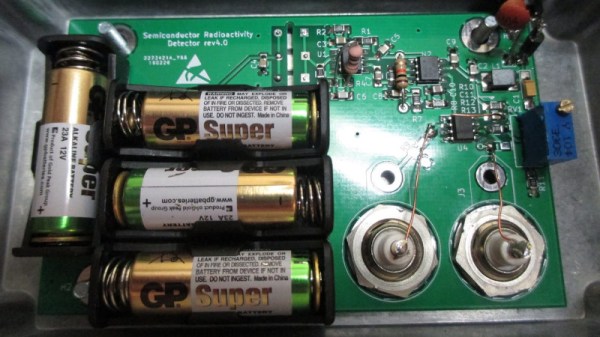
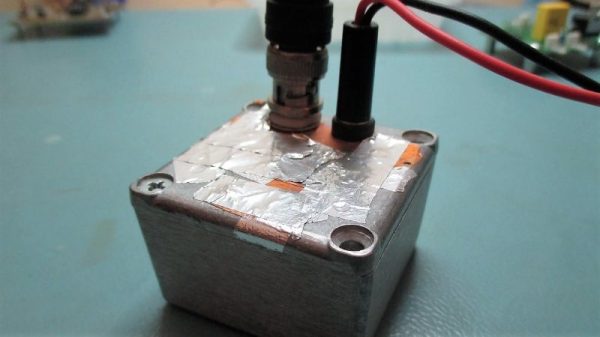
At its heart is a transimpedance amplifier, a not-often-seen op-amp configuration that serves as a very high gain current-to-voltage converter. This produces a spike for every radiation event detected by the diodes, which is fed to a comparator to produce a logic pulse. The diodes require a significant bias voltage, for which he’s used 48 V from a stack of 12 V photographic dry cells rather than a boost converter or other potentially noisy power supply. Such a sensitive high-gain device needs to be appropriately shielded, so the whole circuit is contained in a diecast box with a foil window to allow radiation to reach the diodes.

This isn’t the first BPW34-based radiation detector we’ve seen, so perhaps before looking for a Cold War era relic for our radiation experiments we should be looking in a semiconductor catalogue instead.

Radiation Detector Eschews Tubes, Uses Photodiode

When the topic is radiation detection, thoughts turn naturally to the venerable Geiger-MĂĽller tube. It’s been around for ages, Russian surplus tubes are available for next to nothing, and it’s easy to use. But as a vacuum tube it can be somewhat delicate, and the high voltages needed to run it can be a little on the risky side.

Luckily, there are other ways to see what’s going on in the radioactive world, like this semiconductor radiation detector. [Robert Gawron] built it as a proof-of-concept after having built a few G-M tube detectors before. His solid-state design relies on a reverse-biased photodiode conducting when ionizing radiation hits the P-N junction. The tiny signal is amplified by a pair of low-noise op-amps and output to a BNC connector. The sensor’s analog output is sent to an oscilloscope whose trigger out is connected to a Nucleo board for data acquisition. The Nucleo is in turn connected to a Raspberry Pi for totalizing and logging. It’s a complicated chain, but the sensor appears to work, even detecting alpha emissions from thoriated TIG electrodes, a feat we haven’t been able to replicate with our G-M tube counter.

[Robert]’s solid-state detector might not be optimal, but it has promise. And we have seen PIN diodes used as radiation detectors before, too.

[via Dangerous Prototypes]

Hackaday Prize Entry: An Open Radiation Detector

For his Hackaday Prize entry, [Carlos] is pushing the boundaries of what can be built with PCBs. He’s designed a very low-cost radiation detector that leverages pick and place machines, off-the-shelf components, and very simple electronics. It’s a novel ion chamber design, and if you ever needed a low-cost, easily manufacturable radiation detector, this is the project you want.

Instead of a Geiger tube or a spark detectors, this radiation detector uses an ionization chamber to detect radiation. This project was inspired by the work of [Charles Wenzel] and [Alan Yates], and the implementation is actually pretty simple. A metal can — or some other type of enclosure — is electrified, and a single wire is stuck right into the middle of the can. When alpha and beta particles enter the can, air molecules are ionized, and attracted to either the can or the wire by a difference in voltage. A tiny bit of current flows between the can and the wire, which can be detected if you have a sufficiently sensitive circuit.

The basic idea is well-publicised and well-understood. What [Carlos] is doing with this project is making an ionization chamber easily manufacturable. He’s doing this entirely with standard PCBs and solder instead of paint cans, RF connectors, and deadbugged transistors of the earlier experiments. The resulting PCB actually looks like something that wasn’t put together in a garage (even though it probably was), and is an amazing entry for the Hackaday Prize.

Seeed Looks For Help Developing An Open Source Radiation Detector

Seeed Studios, makers of the Seeeduino and fabricators of small-run PCB orders have put out a call to help develop an open source radiation detector. Will it be of any help to people in the area of Japan that is at risk? We really can’t say. But if you can lend some expertise with this, it can’t hurt. We’ve already seen a simple dosimeter project but this one sounds like it’s more on the level of a DIY Geiger counter. We know it’s possible, but the hacked together unit we saw back in 2007 had very little documentation and used parts that may be hard to come by.

The specific information needed is what type of sensor to use, what supporting circuits should be included, and what method is best to calibrate each unit. There’s a discussion going in the comment thread of that post which should be interesting to read even if you think you don’t have anything to add.

[Thanks Michael]

Dosimetry: Measuring Radiation

Thanks to stints as an X-ray technician in my early 20s followed by work in various biology labs into my early 40s, I’ve been classified as an “occupationally exposed worker” with regard to ionizing radiation for a lot of my life. And while the jobs I’ve done under that umbrella have been vastly different, they’ve all had some common ground. One is the required annual radiation safety training classes. Since the physics never changed and the regulations rarely did, these sessions would inevitably bore everyone to tears, which was a pity because it always felt like something I should be paying very close attention to, like the safety briefings flight attendants give but everyone ignores.

The other thing in common was the need to keep track of how much radiation my colleagues and I were exposed to. Aside from the obvious health and safety implications for us personally, there were legal and regulatory considerations for the various institutions involved, which explained the ritual of finding your name on a printout and signing off on the dose measured by your dosimeter for the month.

Dosimetry has come a long way since I was actively considered occupationally exposed, and even further from the times when very little was known about the effects of radiation on living tissue. What the early pioneers of radiochemistry learned about the dangers of exposure was hard-won indeed, but gave us the insights needed to develop dosimetric methods and tools that make working with radiation far safer than it ever was.

Continue reading “Dosimetry: Measuring Radiation”