Space Technology And Audio Tape To Store Art

[Blaine Murphy] has set out to store an archive of visual art on cassette tape. To do so he encodes images via Slow-Scan Television (SSTV), an analogue technology from the late 50s which encodes images in for radio transmission. If you are thinking ‘space race’ you are spot on, the first images of the far side of the moon reached us via SSTV and were transmitted by the soviet Luna 3 spacecraft.

Yes, this happened

Encoding images with 5os technology is only one part of this ongoing project. Storage and playback are handled by a 90s tape deck and the display unit is a contemporary Android phone. Combining several generations in one build comes with its own set of challenges, such as getting a working audio connection between the phone and the tape deck or repairing old consumer electronics. His project logs on this topic are solid contenders for ‘Fail Of The Week’ posts. For instance, making his own belts for the cassette deck was fascinating but a dead end.

The technological breadth of the project makes it more interesting with every turn. Set some time aside this weekend for an entertaining read.

Just a couple of years back ham radio operators had the opportunity to decode SSTV beamed down from the ISS when they commemorated [Yuri Gagarin’s] birthday. Now if the mechanical part of this project is what caught your interest, you’ll also want to look back on this MIDI sampler which used multiple cassette players.

Semi-Automatic Rail Gun Is A Laptop Killer

It’s huge, it’s unwieldy, and it takes 45 seconds to shoot all three rounds in its magazine. But it’s a legitimate semi-automatic railgun, and it’s pretty awesome.

Yes, it has its limits, but every new technology does, especially totally home-brew builds like this. The aptly named [NSA_listbot] has been putting a lot of work into his railgun, and this is but the most recent product of an iterative design cycle.

The principle is similar to other railguns we’ve featured before, which accelerate projectiles using rapidly pulsed electromagnets. The features list in the video below reads like a spec for a top-secret military project: field-augmented circular bore, 4.5kJ capacitor bank, and a custom Arduino Nano that’s hardened against the huge electromagnetic pulse (EMP) generated by the coils. But the interesting bits are in the mechanical design, which had to depart from standard firearms designs to handle the caseless 6 mm projectiles. The resulting receiver and magazines are entirely 3D printed. Although it packs a wallop, its cyclic rate of fire is painfully slow. We expect that’ll improve as battery and capacitor technology catches up, though.

Want to check out some more railgun builds? We’ve got them in spades — from one with $50,000 worth of caps to a wrist-mounted web-slinger.

Continue reading “Semi-Automatic Rail Gun Is A Laptop Killer”

3D-Printed Kwikset Keys Parametrically

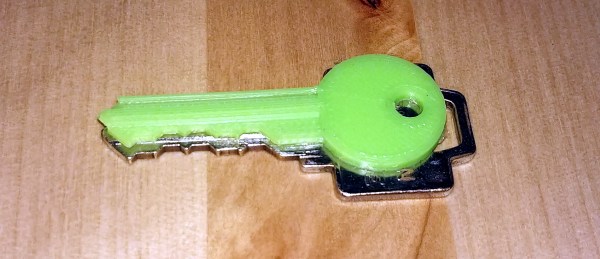
Good ol’ Kwikset-standard locks were introduced in 1946 and enjoyed a decades-long security by obscurity. The technology still stands today as a ubiquitous and fairly minimal level of security. It’s the simplest of the various standards (e.g., Master, Schlage, etc.) with a mere five pins with values ranging from 1 (not cut down hardly at all) to 7 (cut deeply). This relative simplicity made the Kwikset the ideal platform for [Dave Pedu] to test his 3D-printed keys.

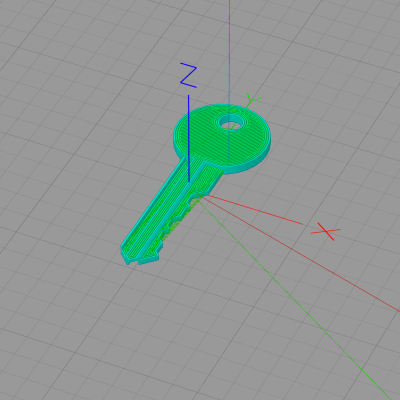
Rather than simply duplicating an existing key, [Dave] created a parametric key blank in OpenSCAD; he just enters his pin settings and the model generator creates the print file. He printed ABS on a glass plate with a schmeer of acetone on it, and .15mm layer heights. Another reason [Dave] chose Kwikset is that the one he had was super old and super loose — he theorizes that a newer, tighter lock might simply break the key.

So, a reminder: Don’t post a picture of your keys on the socials since at this point it’s certainly possible to script the entire process from selecting a picture to pulling the key off the print bed. Looking to technology won’t save you either; Bluetooth locks aren’t much better.

Hackaday Prize Entry: An Open Radiation Detector

For his Hackaday Prize entry, [Carlos] is pushing the boundaries of what can be built with PCBs. He’s designed a very low-cost radiation detector that leverages pick and place machines, off-the-shelf components, and very simple electronics. It’s a novel ion chamber design, and if you ever needed a low-cost, easily manufacturable radiation detector, this is the project you want.

Instead of a Geiger tube or a spark detectors, this radiation detector uses an ionization chamber to detect radiation. This project was inspired by the work of [Charles Wenzel] and [Alan Yates], and the implementation is actually pretty simple. A metal can — or some other type of enclosure — is electrified, and a single wire is stuck right into the middle of the can. When alpha and beta particles enter the can, air molecules are ionized, and attracted to either the can or the wire by a difference in voltage. A tiny bit of current flows between the can and the wire, which can be detected if you have a sufficiently sensitive circuit.

The basic idea is well-publicised and well-understood. What [Carlos] is doing with this project is making an ionization chamber easily manufacturable. He’s doing this entirely with standard PCBs and solder instead of paint cans, RF connectors, and deadbugged transistors of the earlier experiments. The resulting PCB actually looks like something that wasn’t put together in a garage (even though it probably was), and is an amazing entry for the Hackaday Prize.

Opening The Door To Functional Prints

If you are going to do something as a joke, there is nothing to say that you can’t do a nice job of it. If you’re like [Michael], a whimsical statement like “Wouldn’t it be funny to put Gründerzeit-style doors on the server cabinet?” might lead down a slippery slope. True to his word, [Michael] not only installed the promised doors, but he did a darn nice job of it.

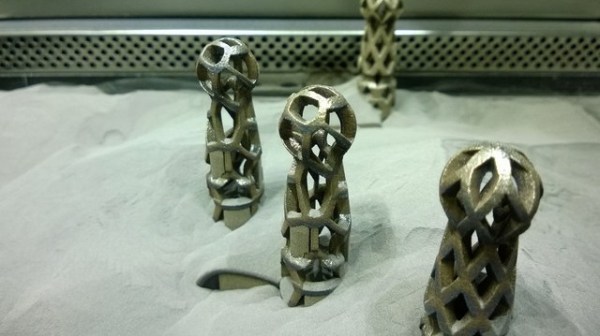
Buying new doors was the easy part because the door frame and hinges were not standardized back then, so there was nothing on the server cabinet to his mount doors. He walks us through all the steps but the most interesting point was the 3D printed door hinges which [Michael] modeled himself and printed in steel. His new hinges feature his personal flair, with some Voronoi patterning while matching the shape of the originals. We love seeing 3D printed parts used as functional hardware, and hinges are certainly a piece of hardware meant to hold up under pressure.

This is not the first 3D printed door hardware we’ve seen. Check out this innovative latch printed as a single piece and here’s the skinny on making flexible objects yourself.

Continue reading “Opening The Door To Functional Prints”

Nintendo Power Glove Achieves Its Promise As Vive Controller

You have to hand it to Nintendo, for blazing the virtual reality trail in consumer products a couple of decades before everyone else, even if the best that can be said for their efforts in that direction is that they weren’t exactly super-successful. Their 1989 Power Glove became little more than a difficult-to-use peripheral for everyday console games, and their 1995 Virtual Boy console was streets ahead of its time but had a 3D effect that induced discomfort in its players.

Many years later though, the Power Glove remains an intriguing product, and one that can be readily found second-hand. The folks at Teague Labs think that perhaps its time has come as the basis of a peripheral for modern VR systems, as a controller for the HTC Vive.

They’ve taken a Power Glove, and through an Arduino Due with a custom shield, interfaced it to the Vive controller mounted where the buttons would have been in its Nintendo days. The Vive provides positional data, while the Nintendo sensors provide hand data. Thus they’ve made an accomplished glove peripheral with a lot less heartache than they would have seen had they done so from scratch.

They show us a couple of environments using the glove, an iPad simulation which we’re having a little difficulty getting our heads round, and a rock/paper/scissors game which looks rather fun. If you are interested in further work, all their code is on GitHub.

We’ve shown you another hugely-upgraded Power Glove in the past, but how about one controlling a quadcopter?

Not Your Typical ATX Bench PSU

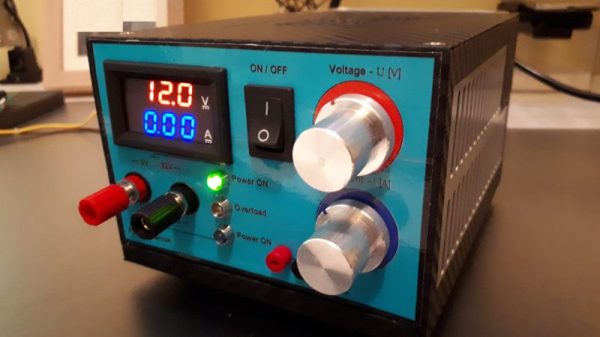
We know what you’re thinking — yet another scrap PC power supply turned into a bench PSU. But look a little closer and you’ll see a nicely designed linear bench supply that just fits inside a gutted ATX case.

A lot of the items on [Medzik]’s BOM for this build are straight from the scrap bin. The aforementioned ATX supply case is one, as is the power transformer donated by a friend. Modules such as the 30V/2A regulator, the digital volt/ammeter, and a thermostat module to control the fan at higher power settings were all sourced via the usual suspects. The PSU boasts two outputs — an adjustable 0-22 volt supply, and a fixed 12-volt output. An unusual design feature is a secondary input which uses the 22-VAC supply from a Weller soldering station to give the PSU a little more oomph. This boosts the maximum output to 30 volts; one wonders why [Medzik] didn’t just source a bigger transformer, but you work with what you have sometimes. There are some nice touches, too, like custom-printed vinyl overlays for the case.

It’s a good-looking and compact unit with a decent suite of features, and you could do a lot worse when building your next bench supply. If it’s not your cup of tea though, just take your pick — tiny and yellow, built to last, or ensconced in Ultrasuede.