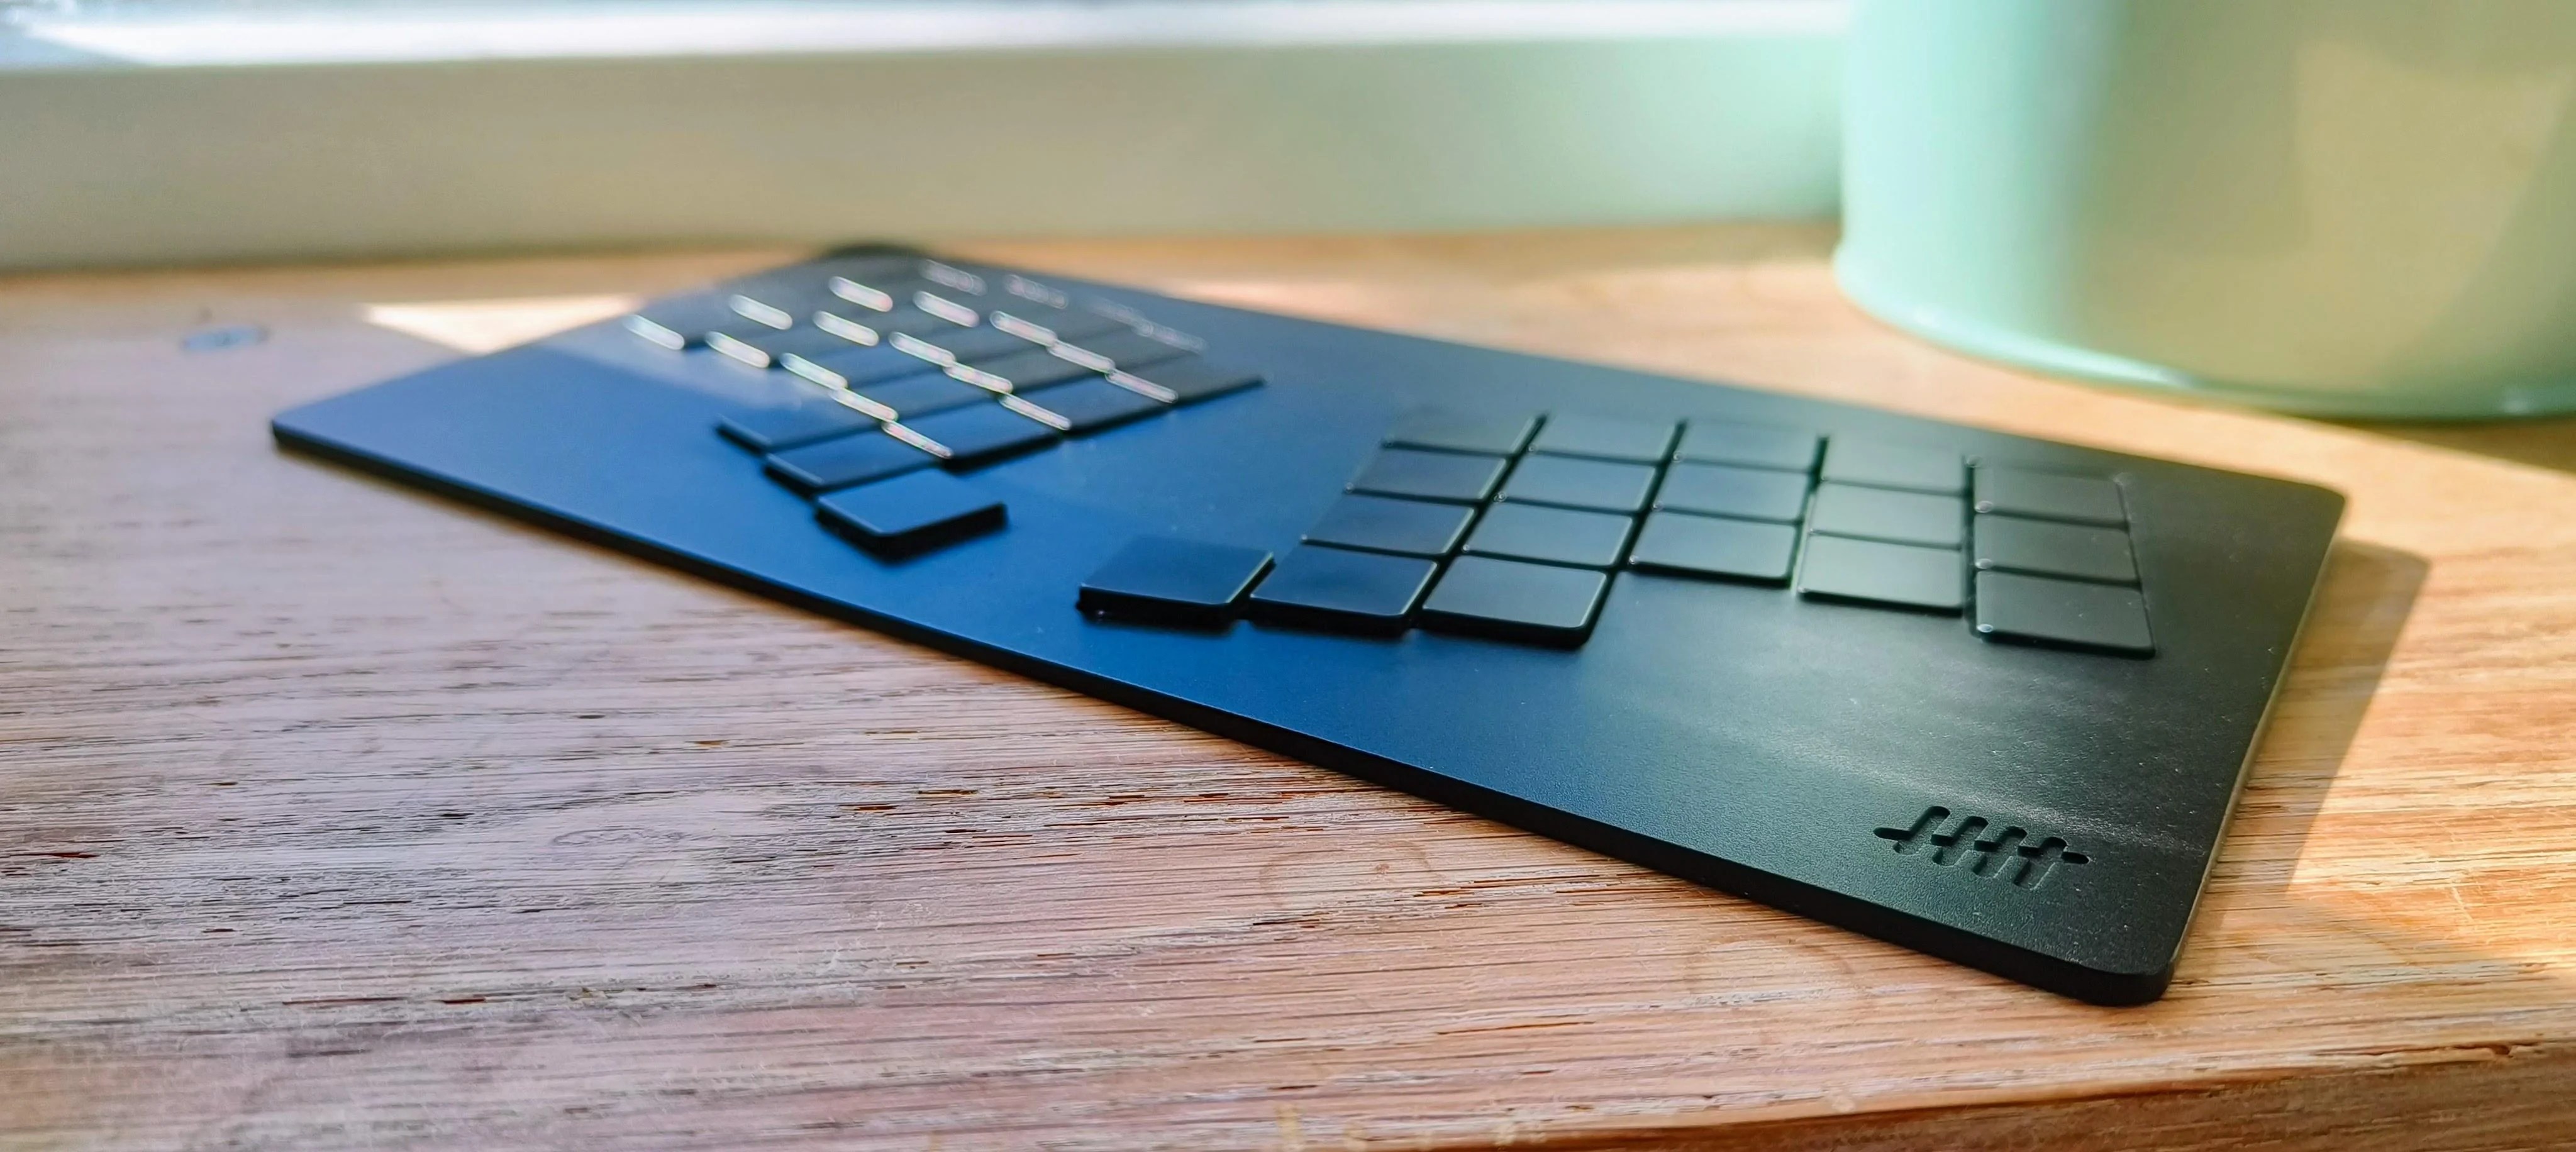
That’s okay, though, because now you’re caught up and I can talk about his latest keyboard, the mikecinq. The inspiration for this one includes the aesthetics of Le Chiffre and the slimness of Le Oeuf. As you’ll see in the gallery, the top is ever-so-slightly slanted downward from the top.
You can see it really well in the second picture — the top row is flush with the case, and the keys gradually get taller toward the thumb clusters. All [dynam1keNL] really had to do was 3D model the new case and screw in the PCB from his daily driver mikefive.

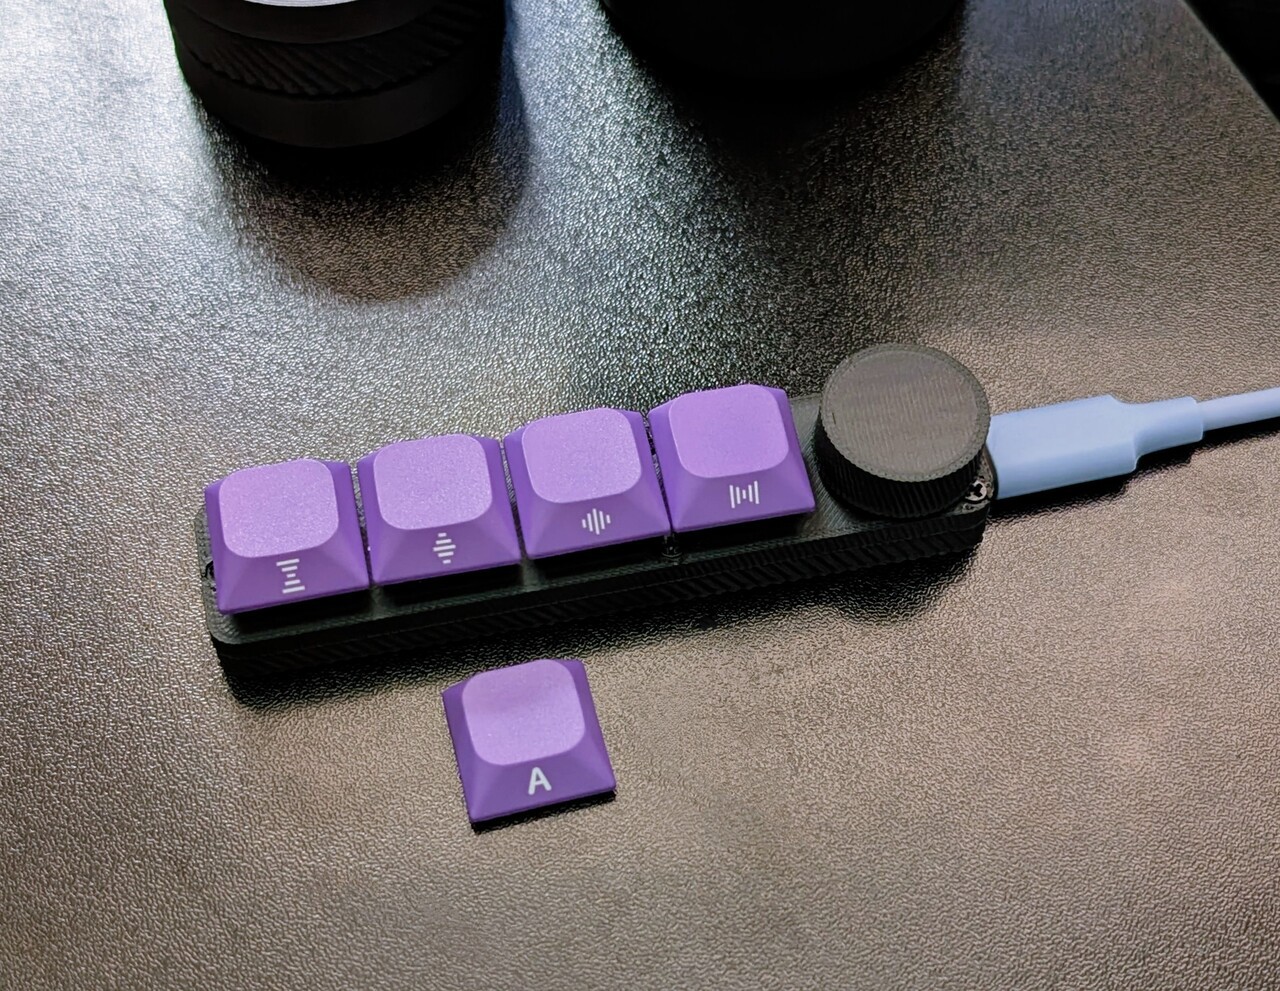
So in order to deal with this, he made a dedicated mikecinq PCB with big cutouts with castellated holes beneath each switch. Now, the switch contacts are accessible from underneath and can be soldered with an iron.
You may have noticed that the mikefive production files are not available on GitHub — that’s because it was recently licensed and will be available soon. But if you want production files for the mikecinq, let him know in the comments.
Continue reading “Keebin’ With Kristina: The One With The Wafer-Thin Keyboard”