an image of maketime showing the current time

Unique Clock Doubles As A Development Board

Most clocks these days have ditched the round face and instead prefer to tell time through the medium of 7-segment displays. [mihai.cuciuc] is bringing the round face to digital clocks with his time-keeping piece, MakeTime.

MakeTime's custom PCB
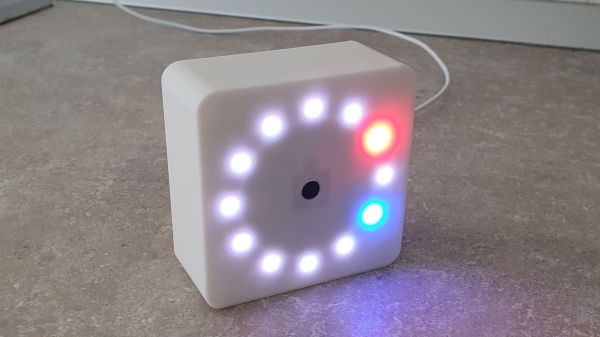
MakeTime serves two purposes, the first and most obvious one is as a clock. Rather than displaying the time with digits, MakeTime harkens back to round dial clocks by illuminating RGB LEDs along its perimeter to show the position of the minute and hour “hands”. By using 24 LEDs, MakeTime achieves a timing granularity of 2.5 minutes.

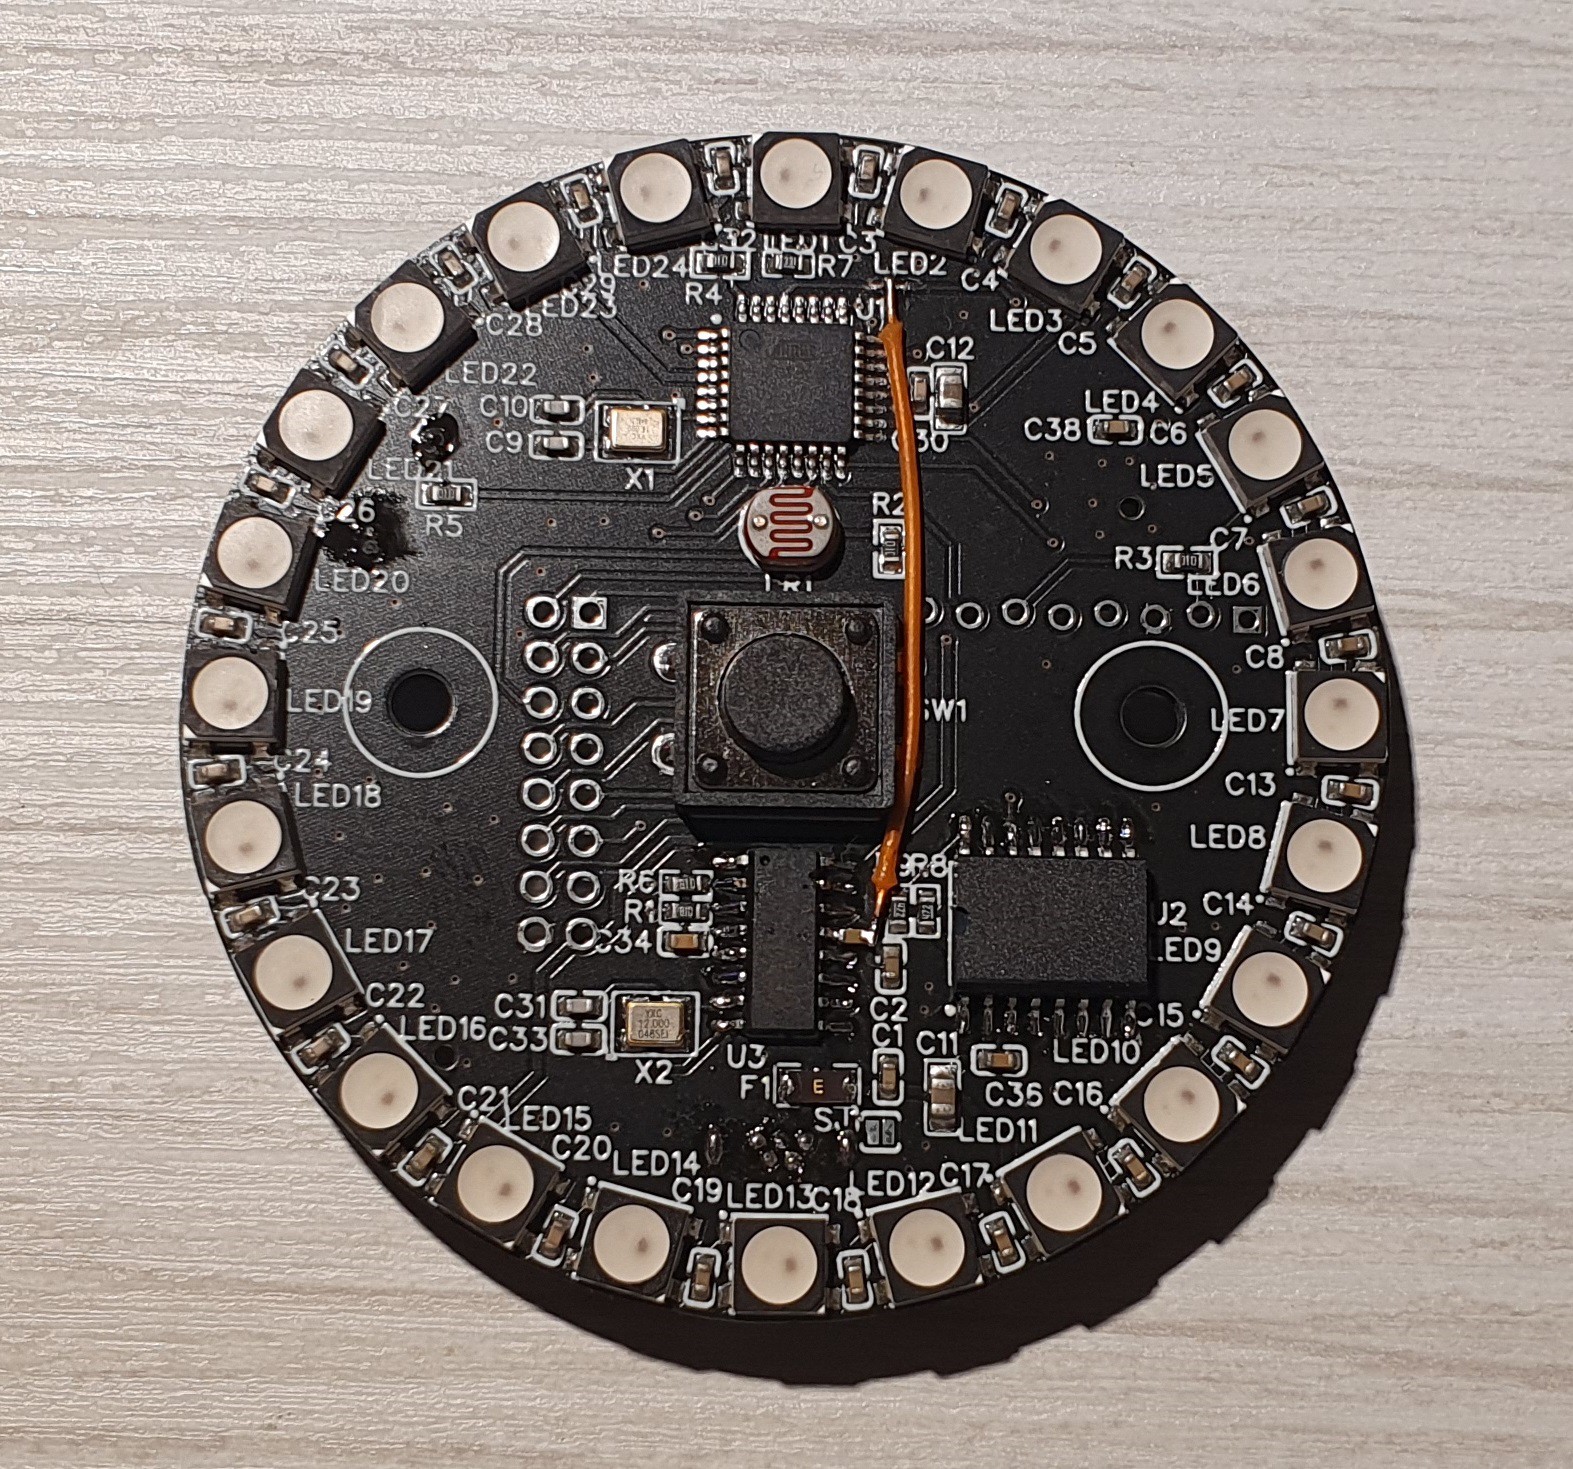
The second purpose is as a development platform. [mihai.cuciuc] designed the clock with hacking in mind, opting to build it with components that many are already familiar with, such as a DS3231 RTC and WS2812 LEDs. To make the entire thing Arduino compatible, the microcontroller is an AtMega 328P, that can be connected to through the micro-USB port and CH340 USB-UART IC. If MakeTime outlives its time as a clock, all of the unused GPIO of the 328P are broken out to a single pin header, allowing it to be repurposed in other projects for years to come.

It seems like everyone is making their own unique timekeeping device these days. Check out the clock made out of ammeters we covered last week.

Arduino And Pi Share Boardspace

A Raspberry Pi Zero (W) and Arduino are very different animals, the prior has processing power and connectivity while the latter has some analog to digital converters (ADCs) and nearly real-time reactions. You can connect them to one another with a USB cable and for many projects that will happily wed the two. Beyond that, we can interface this odd couple entirely through serial, SPI, I2C, and logic-level signaling. How? Through a device by [cburgess] that is being called an Arduino shield that supports a Pi0 (W). Maybe it is a cape which interfaces with Arduino. The distinction may be moot since each board has a familiar footprint and both of them are found here.

Depending on how they are set up and programmed, one can take control over the other, or they could happily do their own thing and just exchange a little information. This board is like a marriage counselor between a Raspberry Pi and an Arduino. It provides the level-shifting so they don’t blow each other up and libraries so they can speak nicely to one another. If you want to dig a bit deeper into this one, design files and code examples are on available.

Perhaps we’ll report on this board at the heart of a pinball machine retrofit, a vintage vending machine restoration, or maybe a working prop replica from the retro bar in Back to the Future II.

Simple, Cheap Nitrate Tester Is Open Source

Too much of a good thing can be a bad thing, and nitrate pollution due to agricultural fertilizer runoff is a major problem for both lakes and coastal waters. Assessing nitrate levels commercially is an expensive process that uses proprietary instruments and toxic reagents such as cadmium. But [Joshua Pearce] has recently developed an open-source photometer for nitrate field measurement that uses an enzyme from spinach and costs a mere $65USD to build.

The device itself is incredibly simple – a 3D printed enclosure houses an LED light source and a light sensor. The sample to be tested is mixed with a commercially available reagent kit based on the enzyme nitrate reductase, resulting in a characteristic color change proportional to the amount of nitrate present. The instrument reads the amount of light absorbed by the sample, and communicates the results to an Android device over a Bluetooth link.

Open-source instruments like this can really open up educational opportunities for STEM groups to get out into the real world and start making measurements that can make a difference. Not only can this enable citizen scientists and activists, but it also opens the door for getting farmers involved in controlling nitrate pollution at its source – knowing when a field has been fertilized enough can save a farmer unnecessary expense and reduce nitrate runoff.

There are a lot of other ways to put an open-source instrument like this to use in biohacking – photometery is a very common measuring modality in the life sciences, after all. We’ve seen similar instruments before, like a DIY spectrophotometer, or this 2015 Hackaday Prize entry medical tricorder with a built-in spectrophotometer. Still, for simplicity of build and potential impact, it’s hard to beat this instrument.

Automated Bathtub Prepares Your Bath Just The Way You Like It

Automated Bathtub Controlled by Arduino

We live in the future don’t we? Is there a reason why only rich people have touchscreen controlled showers and temperature regulated bathtubs? [Raptor_Demon] shows us how to make our very own automated bathtub for cheap, using our favorite microprocessor — the Arduino.

The system controls the filling of the tub, monitors the temperature based on a user profile — and it even adds bubbles. Why do you need this? You probably don’t — but why not, wouldn’t it be nice to press a button and have a bath drawn for you? It uses an Arduino compatible board that controls 3 relays for the water system, a DS18b20 temperature sensor on the inlet and a second wireless (434mhz) Arduino compatible board for monitoring the tub temperature and adding bubble bath using a hacked automated soap dispenser.

[Raptor_Demon] showcased his prototype at the Maker Faire NC 2013 and 2014 where it was a huge hit. He even had a full size tub going, in which he would sit in during his explanation — check it out!

Continue reading “Automated Bathtub Prepares Your Bath Just The Way You Like It”