Things may not have gone as planned last week for the flying cellphone on Mars, but just because Ingenuity‘s flying career is over doesn’t mean there’s no more work to do. NASA announced this week that it’s going to try a series of “wiggle” maneuvers on Ingenuity‘s rotors, in an attempt to get a better look at the damage to the blade tips and possibly get some clues as to what went wrong. The conjecture at the moment seems to be that a large area of relatively featureless terrain confused the navigation system, which uses down-facing cameras to track terrain features. If the navigation program couldn’t get a bead on exactly how far above the ground it was, it’s possible the copter came in too hard and caused the rotor tips to dig into the regolith. There seems to be some photographic suggestion of that, with what looks like divots in the ground about where you’d expect the rotor tips to dig in, and even scraps of material that look out of place and seem to be about the same color as the rotor blades. All this remains to be seen, of course, and we’re sure that NASA and JPL are poring over all available data to piece together what happened. As much as we hate to say goodbye to Ingenuity, we eagerly await the post-mortem.
destructive testing3 Articles
Assessing Nozzle Wear In 3D-Printers
How worn are your nozzles? It’s a legitimate question, so [Stefan] set out to find out just how bad 3D-printer nozzle wear can get. The answer, as always, is “It depends,” but exploring the issue turns out to be an interesting trip.
Reasoning that the best place to start is knowing what nozzle wear looks like, [Stefan] began by printing a series of Benchies with brand-new brass nozzles of increasing diameter, to simulate wear. He found that stringing artifacts, interlayer holes, and softening of overhanging edges and details all worsened with increasing nozzle size. Armed with this information, [Stefan] began a torture test of some cheap nozzles with both carbon-fiber filament and a glow-in-the-dark filament, both of which have been reported as nozzle eaters. [Stefan] found that to be the case for at least the carbon-fiber filament, which wore the nozzle to a nub after extruding only 360 grams of material.
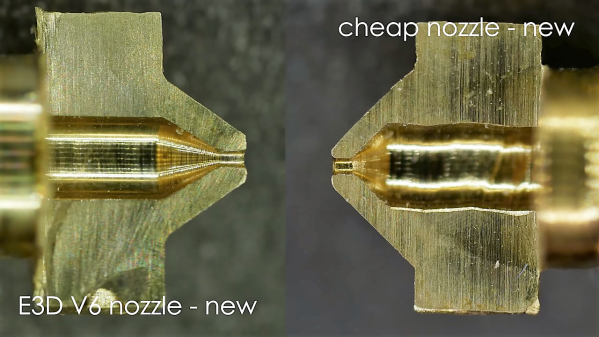
Finally, [Stefan] did some destructive testing by cutting used nozzles in half on the mill and looking at them in cross-section. The wear on the nozzle used for carbon-fiber is dramatic, as is the difference between brand-new cheap nozzles and the high-quality parts. Check out the video below and please sound off in the comments if you know how that peculiar spiral profile was machined into the cheap nozzles.
Hats off to [Stefan] for taking the time to explore nozzle wear and sharing his results. He certainly has an eye for analysis; we’ve covered his technique for breaking down 3D-printing costs in [Donald Papp]’s “Life on Contract” series.
Exploding Multimeter Battle Royale
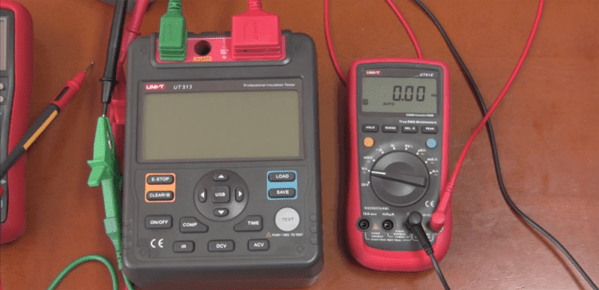
If you check out eBay, Amazon, or the other kinda-shady online retailers out there, you’ll quickly find you can buy a CAT III (600V) rated multimeter for under $50. If you think about it, this is incredible. There’s a lot of engineering that needs to go into a meter that is able to measure junction boxes, and factories in China are pushing these things out for an amazing price.
Over on the EEVBlog, these meters are being pushed to the limits. Last month, [joeqsmith] started a thread testing the theory that these cheap meters can handle extremely high voltages. A proper CAT III test requires a surge of electrons with a 6kV peak and a 2 ohm source. With a bunch of caps, bailing wire, JB Weld and zip ties, anyone can test if these meters are rated at what they say they are. Get a few people on the EEVBlog sending [joeqsmith] some cheapo meters, and you can have some real fun figuring out how these meters stack up.
The real experiments began with [joe smith]’s low energy surge generator, a beast of a machine that can be measured with an even beastlier high voltage scope probe. This is a machine that will send a voltage spike through anything to short out traces on poorly designed multimeters.
How did the cheapo meters fare? Not well, for the most part. There was, however, one exception: the Fluke 101. This is Fluke’s My First Multimeter, stuffed into a pocketable package. This meter is able to survive 12kV pulses when all but two of the other brands of meters would fail at 3kV.
What’s the secret to Fluke’s success? You only need to look at what the Fluke 101 can’t do. Fluke’s budget meter doesn’t measure current. If you ever look inside a meter, you’ll usually find two fuses, one for measuring Amps and the other for all the other functions on the scope. There’s quite a bit of engineering that goes into the current measurement of a meter, and when it goes wrong you have a bomb on your hands. Fluke engineers rather intelligently dropped current measurement from this budget meter, allowing them to save that much on their BOM.
There’s an impressive amount of data collected by [joeqsmith] and the other contributors in this thread, but don’t use this to decide on your next budget meter; This is more of an interesting discovery of how to make a product that meets specs: just cut out what can’t be done with the given budget.


