Robomintoner Badminton Bot To Defeat Amateur Humans

Watching robots doing sports is pretty impressive from a technical viewpoint, although we secretly smile when we compare these robots’ humble attempts to our own motoric skills. Now, a new robot named Robomintoner seeks to challenge human players, and it’s already darn good at badminton.

Continue reading “Robomintoner Badminton Bot To Defeat Amateur Humans”

Stereoscopic Display Art Installation

stereoscopic-display

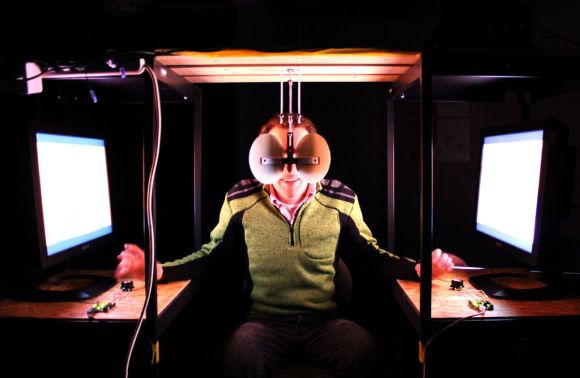
This rig is something of a museum or art installation, but the concept is so simple we thought it could easily inspire your next project. The two mirrors and two video sources make up a stereoscopic display.

The user sits between two displays (computer monitors shown here, but the post also shows images projected on two walls of a room). A pair of mirrors mounted at forty-five degrees form the eye pieces. It’s a V-shaped mirror assembly in which the narrow end pointing toward the bridge of the user’s nose. The mirrors reflect the images from the monitors, giving a different view for each eye.

In this case each monitor is playing back a video loop, but one is just slightly longer than the other. Each monitor has a potentiometer in front of it. The user can turn them to speed or slow the playback in an attempt to bring the video back into sync. We don’t think we’d replicate that portion of the project. But it might be fun to view some stereoscopic clips in this way. There’s even instructions on how two cameras were used to record the scenes.

You can get a closer view of the test apparatus in the clip after the jump.

Continue reading “Stereoscopic Display Art Installation”

Turn Your IPhone Into A View-Master

This super quick hack will be fun to do with the kids. Remember the days of View-Masters? You’d put a disk of small slides into a little plastic viewer and a stereoscopic image would jump out at you in 3D! Now you can not only view stereoscopic images on your smartphone, but make your own too!

To shoot the images just hold your phone in portrait orientation and take a snapshot of your subject, then move the camera six inches to the right and take a second image. The two pics need to be displayed on the screen at the same time and for this [Plarky] uses a free iPhone app called Pic Stitch. We’re sure you can find an Android equivalent in no time if you do a bit of searching.

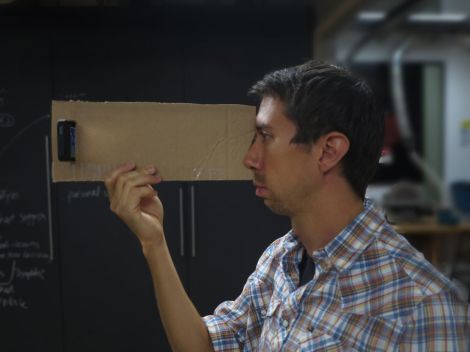
To view the stereoscope it helps to make a divider out of cardboard like the one seen above. You’ll need to cross your eyes and focus on a point to bring the two images together. We don’t remember having to do this with the View-Master so we’re hoping someone will take the idea and improve upon it. We’ve already seen a digital View-Master. Now we want to see those dual screens replaced with an iPhone cradle.

Building A Passive 3D Projection System In Your Attic

While the whole 3d movie/game craze seems to be ramping up, it really isn’t a new thing. We all recall those fancy red-blue glasses that were popular in theaters for a while, but I’m not talking about that. Passive 3d projection (using polarized glasses) has been around for a while too. Many people have figured out cheap ways to build these systems in their homes, but only recently have we seen media created for them in quantity.  Now that you can buy 3D games and movies at your local box store, the temptation to have a 3d system in your home is much higher.

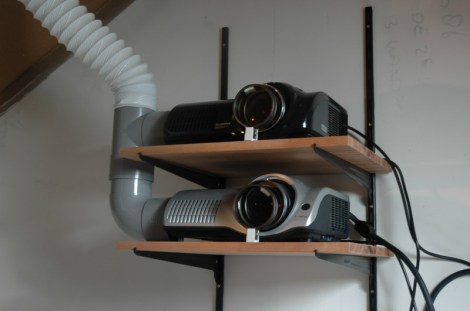
Here’s a great read on how to put together a fairly simple projection system that uses two identical projectors with polarizing filters. Basically, all you need are two projectors, two filters, a screen, and the glasses. There are plenty of tips for mounting and setup in the thread to help alleviate any headaches you might encounter.

This system is primarily used with a PC, because it requires two video feeds to function. A cost breakdown might make you wonder why you wouldn’t just jump on amazon and get a 32″ 3d tv for under $400, but sitting in front of that giant screen might make you understand.

Make Any Photo 3D Using The Gimp

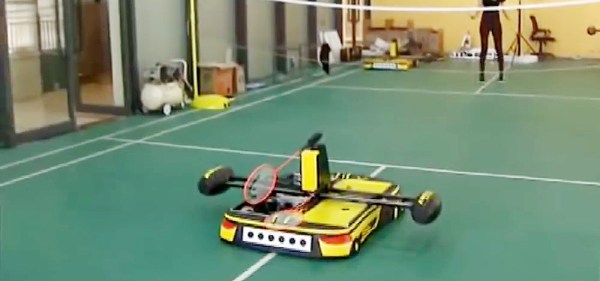
Put your face close to the screen and cross your eyes until the two images above become one. You may need to adjust the tilt of your chin to make it happen, but when they come together you’ll see [John Lennon] pop out in 3D. This was made using a 3D rendering script for The Gimp.

The process is not entirely automatic, but it won’t take too long to mask off the outlines for different depth layers. The script makes three different layers from the image. One of them is a color-coded depth map that uses a custom color palatte to choose distance for each item. If you paint the background dark blue it will be processed at the furthest distance from the viewer’s cross-eyed perspective, yellow is the nearest.

[Don] mentions a parallel output and a cross-eyed output in his write up. We understand the cross-eyed version, but are just guessing that the parallel version would be used in a stereoscopic viewer that puts a partition between the two images so that each eye sees a different frame. You know, like a View-Master.

This Robot Will School You At Freethrows

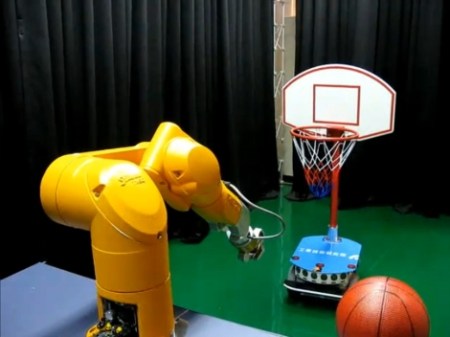
People spend years of their lives practicing on the courts to get the kind of accuracy that this robot achieves. It is able to shoot freethrows thanks to stereoscopic camera analysis of the target. We know what you’re thinking; big deal, it knows the distances which makes the calculations easy. That’s not the case, look a bit closer in the image above. The basket itself is mounted on a robotic platform and creates a randomly moving target. It looks like shots are only taken when the basket is stationary. But still, that means the system is able to calculate accurate throws when the basket is not only at varying distances, but also when it is not directly in front and not square to the arm of the robot. The accuracy relies on analyzing the square on the backboard of the basket. Because two cameras give different perspectives, edge and corner detection of both images allow the system to extrapolate the location of the target.

After the fold there’s a video of this robot being demonstrated to the public. Apparently the yellow-armed-monster isn’t suitable for public consumption because the developers have covered it with the body of a plush seal.

Continue reading “This Robot Will School You At Freethrows”

Anaglyphic Photography Made Easy

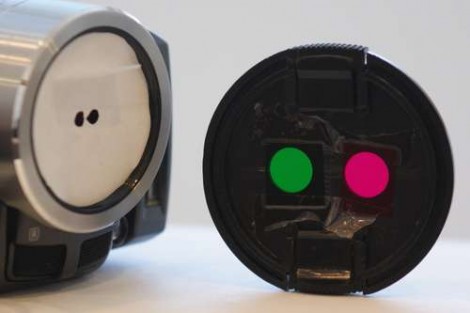
[ProfHankD] came up with a pretty easy way to take 3D photos using a single lens. He’s making Anaglyph images which use color filtering glasses to produce stereoscopic 3D effects. We’ve seen stereoscopic imaging hacks that use two cameras or a clever combination of mirrors, but this one uses a special filter and post-processing. [ProfHankD] drew up a template that can be used to properly align two colored filters, like those in the lens cap seen above. Once installed, just snap all the pictures you want and then hit them with your favorite photo editing software. This involves separating the color channels of the photograph and offsetting them to increase the depth of focus.

It’s a nice little process, and his writeup is easy to understand even if you’re not a hardcore photography guru.

[Thanks Paul]