Building An Electromagnetic Pendulum Clock

electromagnetic_pendulum_clock

[Stephen Hobley] has been experimenting with an electromagnetic pendulum in order to build himself a clock. Through the course of his experiments, he has learned quite a bit about how pendulums function as well as the best way to keep one moving without the need for chains and weights, which are typically associated with these sorts of clocks.

His first experiments involved driving a simple pendulum with a pulse motor. He discovered that the easiest way to keep the pendulum moving was to use a coil to detect when the it reached the equilibrium point, pushing it along by sending a small pulse to that same coil. He noticed that he could keep the pendulum moving at a pretty good tick if he triggered the magnetic coil every third pass, so he implemented an Arduino to keep count of passes and apply the appropriate force when needed.

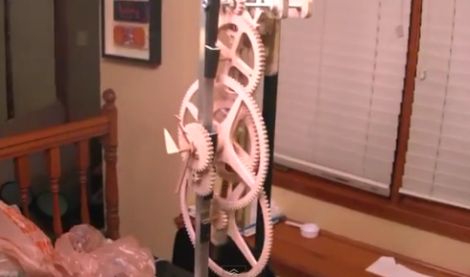
He has been making pretty decent headway since his first experiments and now has nearly all of the clock works assembled. Crafted out of wood, he uses a 15-tooth primary drive ratchet, which powers two 60-tooth gears responsible for keeping track of seconds, as well as a pair of larger gears that track the minutes and hours.

It’s looking good so far, we can’t wait to see it when finished.

Stick around to see a quick video demonstration of the clock with all of its gearing in action.

Continue reading “Building An Electromagnetic Pendulum Clock”

RFID Record Player

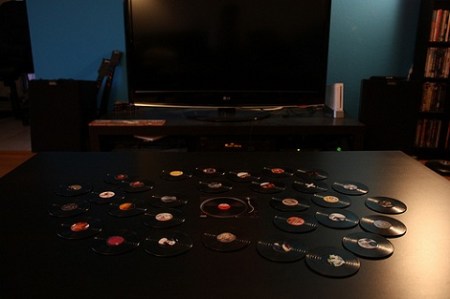
Like most of us at Hack a Day, [Bertrand Fan] has a huge collection of digital music that was all obtained through legal channels. Missing the physical process of choosing and playing an album, [Bertrand] built an RFID record player to get rid of the paradox of choice that arises when thousands of albums are at your fingertips.

The records are repurposed Christmas ornaments with RFID disk tags pasted under the label. These records are read by a RedBee RFID reader and sent to a Popcorn Hour media server, but we’re guessing this could be easily adapted to any HTPC.

The only limitation we see is the fact that the RFID chip is hard coded to individual songs. We think it would be easier to have the RFID chip store an album’s CDDB discid, but feel free to leave a comment and say how you would catalog thousands of albums on RFID tags.

We’re a little tired of skipping though our music collection like a portable CD player from 1990, so we’re pretty impressed that [Bertrand] came up with something that would get us to sit down and listen to our Terabytes of FLAC-encoded music. Check out the video after the jump for a demo of the RFID record player.

Continue reading “RFID Record Player”

Million Volt Guitar Rocks The House…for Science!

science_brothers_tesla_hero

[Bill Porter] and his friend [Dan Flisek] work together to put on a science-related educational stage show called “Science Brothers”, in which the pair try to convince school children that their field of expertise is the cooler science. While the two are competitive on stage, the main goal of the program is to get kids interested in science, no matter what the specialty.

The pair currently finance the project out of pocket, so they are always looking for ways to make things interesting while also keeping costs in check. With that in mind [Bill] came up with an awesome way to show off the Tesla coil he built a while back. His most recent educational creation is a little something he calls “Tesla Hero”.

Since he already had a solid state Tesla coil hanging around, he dug up a PS2 Guitar Hero controller and got busy getting the two acquainted. The guitar connects to the coil via a fiber optic isolator board, playing one of five notes as he strums along. A series of Arduino-driven LED strips adorn the guitar, flashing various colors while he plays, as you can see in the video below.

It’s quite a cool project, and we’re sure that his audience will be impressed!

Stick around to see a video of  Tesla Hero in action, and if you’re interested in learning more about the Science Brothers, be sure to check them out here.

Continue reading “Million Volt Guitar Rocks The House…for Science!”

DIY Digital Bench Power Supply

[Guido Socher] built himself a great little bench power supply that’s able to put out 30 Volts at 2 Amps.

Instead of taking the easy way out by putting a few taps on an ATX power supply, this project was built around a generic 24 Volt laptop power brick. An ATmega8 generates a PWM signal that is sent though a low-pass filter, allowing everything to be very precisely controlled. This DC signal is then sent through a BD245 power transistor to bring everything up to the desired output. [Guido Socher] included a USB port for computer control of everything, and the final project is something we’d be happy to have on our bench.

We’ve seen a few computer power supplies converted into a bench power source, but we’re impressed with [Guido Socher]’s build log. It’s not often we see a hack that goes over the theory of operation, and the end product is very nice (and functional) too.

Retro Video Games Sounds…for Your Toilet

super_mario_toilet

After reading about a Super Mario Brothers themed bathroom, [Jonathan] decided that it would be pretty cool to have his toilet play the “warp pipe” sound whenever anyone flushed.

He grabbed a small sound drop key chain on eBay and disassembled it to see how things worked. Once he figured out which solder pads corresponded to the warp pipe sound he added a few wires that, when shorted, trigger the sound effect.

He debated as to how the sound generator should be wired to the toilet, and was pretty reluctant to place the key chain inside the tank due to concerns about sound volume and water damage. He ultimately decided to trigger the sound effects using triboelectric charge, much like those touch lamps from the ’80s. He rigged up a simple circuit that is connected to both the toilet handle as well as the water intake valve on the wall. When someone touches the handle, the small charge that is present in their hand triggers the sound effect as you can see in the video below.

Instead of using a standard project box, he opted to build a small warp tube replica from cardboard and paper, which really brings everything together nicely.

While he says that the circuit is pretty sensitive, triggering at odd times or not at all, we still think it’s awesome.

Continue reading “Retro Video Games Sounds…for Your Toilet”

Converting A Laptop Computer Into A Desktop Machine

[Michael Chen] found himself in possession of a thoroughly broken laptop. The hinges connecting the screen to the body of the computer were shot, and the battery was non-functional. After a bit of thinking he decided that it wouldn’t take much to resurrect the hardware by turning it into a desktop machine.

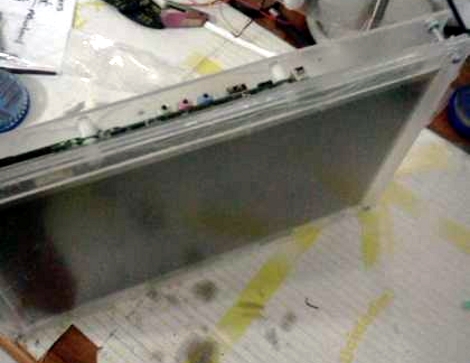
At the core of this hack is the hardware that you must keep for the computer to function. That is, the LCD screen, the motherboard, hard drive, and the AC/DC brick that powers it. [Michael] ditched everything else; the case, keyboard, trackpad, webcam, etc. Next he started building his own enclsure out of acrylic. First he sandwiched the LCD screen between a full sheet of acrylic and a bezel that was one inch wide on each side. Next, another full sheet was used to mount the motherboard and hard drive. You can see how the three sheets are connected by nuts and bolts in the image above. It looks like the only other alteration he made was to relocate the power button to a more convenient spot.

Once a USB keyboard and mouse are added he’s back up and running. We’ve got our eye on an old XP laptop that might end up seeing this conversion to become a dedicated shop computer. We just need to build in some more dust protection.

Beginner Concepts: Designing Transistor Control Circuits

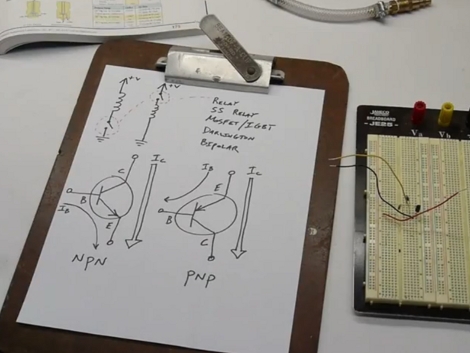
Need to switch something on or off using a microcontroller? Using a transistor is one of the best ways to do this, but how exactly do you design properly for transistor switching? [Ben Krasnow] put together a tutorial in which he does an excellent job of explaining the ins and outs of designing transistor control circuits.

We’ve embedded his twenty-minute video after the break. In it he talks about the use of transistors, the difference between NPN and PNP transistors, and the design specifics you need to know when working with them. We think that beginners will find [Ben’s] demonstration of how to calculates Hfe, which is the base current necessary to fully switch the transistor. If this is gibberish to you, have no fear. [Ben’s] instruction is clear and easily understandable.

The one thing we missed in the video is clarification about base current protection for PNP transistors. [Ben] mentions that there’s no easy circuitry that can be used on the base of a PNP  to regulate flow from the emitter to the base, but he doesn’t elaborate. Otherwise, it’s everything we could have wanted on the topic.

Continue reading “Beginner Concepts: Designing Transistor Control Circuits”