Building A Battery-powered Motion Alarm

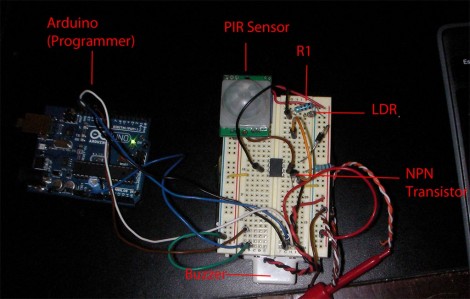
[Brad] was asked by his Sister to design a motion-based alarm that would help her catch her son sneaking out of the house at night. Obviously this didn’t need to be a long-term installation so he decided to throw something together that is only active at night and can be battery-powered. What he came up with is a light-sensitive motion sensor that uses very little power.

He knew that an Arduino would be overkill, and decided to try his hand at using the Arduino to develop code for an ATtiny85. It has an external interrupt pin connected to the output of the PIR module, which triggers action when motion is detected. The first thing it does is to check the photoresistor via the ADC. If light levels are low enough, the buzzer will be sounded. [Brad] measured the current consumption of his circuit and was not happy to find it draws about 2.5 mA at idle. He spent some time teaching himself about the sleep functions of the AVR chips and was able reduce that to about 500-600 uA when in sleep mode. Now all he has to do is find a nice place behind the house to mount the alarm and there’ll be no more sneaking around at night.

If you’re trying to keep a tight leash on your own kids you could always make them punch the time clock.

Sustainability Hack: Wind Turbine Battery Charger

Hit your parts bin and set aside an afternoon to build a wind turbine that recharges batteries. You can see two AA batteries hanging off the side of this small generator. You only need a few parts to make this happen, and chances are you have them sitting in your junk bin already.

The generator itself is a small stepper motor which can be pulled from a floppy disk drive or a scanner. The blade is cut from a single piece of 3.5″ (90mm) PVC pipe, with another piece of smaller-diameter pipe serving as the body of the turbine. The tail-fin makes sure it’s always pointing into the wind and was made from some plywood. As the blade spins, a current is induced on the control pins of the stepper motor. By building a pair of bridge rectifiers and using an RC filter you’ll get the most out of the generated current.

This turbine can charge a pair of NiCad batteries in about 10 hours, but it might be worth developing some smart circuitry to manage charging. If it were able to choose between a dedicated storage battery and the on-board battery holder you could put all of the wind energy to good use.

[Thanks Michael]

Toilet Paper Printer Made From Scrap Parts

toilet_paper_printer

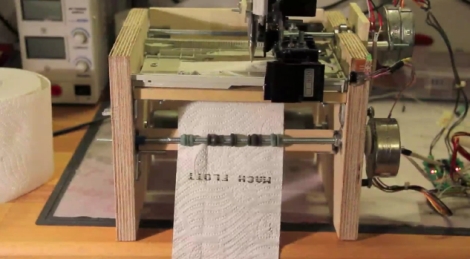
Some of our favorite hacks are those made with scrap materials, so we were delighted to see a contest being held by the German technology magazine c’t which focuses on using salvaged components. “Mach flott den Schrott” is the name of the competition, which loosely translates to “Make fast the scrap”.

German builder [Mario Lukas’] entry into the contest (Google Translation) is definitely unique, and certainly fits within the theme. He built a toilet paper printer that uses a bunch of recycled components to write anything he desires on a roll of the soft white stuff. His blog walks through the build details, including a bill of materials for all of the scrap bits he used to put it together. Several CD-ROM drives, printers, and even inline skates donated some components to the printer, while an Arduino controls the entire printing process.

Though [Mario] is using RSS and Twitter feeds as a data source for his toilet-side scribe, we imagine it will only be a matter of time before advertising companies seize upon this sort of technology to create personalized advertisements geared towards a decidedly captive audience.

Continue reading to see a quick video of his toilet paper printer in action.

[via Make]

Continue reading “Toilet Paper Printer Made From Scrap Parts”

Bluetooth Communications For Android Devices Via Processing

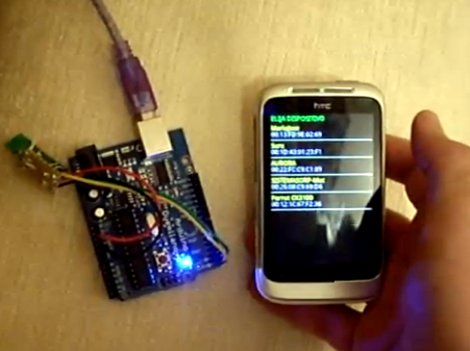
[Oscar] shows us how to use a Processing sketch for Android to communicate with Bluetooth devices (translated). It turns out this is easier than you might think. Processing and Android are both closely related to Java, and you can just import the Android libraries that deal with Bluetooth within the Processing sketch. That makes it easy to enable the Bluetooth modem when the sketch is launched, and manages connecting with devices as well as sending and receiving data.

For this example [Oscar] is using an Arduino with a Bluetooth module as a test device. His sketch first shows what devices are available, then connects to the one you select from the list. The 11 lines of Arduino code transmit a value via the serial port, and listens back for a command to toggle the LED on pin 13. [Oscar] takes time in his tutorial to show us how each step of the Processing sketch is assembled, instead of only posting the finished code.

[Thanks Sara]

Python On A Microcontroller

The team at LeafLabs was looking for something cool to do with their new ARM development board. [AJ] asked if anyone had ever played around with Python, so [Dave] cooked up an implementation of PyMite and put it on a Maple board. While the writeup is only about blinking a LED with a microcontroller, they’re doing it with Python, interactively, and at runtime.

The build uses the Maple Native board the team is developing. The board has a 32-bit ARM chip with 1 Meg of RAM – more than enough horsepower to run PyMite. The tutorial for putting PyMite on a Maple is up on the LeafLabs wiki.

PyMite is theoretically able to control every pin on the Maple Native and do just about everything a regular Python distro can do. The LeafLabs team is still working on the necessary libraries for their board (although we don’t see anything on the Google code page), so right now only blinking the LED is supported. Still, it’s pretty cool to have Python in your pocket.

Barebones PIC RFID Tag

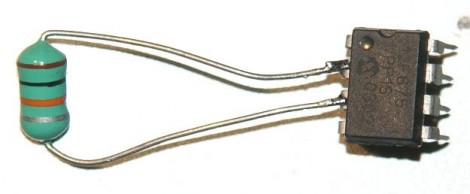
An inductor and 8-pin microcontroller are all that make up this barebones RFID tag. You might have done a double-take when first seeing the image above. After all, there’s nothing hooked up to the power and ground pins on the chip. As [Ramiro Pareja] explains in his post, the power is actually supplied via the I/O pins to which the inductor is soldered. It seems that each I/O pin has a parasite capacitor and a pair of clamping diodes inside the chip. When the AC current that is induced by the magnetic field of the RFID reader hits those pins, the capacitors charge and the clamping diodes form a bridge rectifier. This results in power being injected into the chip, which turns around and sends the RFID code back through the inductor.

This isn’t the first time that we’ve seen this concept. We featured a hack that is exactly the same except it used an AVR chip. This one uses a PIC 12F683 but should work with just about any 12F or 16F model. The code is written in Assembly and shouldn’t need any changes for different hardware. [Ramiro] does talk a bit about adding a decoupling capacitor to Vss and Vdd, as well as a tuning capacitor to the two I/O pins used above to help make the device a little more robust. But, as you can see in the video after the break, it works just fine without them.

Continue reading “Barebones PIC RFID Tag”

Voxel Shield Makes Driving LED Cubes Easy

voxel_shield_led_cube

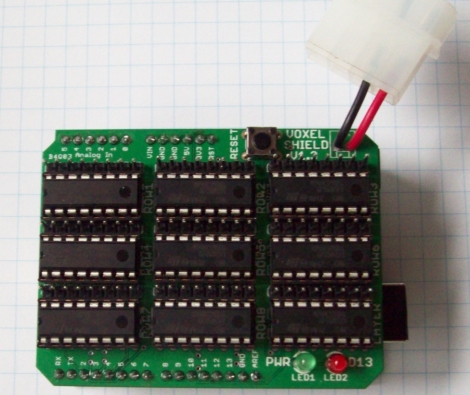
An Arduino can handle running a small LED cube on its own, but if you’re planning on building something big, eventually you are going to run out of pins. For something like an 8x8x8 cube, odds are you will have to turn to shift registers to get the job done. While you could design a breakout board full of shift registers on your own, [Connor] has done the work for you and produced an easy to use Arduino LED cube shield.

He calls his creation the Voxel Shield, and it incorporates 9 SN74LS595N shift registers and an external power plug for all of your LED cube needs. The shield can handle addressing up to 512 LEDs, making it an easy way to drive an 8x8x8 cube or even a 64×8 LED matrix.

It’s a nice clean and compact way to drive a large number of LEDs, so if you have the need, be sure to swing by his site – he has made his schematics and board layout files available to all comers.

[Thanks, Thomas]