Syneseizure Makes Objects Feel Loud

Synesthesia is a mix-up in the wiring of the brain where sensory inputs are perceived differently than what ‘normal people’ usually experience. People with synesthesia can have visual input mapped to aural perception in the mind, or driving along a highway where there’s a recent skunk roadkill can smell ‘loud.’ It’s an interesting way of perceiving the world that’s usually inaccessible to most of the population, but the Syneseizure tries to replicate this way of viewing the world.

There’s a bunch of types of synesthesia (Led Zeppelin feels purple, or apples smelling further away than grapes), but [Greg] and his team needed to choose one subtype to reduce the complexity of their project. They chose mapping visual input to touch sensation. This was accomplished by attaching a dozen speakers to the test subject’s face. A webcam recorded where the subject was looking at and with a Processing sketch, the webcam was reduced to a grayscale 4×3 pixel grid. The intensity of the each pixel corresponded to the strength of buzzing in each speaker. All that was left to do is put a mask over the subject and have them walk around.

The Syneseizure was built for Science Hack Day San Francisco and ended up winning the people’s choice award. There’s a bunch of pics and a great write-up on the project website, so be sure to check that out.

FIGnition FLINT Is A Stripboard Build Of The Simple Computer

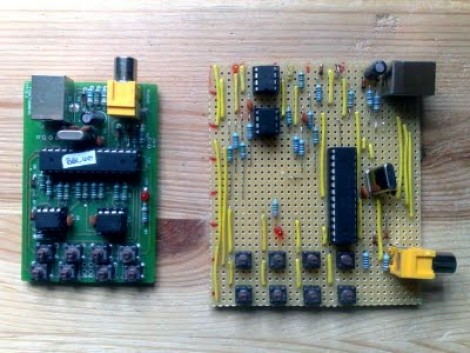
If you want people to really be impressed by your projects it’s often better not to have a fully finished look. In this case, we think hooking the stripboard version of FIGnition up to your TV will raise a lot more eyebrows than the PCB version will.

[Julian] put together a guide to building the computer on strip board. He’s using his own Java application for laying out circuits on this versatile prototyping substrate. This tool is worth a look as it may simplify those point-to-point solder prototypes you’ve been agonizing over. You’ll have to do some poking around on his site to gather all of the knowledge necessary to complete the build. Most of the components are easy to source, but unless you have them on hand, you’ll need put in a parts order for the crystal, the ATmega168, the SRAM chip, and the flash memory chip.

For those not familiar, FIGnition is an 8-bit computer with composite TV-out for a display and rudimentary input from the eight momentary push buttons.

MAME Cabinet 3D Modeled And CNC Milled

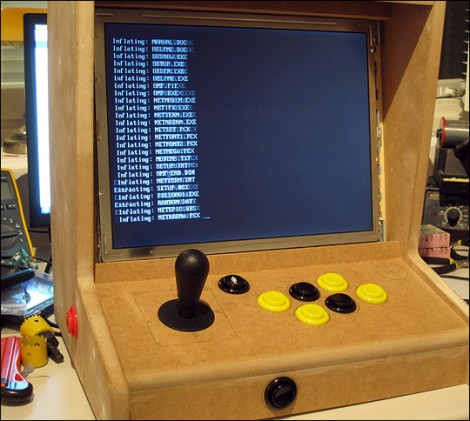
[Entropia] is just putting the final touches on his bar-top MAME cabinet (translated). The project started out as a 3D model to get the case dimensions just right. An old laptop is being, so the enclosure was designed to fit the bare LCD assembly and hide the rest of the computer. [Entropia] had access to a CNC mill through an education program and used it to cut most of the parts for the case out of MDF.

From there the build proceeds as normal. Mounting holes for the controls were cut with a drill and hole saws. We think it’s a bit easier to lay this design out once you have the control panel itself milled, rather than try to get it right in the 3D model. The image above is part way through the build. Since it was taken the case has been painted and a sound system was added but it looks like it’s still waiting for a bezel over the LCD and a marquee for the masthead.

You can see a demo of the game selection UI after the break.

Continue reading “MAME Cabinet 3D Modeled And CNC Milled”

The Cheapest And Easiest 3D Printer We’ve Seen So Far

3D printers are awesome, but boy are they frustrating. If you’ve built a RepRap Mendel, Prusa or Huxely, you know there’s nothing quite like trying to get a washer off of a threaded rod without disassembling the entire machine. This frustration in part sourcing, assembling and correctly aligning a printer is where printers like the Makerbot find their niche. There’s a new printer on the block that promises a 45 minute assembly time and less than 2 hours from starting the build to first print. It will do all this for under $500, electronics and motors included.

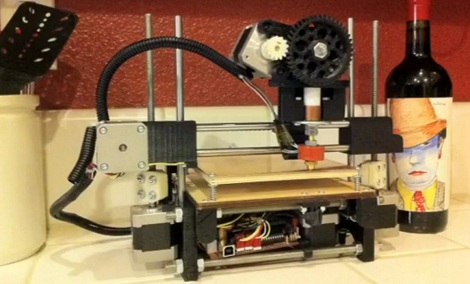
From the Flickr photoset, we can see that the Printrbot has 2 motors for the z-axis, uses sanguinololu electronics, and uses a derivative of Wade’s extruder – all proven design choices. Unlike the RepRaps, most of the frame is actually printed, and not built out of threaded rods. This drastically reduces the assembly and calibration time.

The inventor of the Printrbot, [Brook Drumm], has a Kickstarter up where he’s selling complete kits (electronics, motors and vitamins) for $499. This beats the very inexpensive SUMPOD in affordability. We haven’t been able to find the 3D design files for the Printrbot (although you can buy these printed parts for $75), and there’s no word on the build volume of the stock printer. That being said, the printrbot does have pretty good resolution. Check out the video of a Printrbot in action after the break.

Continue reading “The Cheapest And Easiest 3D Printer We’ve Seen So Far”

Video Display From RGB Strips Makes It Seem So Easy

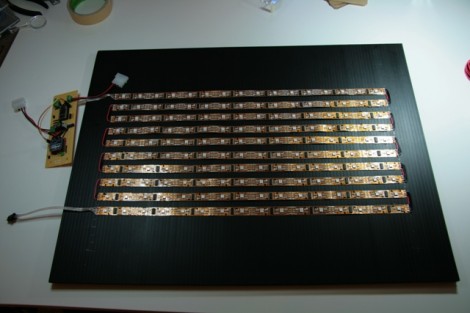
[Fabien] wrote in to share a link to this RGB video display which he made. He’s got some pretty cool routines that make it more functional than you would think, but first we want to comment on the construction. He used an RGB strip, which makes this look like an incredibly simple build. The strip has a data and power bus running the length of it. You can it into smaller segments, then just solder jumper wires to reconnect the buses. That’s exactly what he did here, making it what must be the fastest method of putting together a display of this size (16×10 pixels).

It’s driven by a Netduino which easily addresses the LPD8806 drivers responsible for the LEDs. It gets input from a computer via Xbee, making it easy to include data from the net, or to push visualizations. The video after the break shows a [Van Gogh] self-portrait. Since 160 pixel resolution wouldn’t do it justice, the visualization software shows a zoomed in portion of the painting which is constantly panning to let you see the entire work. It’s a fabulous effect.

Continue reading “Video Display From RGB Strips Makes It Seem So Easy”

Kitchen Hacks: Microwave Plays YouTube Videos Matched To Your Cooking Time

Behold the uWave, a microwave oven that plays YouTube videos while it cooks. [Kevin] and three classmates at the University of Pennsylvania developed the project for the 2011 PennApps hackathon. It uses a tablet computer to replace the boring old spinning food display microwaves are known for. Now, an Arduino reads the cook time and sends that information to a server via its Ethernet shield. The server then searches YouTube for a video that approximately matches the cooking time, then pushed that video to the tablet to start playing. The video demonstration embedded after the break shows this, as well as the tweet that the machine sends at the beginning of the process.

It’s an interesting concept, and we think the code used to push a video to the tablet has a lot of other applications (we’re keeping this one bookmarked). On the other hand, we wonder how long it will take for public microwaves to become ad-supported? We’re thinking it’s hard for companies selling antacids, acid reflux medicine, Cup ‘o Soup, and Hot Pockets to resist this opportunity.

Continue reading “Kitchen Hacks: Microwave Plays YouTube Videos Matched To Your Cooking Time”

A DIY Audio Player For When All That Matters Is The Music

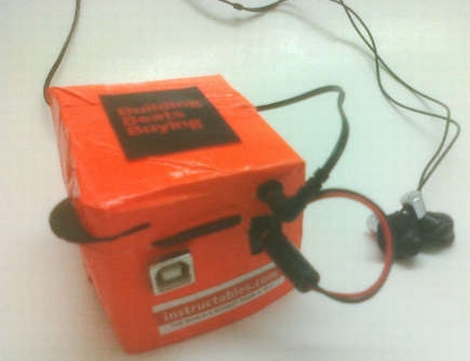
orange-mepod

[Grissini] hasn’t had the best of luck when it comes to personal audio players. He estimates that he’s gone through about half a dozen iProducts/iKnockoffs over the years, which ultimately adds up to a lot of money poured right down the drain. Rather than lay down his cold hard cash for yet another music player that would succumb to a dead battery or cracked screen, [Grissini] decided that he would be better off if he built one himself.

His Orange mePod isn’t exactly the most attractive or sleekest music player out there, but [Grissini] says it works like a charm. An Arduino Uno powers the device, and he uses an Adafruit Wave Shield to handle the audio playback. Power is supplied via 4AA batteries which keep the tunes going for a reasonable amount of time, and afford him the ability to swap them out for recharging without much fuss.

The player was encased with some leftover cardboard and wrapped in bright orange duct tape, before being mounted on [Grissini’s] belt. He says he gets plenty of looks when he’s out and about, which you would expect from such a unique design.

Stick around to see a quick video of the audio player in action.

Continue reading “A DIY Audio Player For When All That Matters Is The Music”