Color Sensing With An RGB LED And Photoresistor

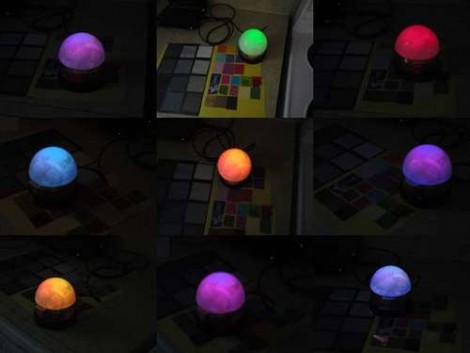
[Fjord Carver] brings together an RGB LED and CdS Photoresistor to make a color sensor. Those Cadmium Sulfide lights sensors usually have a very wide swing of resistance when exposed to varying levels of light sensitivity. That makes for great resolution when reading them using the ADC of a microcontroller. The LED comes into play by shining known wavelengths of light on the surface being measured. Three separate readings are taken with each of the LED’s different colors, then used to extrapolate the RGB value of the test material. We saw the very same method used a couple of years back. This time around it’s an Arduino doing the measuring instead of a PIC.

So why isn’t that sensor shown in this picture? It’s because we appreciate the application which [Fjord] is using for this sensor. He built a lamp that shines the same color as the surface on which it is placed.

Win Free Stuff By Uploading A Pic Of Your Fritzing Circuit

Pull out your old Fritzing designs, or churn out a new one, and you might be able to win one of these prizes. Fritzing is looking for the top three designs which will receive these prizes. On the left is a Fritzing super upgrade kit with goodies like a Character LCD, DC motor and driver IC, shift register, LEDs, and buttons. In the middle is a free PCB from your design (they’ve started their own service to us Fritzing for board layout). Third prize is a motor driver breakout module for breadboard use.

You can get an idea of what others are submitting by poking around their project pages. You’ve got a bit more than a week to get your designs in for consideration. Their deadline is on Sunday, December 18th, 2011.

If this stuff doesn’t interest you, don’t forget to try your luck with 2012 Free Day!

IR Remote For DSLR Cameras

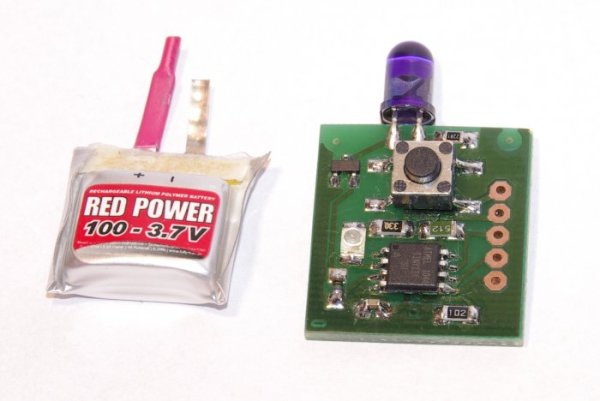
Since most DSLR cameras now have an IR communication port, [Julius] thought it would be a good idea to build an  IR shutter release remote. He has released the plans for two versions; a single sided hand etched one, and a double sided one to have made professionally. He notes that it should have a range of at least 10 meters thanks to the 100mAh Li-Po battery and a reasonably high power IR LED.  You can download the source code as well as the etching mask and eagle files from the wiki page.  He does note that you may have to change the pattern sent to match your camera.

Hack A Webcam And A Film Camera Into A USB Microscope

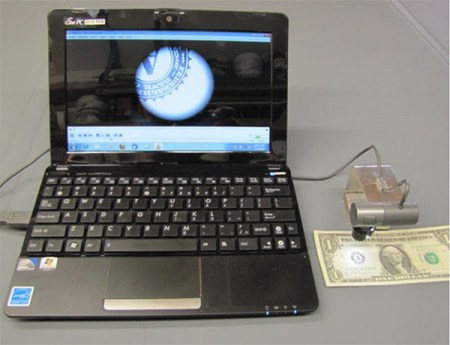
Most of you probably have a webcam sitting around somewhere, and after all the high voltage projects you’ve done using disposable cameras, we bet you have some camera lenses too. You could always do what [Butch] did and combine the lens from the camera with the webcam to do some up close inspection.

This seems like something we’ve seen several times, but we can’t find it in our archive. Such a simple and quick hack looks surprisingly effective in his shots. If you want to see the details, like where he tied into the webcam’s board to power an external LED, you’ll have to download the PDF.

[DJ Sures] Digs Up Another 80s Robot Toy, Makes It Awesome

omnibot-2000

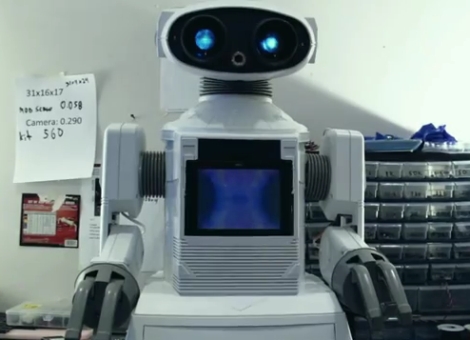
[DJ Sures] just can’t help himself from tinkering with robot toys built in the 80s. This time, he got his hands on an Omnibot-2000 (not to be confused with his other Omnibot hack), and updated it for the 21st century.

After its obligatory run through the dishwasher, the robot was fitted with two heavy duty servos in each arm – one for the shoulder and one at the elbow joint. He added another pair of servos and a head-mounted camera to the robot as well, giving it the ability to look around and navigate through his house.

While these physical modifications are nothing new to [DJ Sures], he wanted the robot’s control scheme to be different than what he has done in the past. Along with the standard autonomous/joystick/Wiimote/voice/iPhone controls that he built into his other projects, he added “visual glyph” control capabilities to the Omnibot. This means that the robot can recognize specific objects and surroundings, giving it the ability to perform context-related tasks.

He’s working on getting the robot to recognize both the refrigerator and living room, in hopes of eventually having the Omnibot to fetch him drinks from the kitchen – that’s something we can totally get behind!

Continue reading to see a pair of videos of the Omnibot-2000 in action, and be sure to visit his site if you’re interested in seeing more.

Continue reading “[DJ Sures] Digs Up Another 80s Robot Toy, Makes It Awesome”

Hand Made Carbon Fiber Violin Is A Stunning Work Of Craftsmanship

carbon-fiber-violin

Building a violin by hand is no easy task, but constructing one out of carbon fiber is an amazing feat! Carpenter [Ken] had never made a violin before, nor built anything substantial out of carbon fiber, and he figured the best way to learn was by doing.

He spent a good bit of time measuring and drawing out his design before making fiberglass molds of the violin’s front and back plates from carved plaster plugs. The process was extremely time consuming, requiring him to make 10 different infusion-molded carbon fiber body plates before he was satisfied with the sound they produced.

With the larger parts of the violin’s body built, he started on the rib molds, which took him 5 hours apiece to set up before injecting the resin. With the body complete, [Ken] was ready to cut the f holes into the violin – a process that required a lot of time hunched over a tank of water with Dremel in hand.

As you can see in the picture above, the final result is stunning – we just wish we could give it a listen to see if it sounds as good as it looks.