Workshop 88 Hosts A Near Space Balloon Contest

hackerspaces_in_space

Launching high-altitude balloons to take pictures of the Earth from space is great fun. Heck, even credit card commercials are now suggesting you cash in your rewards points to organize a space balloon adventure for you and your friends.

Capturing snapshots of the Earth from space is such a good time that Workshop 88, a hackerspace located in the Western suburbs of Chicago, is making a contest out of it. They recently kicked off their second annual “Hackerspaces in Space” competition, a contest to see who can build the best near space balloon for under $250. The contest pits individuals, groups, and hackerspaces against one another, assigning each team a score based on the performance of their high-flying rig.

The winner of the contest will have their design replicated by the crew at Workshop 88, who will then hand out the space balloon kits to randomly selected K-12 schools around the country.

If this sounds interesting, but a contest entry just isn’t in the cards, you can always support the kit distribution by funding their Kickstarter project here.

Sustainability Hacks: Heliostats

Solar panels are a popular item among people who are trying to do more with less but, at least in the past, they have been pretty expensive to install. For some uses, you can forget using solar panels and use the sunlight directly with very little efficiency loss. A device that lets you do that is called a heliostat, which is really just a fancy mirror that you can set to reflect sunlight to wherever you might want it. You could aim it through a window so that it hits your ceiling and diffuses throughout the room or you could point it towards a location where you could collect the sun’s energy to heat something directly.

For a really good rundown on how heliostats work and how you can build one, check out this page where you can find all sorts of information. Heck, they even have an Arduino controlling some of them!

Repairing The Blue Canary In The Outlet By The Light Switch

blue_canary_in_the_outlet_by_the_lightswitch

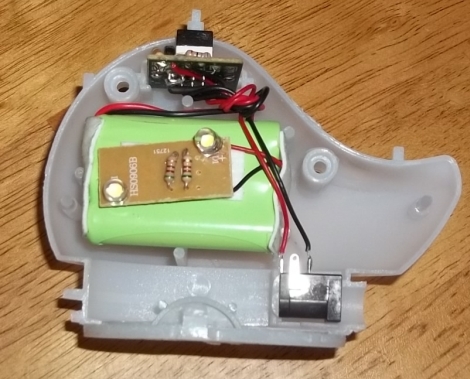
[Vince] and his wife are big fans of [They Might be Giants], so when they were perusing their local Target one evening and stumbled upon a blue canary nightlight, they bought it immediately. While the nightlight was easy for his toddler to use, the LEDs inside started to dim after about a month, and eventually they started flickering like mad as you can see in the video below. A battery swap didn’t remedy the problem, and instead of returning it, [Vince] decided to try fixing it himself.

After poring over the device’s simple circuit, he couldn’t figure out any reason why the nightlight would start behaving like it did. He did notice that a resistor was left out of the device, likely as a cost-cutting measure, so he added one in before replacing both of the nightlight’s LEDs.

With his simple tweak, the nightlight was better than new, saving him from what would likely be a string of annoying merchandise exchanges.

Continue reading “Repairing The Blue Canary In The Outlet By The Light Switch”

Booting A 1989 Mac With Mario

As a new recruit to the 68k Macintosh Liberation Army, [dougg3] is really showing off his hardware hacking ability. He came up with a replacement ROM SIMM for his Mac IIci and made it play the Mario theme on boot instead of the normal chimes.

Swapping out the ROM in these old macs isn’t an uncommon procedure. On some 68k machines, there’s a SIMM slot to either replace or expand the soldered ROM. In fact, it’s fairly common to take the ROM SIMM out of a IIsi and put it in the king of kings computer to make an SE/30 32-bit clean. We’ve never seen a re-writable ROM SIMM for these old macs, so we’re pretty sure [dougg3] just spared a Mac IIsi from the dumpster.

Now that the entire 68k Liberation Army is clamoring for one of [dougg3]’s re-writable ROMs (we’ve got cash), the question of what to do with it comes up. Of course, SE/30s can now be 32-bit clean without installing MODE32 and new startup chimes can be added. We’d really like to see some hard-core ROM hacking going on, like installing a 68060 in a Quadra 950.

Continue reading “Booting A 1989 Mac With Mario”

Fully Fretted Guitar MIDI Controller

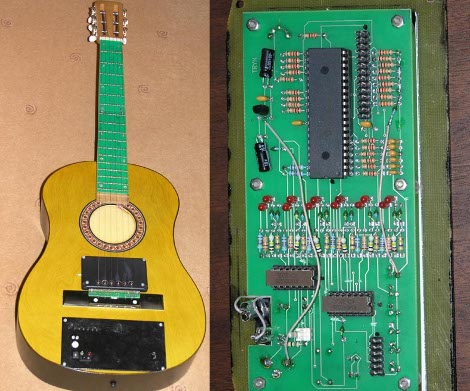
[Andy] came across this guitar midi controller project from way back and decided to send us a tip about it. The English version, translated from the original Russian, is easy to follow and documents the build process from first prototypes to the version you see above. It can connect via a standard MIDI cable and then be used to control anything you want. The only thing missing is the ability to transmit velocity data, but that’s certainly not a deal breaker.

The device has two sensory parts. The first is a set of pickups that can be seen underneath the strings near the bridge. These work like standard magnetic pickups but instead of extrapolating fret data from the pitch picked up on the string, there is a second sensor mechanism for every fret of each string. Since the strings are made of metal, it’s possible to detect which fret is depressed based on continuity sensing. Of course this means you need a conductor between every fret, and that’s why the fingerboard has been replaced with one made of printed circuit boards. All of this data is gathered, then sent to the MIDI device via a PIC 16F74 microcontroller.

If this leaves you wanting for more guitar hacks, don’t miss this one that adds addressable LEDs in between each fret.

What Has 114 LEDs And Is Always Running?

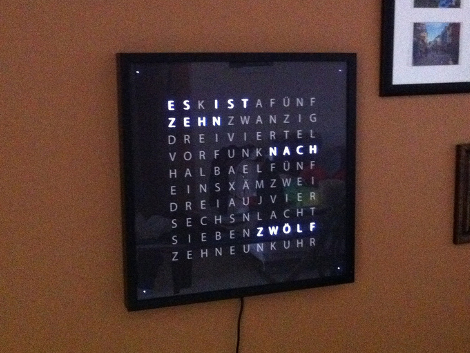
The answer, of course, is a word clock. This is actually [Eric’s] second version of a word clock. Like the first one, it uses 114 LEDs to back light the words on the display.

In his first iteration he used an Arduino to drive a Charlieplex array of lights. It was an 11 by 10 grid, plus four LEDs to display the in-between minutes as dots at each corner of the clock face. This time around he’s still using an Arduino, but the lights have seen a huge upgrade. In one of his build pictures you can see the reel of RGB led modules which have two RGB LEDs and an HL1606 driver on each segment. These are SPI controlled, making them easy to hook up, using just a few data and power bus rails. Check out the test video after the break that shows what this grid is capable of.

In case you can’t figure out what time is displayed above, you might check out an English version of a Word Clock face to help in your own build.

Continue reading “What Has 114 LEDs And Is Always Running?”

Prototyping A Bluetooth To IR Remote Control Translator

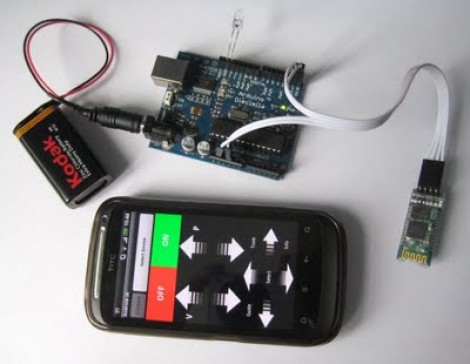
[James] is one of those guys on a quest to control everything with one device. His tool of choice is an Android phone, which can do quite a lot right out of the box. But he was never satisfied with its lack of IR remote control abilities. He fixed that feature-gap by building a Bluetooth to Infrared translator.

The hardware he used for the prototype is quite simple. A cheap serial Bluetooth modem from eBay lets him connect to his phone. An Arduino board listens for data from the modem and converts incoming commands to flashes on an IR LED. Voila, he can control the tube with his phone.

We love the potential of this hack. The Bluetooth module runs from 3.3V, and reading serial data and flashing an LED is extremely simple. You should be able to use a small uC, say an ATtiny13, and a 3.3V regulator to miniaturize the module. We could see this plugging into the USB port on the back of a TV for power, with a wire extension to put the LED into position. The only shortfall is the inability to turn the TV on remotely when drawing power this way.

Remote codes aren’t particularly large to store either. So this would be pretty easy to extend to full control of all IR-compatible home entertainment devices. You just need a tool to discover the remote control codes.

Continue reading “Prototyping A Bluetooth To IR Remote Control Translator”