Full-color EBook Reader Needs Only 8-bits Of Muscle

[Rossum’s] still coming up with great ways to use his microtouch hardware. This time, he’s taken his inspiration from Amazon’s announcement that a full-color eBook reader (and movie player) is on the way. Judging from the video after the break, his fully functional reader is a big win for the device.

You’re probably familiar with the hardware, an ATmega644-based board connected to a touch sensitive LCD screen. You can make your own or buy one pre-assembled (but currently out-of-stock). The board has a microSD card slot making it quite easy to add books to the device. At the start of the project [Rossum] thought he might be able to read ePub files directly, but the embedded images, and unzip function needed to open the package file is a bit too much for the 8-bit processor’s restrictions. One simple step does the trick. A helper script can be used to format the files before transferring them to the device. This does the unzipping, scales the images, and repaginates the text into a format friendly for the display size.

Now if we only had a nice little case to house the hardware we’d be in business.

Continue reading “Full-color EBook Reader Needs Only 8-bits Of Muscle”

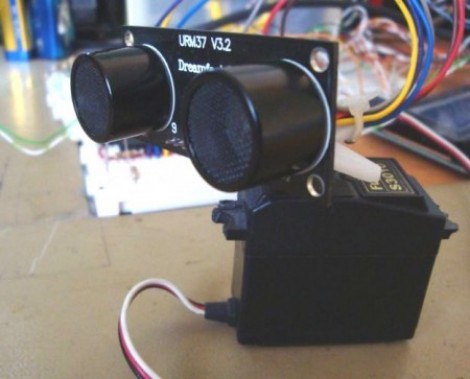
Ultrasonic Rangefinder As Scanning Radar

Ultrasonic rangfinders are a cheap and easy way to gather obstacle avoidance data. When added to a servo motor they form something of a scanning radar for near-proximity objects.

In this implementation, [Rui Cabral] is driving the servo, and collecting data from the sensor using a PIC 18F4520. The servo rotates 180 degreees, taking sensor measurements in increments of nine degrees. If it discovers obstacles, the distance and orientation are recorded. Feedback is displayed on a 20-LED bar graph display which shows a moving LED to track the sensor orientation, with LEDs remaining lit whenever an object is found. Right now the obstacle data is pushed over a serial connection with a PC, but could easily be injected into navigation logic for a robot in order to triangulate a path around the obstruction. You can see [Rui’s] project in action after the break.

We looked in on the same concept with a different display technique a couple of years back. That hack used an Arduino and Processing to map sensor data with a traditional green sweep display.

Continue reading “Ultrasonic Rangefinder As Scanning Radar”

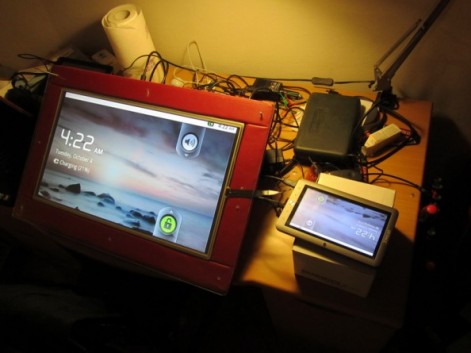
How To Build A 23″ Android Tablet

If you’re looking to build a really big Android tablet the trick is not to start from scratch. [Peter] pulled off a 23″ Android Tablet hack using a collection of easily acquired parts, leaving the hard work up to hardware that was designed to do it.

He didn’t really build a tablet, as much as he built a big touch-screen add-on for one. He already had a couple of inexpensive tablets on hand to play around with. One of them has an HDMI out port, which let him easily push the display onto a 23″ monitor. He knew the tablet was a 4-wire resistive touchscreen, but he didn’t know if other touchscreens with the same number of connectors and be directly swapped and still work. To test this, he cracked open a second tablet device and connected its touchscreen to the first one’s hardware. When he was met with success it was time to source a couple of 23″ touchscreen overlays to test with the external monitor. As you can see in the clip after the break, it works like a charm!

[Peter] was inspired to write about his experiences after seeing the 23″ Android tablet video in our recent links post.

Continue reading “How To Build A 23″ Android Tablet”

Electric Mountain Board With Glove Control

Last summer, we saw [Andres Guzman]’s electric mountain board tearing around the University of Illinois campus. He’s back again, only this time the board isn’t controlled with a PlayStation controller. [Andres] built a wireless glove to control his mountain board.

An Arduino and power supply is mounted to the glove. A 2.4GHz transceiver serves as the comm link between the glove and board. The speed control is handled by this flex sensor from Sparkfun. With the flex sensor held between the middle and ring fingers, all [Andres] needs to do to apply power is slightly bend his fingers.

There’s also a number of safety features built into the board. To enable power to the boards motor, there’s a dead man switch on the glove underneath the thumb. If [Andres] were to take a nasty spill, he would release the switch and the board would come to a stop. [Andres] also made sure the board would shut down if the wireless link was interrupted. The build seems pretty safe, even if he is tearing around his campus in the video below.

Continue reading “Electric Mountain Board With Glove Control”

Animated X-mas Sign

Sure, it may be two and a half months until Christmas. That doesn’t mean we can’t start building a few Christmas decorations. Last year, [RB] over at Embedded Lab made an animated Christmas sign using a simple microcontroller setup. This year, [RB] is adding a blinking LED border and doing the entire project with 74xx ICs.

The letters for this year’s sign were recycled from last years’. This time, however, two strings of 12 LEDs are used for the blinking border. The blinking circuitry uses a 74hc14 Schmitt trigger to provide the clock. A pair of 74hc595 shift registers turn each letter on one at a time. The speed is controlled with a small trim pot.

Using ICs to drive a series of lights in a pattern isn’t a new thing – you’d be hard pressed to not find a similar setup in the blinking panels of sci-fi shows of the 60s and 70s. Of course this sign doesn’t compare with what can be done with a microprocessor a lot of patience, it’s still a very nice build. Check out the video after the break to see the X-mas sign in action.

Continue reading “Animated X-mas Sign”

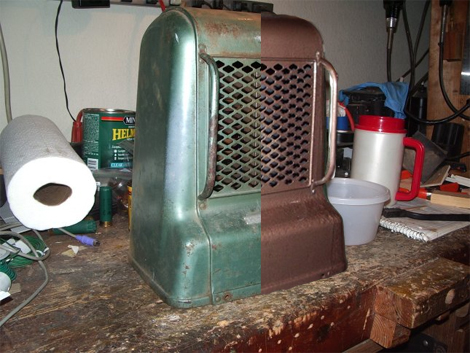
Retrofitting A 60-year Old Electric Heater

electric_heater_retrofit

[John] found an old Kenmore electric heater at a junk store one day, and thought it would look great in his bathroom. The only problem with the unit is that it was built back in the 1940s/1950s, so it lacked any sort of modern safeguards that you would expect from an indoor heater. There was no on/off switch, no fuse, no thermostat, and no tip switch – though it did have a nice, flammable cloth-covered power cord.

Since [John] wasn’t too keen on burning his house down in the name of staying warm, he decided to retrofit the old unit’s shell with a new ceramic heater. He found a $20 unit that looked like it would fit, so he disassembled both heaters and got to work. The Kenmore’s innards were scrapped, then he gave the unit a nice fresh coat of high-temp paint. The new heater was cut to fit inside the old unit’s shell, controls and safety features intact.

He says that it works very well, and that it looks great in his bathroom. If you’re considering doing something similar, be sure to check out his writeup – it is very thorough and has plenty of details that will help you along the way.

22 Miles Straight Up In 90 Seconds

Those little Estes rockets you built as a kid just got blown out of the water.

In response to the Carmack Prize to launch an amateur rocket above 100,000 feet, [Derek Deville] and the rest of the Qu8k team launched a 320 pound, 14-foot-long rocket through 99% of the Earth’s atmosphere.

Unlike our little toy rockets from years ago, more than half of the entire rocket is fuel. This isn’t a plastic or salami-powered hybrid rocket, though. It’s an entirely solid fuel rocket. The fuel grain is specially made for this rocket in a cylinder-with-fins shape that ensures an even burn through the entire flight.

The payload included 2 timers, an accelerometer, a cosmic ray detector (check out the Geiger tube) and 4 GPS units required of the Carmack Prize. The video from the on-board camera shows a fantastic flight, only partially obscured by the plastic aeroshroud that melted when the rocket was going about Mach 3.

Videos of the entire flight and a ‘highlights’ reel are available after the break.

Continue reading “22 Miles Straight Up In 90 Seconds”