Automating The Shutdown Of APC UPS Devices

ups-shutdown-device

[Ishan Karve] works in some bizarro world where the building management demands that all servers and Uninterruptible Power Supplies be shut down at the end of each evening. While inconceivable to most systems admins, he has no recourse but to comply. This means that his employees need to turn things off before they leave for the day, and since they often work up to 15 hours a day, waiting for Windows server to shut down seems like an eternity.

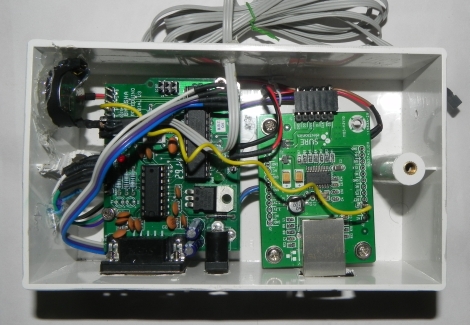
Being the good manager he is, [Ishan] decided to build a device that handles the clean shutdown of their servers and UPS for them. An Arduino board serves as the brains of the device, communicating with and issuing shutdown commands to the UPS over a serial port. The Arduino is also connected to the office network, enabling it to send ARP requests to the servers in order to determine when they have completely shut down for the day. In order to protect against an accidental shutdown due to network connectivity issues, [Ishan] added an RTC module to the mix so that the Arduino does not issue shutdown commands until at least 8 pm.

Instead of waiting around for Windows to do its thing, [Ishan’s] employees can take off once they start the server shutdown process, knowing that they are totally compliant with their landlord’s crazy requests.

Boxie Is An Adorable Toddler Videographer

Meet Boxie. He’s a robot videographer with levels of interaction we haven’t seen outside an episode of Dora the Explorer. The project was conceived by [Alex] as his MIT thesis project to see if robots can use humans to make themselves more useful. All we know is Boxie is freaking adorable, as evidenced by this video.

The idea behind Boxie was inspired by Afghan Explorer to capture video in an attempt to tell a story. In the videos (after the break), Boxie wanders around the halls of MIT searching for people to help him (“can you carry me up the stairs?”) and tell stories (“what do you do here?”). It’s an experiment in autonomous documentary directorial skill that was edited down into a video that made sense.

[Alex] designed Boxie to be the cutest thing we’ve ever seen so he could elicit a response from the subjects of the documentary. We’re going to say the voice helped, but [Alex] also found the cardboard robot factor also played into the success. Boxie was originally planned to have a plastic skin, but [Alex]’s friends thought it looked really creepy. They suggested that [Alex] go back to the prototype cardboard body. All we know is there’s a robot cuter than a Keepon, finally.

Continue reading “Boxie Is An Adorable Toddler Videographer”

Cheap WiFi Bridge For Pen Testing Or Otherwise

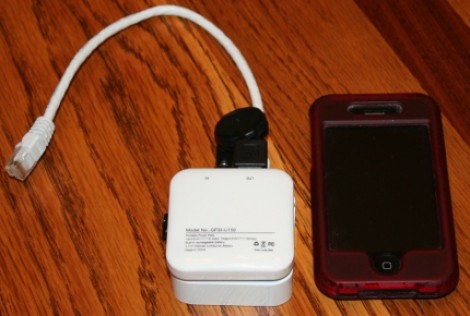
Twenty three dollars. That’s all this tiny pen-testing device will set you back. And there really isn’t much to it. [Kevin Bong] came up with the idea to use a Wifi router as a bridge to test a wired network’s security remotely. He grabbed a TP-Link TL-WR703N router, a low-profile thumb drive, and a cellphone backup battery; all cheaply available products.

No hardware hacking is necessary to connect the three components. The only other preparation needed is to reflash the router firmware with OpenWRT and load it up with common pen-testing software packages like Netcrack and Airhack.

[Kevin] calls this a drop box, because you find an Ethernet jack, plug it in, and drop it there. You can then connect to the router via Wifi and begin testing the wired network security measures. We’re sure images of espionage pop into your head from that description, but we’re certain this can be useful in other ways as well. If you ever find yourself with an Ethernet connection but no access to Wifi this is a quick way to setup an AP.

Oscilloscope Clock Made Possible By Dumpster Diving

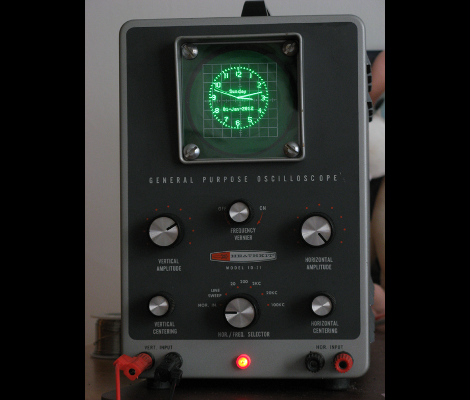
We see people driving around the night before trash collection and reclaiming items doomed to the land fill (or on their way to recycling… who knows). We’re beginning to think we need to join those ranks. Case in point is this vintage oscilloscope which [Bob Alexander] plucked from the curb in the nick of time. Here’s the kicker, when he got it home he found it still worked! He couldn’t let this opportunity go to waste, so he figured out how to turn it into a clock without losing the ability to use it as a scope.

You probably already know that it’s possible to display your own graphics on an oscilloscope. In fact, you can buy a board from Sparkfun which will turn the scope into an analog clock, and that’s exactly what [Bob] did. But he was met with two problems, the X-axis was flipped and he didn’t have an easy way to power the board.

He struggled with the voltage supply, frying his first attempt at boosting the internal 6.3V supply to use with a linear 5V regulator. His second attempt worked though, soldering a 12V regulator to the transformer. He was then on to the X-axis correction, using a rail-to-rail op-amp to invert the signal. The project finishes by adding toggle controls and buttons on the back of the case to switch between scope and clock modes, and to set the time.

Hellduino: Hellschreiber Radio Transmissions From An Arduino Board

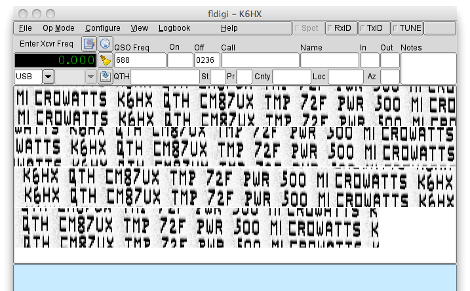
[Mark VandeWettering] was experimenting with a simple transmitting circuit and an Arduino. The circuit in the project was designed by [Steve Weber] to broadcast temperature and telemetry data using Morse Code. But [Mark] wanted to step beyond that protocol and set out to write a sketch that broadcasts using the Hellschreiber protocol.

This protocol transmits glyph images, which are decoded as you see above. For some reason we can’t help but think this is like Captcha for radio enthusiasts. We have seen Hellschreiber used with AVR microcontrollers before, but this is the first Arduino implementation that we’ve come across. [Mark] does a great job of demonstrating his project in the video after the break. He mentions that the transmitter has no antenna, but is still being picked up by his receiving antenna mounted behind his house.

Since [Mark] doesn’t really cover the hardware he used, you will need to look back at [Steve’s] original design schematics for more information.

Continue reading “Hellduino: Hellschreiber Radio Transmissions From An Arduino Board”

Fully Loaded Electronics Lab Makes Your Projects A Breeze

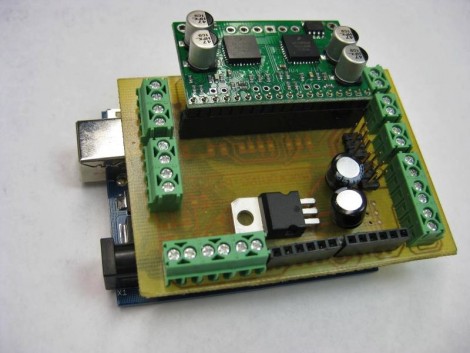
There’s really nothing special about this hack. [Craig Hollabaugh] needed an Arduino shield for hosting a Pololu motor driver and making connections to external hardware. What really caused us to spend way too much time reviewing his posts is that [Craig’s] narrative style of documenting the project is delightful, and we’re envious of his electronics lab. That link points to the first of four project pages. The next page is linked at the bottom of each page, or you can find the collection after the break.

[Craig] starts by designing a single-sided shield in Eagle. It’s been years since he made his own PCB, and it takes him about four tries to get the toner transfer right (we’ve also been victim to the wrong mirroring of the resist!). When it comes time to drill for the pin headers [Craig] uses his 3D printer to make a bracket allowing the Dremel to mount to the drill press. There’s a good tip here about buying carbide bits from Harbor Freight; we thought eBay was the only place to get these. Many of us would need to put in a parts order, but this workshop has a well-organized stock of everything he needs. He also has the solder paste and PID outfitted toaster oven to reflow the board. Oh, and when he forgets to add a resistor it’s off the rework station to add one.

See what we mean… one can never have too many tools.

Continue reading “Fully Loaded Electronics Lab Makes Your Projects A Breeze”

Fixing The Control Scheme For An Aftermarket Headlight Assembly

The headlight enclosures on [Bill Porter’s] 2004 Passat had yellowed with age and were not outputting the kind of light they should. He decided to replace them with some aftermarket modules that also incorporated LED strips. When they arrived he was surprised at how easy there were to drop into place. But when testing he was certainly not satisfied with how they worked. The day-driving mode used the HID bulbs at full power, where the factory assembly had dimmed them during the day. He set out to alter the electronics to work as he prefers.

Always the mad scientist, [Bill] started off by making a truth table showing how the lights reacted to the various states of the ignition and headlight switches. What he came up with is an AND gate built from a relay and diode. It allows him to have the LEDs on as the running lights (without the HIDs on at all), and leaves the rest of the functionality unaffected.