Automatic Beer Pourer Was Hacked Together From A Bit Of Everything

beer-conveyor

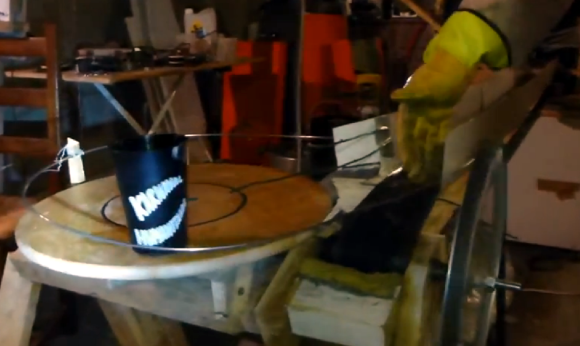
This thing is really remarkable. It’s a beer draft system that automatically fills and distributes to your party guests. The approach is something of an industrial revolution for parties. A hopper feeds cups to the tap; once filled they are whisked off to thirsty guests using a conveyor belt system.

Many of the parts come from a washing machine that the team scrapped for the build — most notably the motor which drives the belt. But pretty much every part of it is salvaged. For instance, the conveyor belt that transports the full glasses was made from gluing sections of bicycle inner tubes together. To help ease the transfer of a cup from the filling station onto that belt a series of very long cable ties were attached to a pole. The tails from those ties act as a brush to stabilize the cup as an arm pushes it onto the conveyor. The best way to see all of this is to watch the entire clip embedded after the jump.

Continue reading “Automatic Beer Pourer Was Hacked Together From A Bit Of Everything”

Laser Kaleidoscope Uses More 3D Printing And Less Scavenging

laser-kaleidoscope

At first we thought that [Pete Prodoehl] was using the wrong term when calling his project a Laser Kaleidoscope. We usually think of a kaleidoscope as a long tube with three mirrors and some beads or glass shards in one end. But we looked it up and there’s a second definition that means a constantly changing pattern. This fits the bill. Just like the laser Spirograph from last week, it makes fancy patterns using spinning mirrors. But [Pete] went with several 3D printed parts rather than repurposing PC fans.

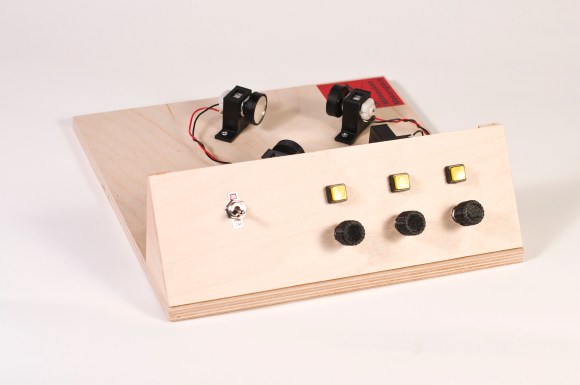
In the foreground you can see the potentiometers which adjust the motor speeds. The knobs for these were all 3D printed. He also printed the mounting brackets for the three motors and the laser diode. A third set of printed parts makes mounting the round mirrors on the motor shaft quite easy. All of this came together with very tight tolerances as shown by the advanced shapes he manages to produce in the video after the break. Continue reading “Laser Kaleidoscope Uses More 3D Printing And Less Scavenging”

Critter Cam Hacked From An Old Cellphone.

critter-cam-hacked-from-old-cellphone

[Art Barrios] kept having night-time visitors who were raiding his dog’s food storage bin. It’s a plastic tub with a lid that latches but the critters were knocking it over and popping that lid off. He wanted to find out which animal was the culprit so he hacked together an automatic camera system using an old cellphone.

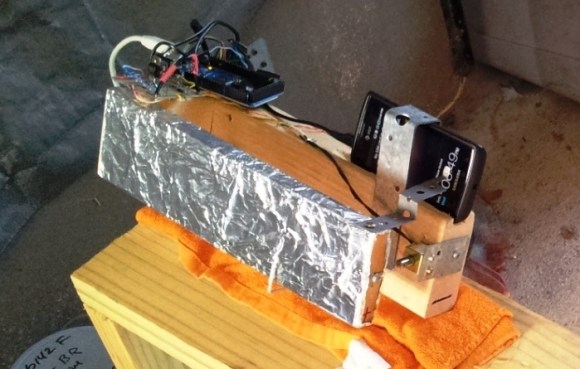
You can see the majority of the hardware he used in the image above. There’s an Arduino on the left. This monitors a switch which he added to the lid of the food storage container. It triggers the system when opened, switching on an LED light and snapping pictures.

The touchscreen button is used to trigger the shutter. That’s what all of that tin foil is about. Some experiments led [Art] to realize that a metal ‘finger’ could register on the screen if there was enough foil attached. To move the metal bracket he uses a solenoid. The last problem he faced was keeping the cellphone screen awake. He figured out that power cycling the charger does the trick. The Arduino manages this using a mains-rated relay.

The system successfully captured images of a family of raccoons feasting on the tasty morsels.

Veronica 6502 Computer Reaches Hello World Stage

veronica-hello-world

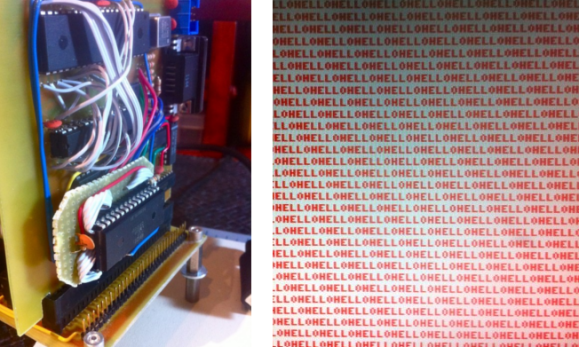
The screenshot on the right shows [Quinn Dunki’s] computer project displaying a Hello World program. Well, it’s only showing the word Hello right now, but the concept is the same. This proves that native 6502 code is running on the processor and reliably outputting data through its VGA hardware. That’s a welcome achievement after watching so much work go into this project.

But with anything this complex you can’t expect to make progress without finding bugs. And this step in the journey had a pretty big one in store for [Quinn]. After writing the assembly code and loading it into the machine she was dismayed to find that there were dropped characters all over the place. Now she shows a screenshot and says it’s easily recognizable as a race condition — proving she has a bigger brain than us.

The problem is a pair of uninterruptible processes running on the same AVR chip (part of the GPU she built). They are fighting with each other for control of the processor cycles and she fixed it by making the daughter board seen in the image above. It moves one of the time-critical processes out of that single AVR chip to fix the issue by using an IDT7200L FIFO SRAM chip.

Using A Flashing LCD Monitor To Transfer Data

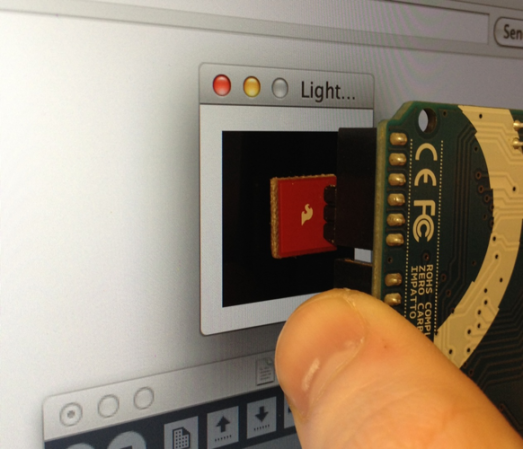
lcd-screen-data-transferWe love the concept of using an LCD screen to transfer data. The most wide-spread and successful method we know of is the combination of a QR code and the camera on a smart phone. But for less powerful/costly devices data can be transferred simply by flashing colors on the screen. That’s what [Connor Taylor] is testing out with this project. He’s using a TEMT6000 light sensor to turn a white and black flashing monitor into binary data.

So far this is just a proof of concept that takes measurements from the light sensor which is held in front of a Macbook Retina display with different backlight levels. At 3/4 and full brightness it provides more than enough contrast to reliably differentiate between black and white when measuring the sensor with the Arduino’s ADC. What he hasn’t gotten into yet is the timing necessary to actually transfer data. The issue arises when you need to have multiple 1’s or 0’s in a row. We’ve tried this ourselves using an LDR with limited success. We know it’s possible to get it working since we’ve seen projects like this clock which can only be programmed with a flashing screen.

[Connor’s] choice of the TEMT6000 should prove to be a lot more sensitive than using just an LDR. We figure he could find a way to encode using multiple colors in order to speed up the data transfer.

Ubuntu With A GUI On A Beagleboard

beagle

The Raspberry Pi is great if you’re looking for a cheap yet powerful computer running Linux, but let’s not forget all the other ARM dev boards out there. [Adam] spent some time this weekend putting together an Ubuntu distro for his Beagleboard XM to give it the convenience of a GUI and a whole bunch of drivers to get a lot of stuff done.

The Beagleboard XM is another high power ARM dev board that is a little more capable than the Raspberry Pi. With an integrated USB hub, LVDS LCD displays, and a camera board, the Beagleboard already has a lot of peripherals that are now only promised for the Raspberry Pi. The only problem with the Beagleboard XM is the state of drivers and software; a problem [Adam] resolved by bringing Ubuntu to the Beagleboard.

[Adam]’s distro comes with all the goodies a relatively high-powered ARM dev board should have: Python, scipy, numpy, and a few cool extras such as GIMP and Chromium. He says it’s a bit faster than the stock Raspbian distro on the Raspberry Pi, so if you’re looking for the best ARM/Linux dev board for your next project, you may want to give [Adam]’s distro a try.

SCARA Arm Finally Prints Plastic Parts

SCARA

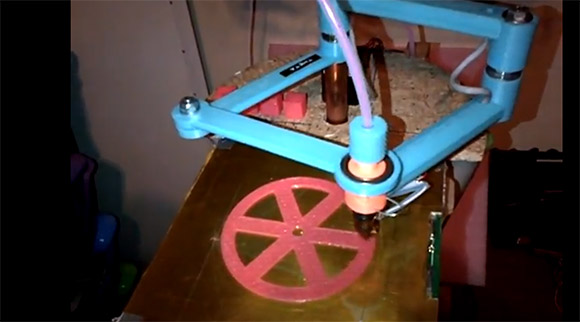
Here’s a neat alternative to the usual gantry setup you see on 3D printers. [Quentin] designed and build a SCARA arm 3D printer that just saw its first print.

We caught wind of [Quentin]’s SCARA arm a few weeks ago when it was still just a few plastic parts and a glimmer of ambition in its creator’s eye. Most of the parts are 3D printed, including the blue arms for the x and y axes that are driven by stepper motors. The z axis is controlled by two lead screws, and judging by the height of [Quentin]’s machine, he has a pretty big printable volume – at least as large as some of the delta bot 3D printers we’ve seen.

So far [Quentin] has printed a handful of calibration cubes and a wheel with a fairly impressive print resolution. You can check out a video of the SCARA arm printer after the break.

Continue reading “SCARA Arm Finally Prints Plastic Parts”