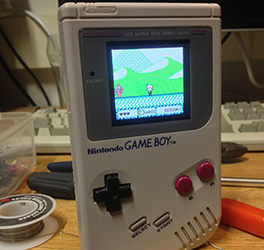
A Brick-sized Game Boy Advance SP

gameboy

For a few years now, [Michael] has wanted to put the guts of a Game Boy Advance – the small clamshell version with a backlit LCD – into the classic and comfortable DMG-01 ‘brick’ Game Boy. He’s finally finished with his project, and we’ve got to say it’s looking pretty good.

The build began by excising the backlit LCD from an old clamshell Game Boy Advance and hot gluing it to the screen bezel of an old DMG-01. The cartridge slot from the original ‘brick’ Game Boy remained, but this design decision did require a fair bit of soldering and a length of ribbon cable.

Since [Michael] is using the original cartridge slot found in the original Game Boy, he can’t play any games in the smaller Game Boy Advance cartridge format. Still, it should be possible to build an adapter to fit those smaller cartridges inside the larger Game Boy, and he can always play Tetris and Little Sound DJ, so nothing of value is lost.

Video Phone Arduino Shield

video

We’ve seen Arduino-powered Twitter machines, and even some that can send text messages, but how about one that’s a video phone? That’s what the guys over at Cooking Hacks put together with their very impressive 3G Arduino shield.

On board the shield is an internal GPS receiver, microphone, speaker, 3G module, and a camera sensor with VGA resolution. The 3G module is able to act as a 3G modem via a USB connection, allowing any computer to take advantage of wireless Internet with a SIM card.

While in their tutorial the guys use a terminal running on their computer to send AT commands to place a call, it’s possible to simply put all that info in a sketch making for a small, battery-powered video link straight to your cell phone. Seems like the perfect piece of hardware for a wireless, 3G-enabled video feed for a robot. You can check out the video from their tutorial after the break.

Continue reading “Video Phone Arduino Shield”

The Perils Of Buying A Stereo Microscope Without A Stand

scope

[Steve] has wanted a stereo microscope in his lab for years now. Since his eyesight is becoming progressively worse, he figured it was time to look around on ebay and see what he could dig up. He ended up buying a very cheap microscope without a stand, figuring he could build one rather easily. Well, the articulated stand was rather easy to put together, but it did take a whole lot of time to build.

The main goal of [Steve]’s project was to have his microscope at the end of an articulated arm. With this setup, he could easily tuck the ‘scope against the back of his workbench when not in use and easily bring it out when necessary. This meant building a custom arm, though, and in the building process [Steve] used just about every machine tool he had at his disposal.

The end result is a fully articulated arm that can be moved to just about any point on his workbench and adjusted up and down for those really weird project. [Steve] says this may be a great introduction to home powder coating, and he really should build a small LED light source, but we’re loving the project so far.

Continue reading “The Perils Of Buying A Stereo Microscope Without A Stand”

3Doodler, A 3D Drawing Pen

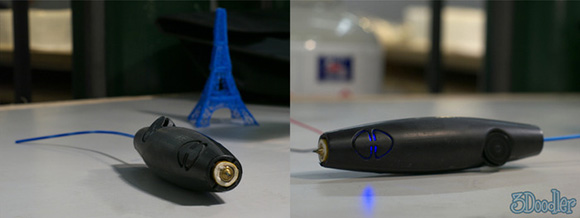
Here’s something that’s making its way to the top of our, “why didn’t we think of that” list. It’s called 3Doodler, a device based on the plastic extrusion technology found in 3D printers stuffed into a pen that fits in the palm of your hand.

If you’re familiar with 3D printers, the design of the 3Doodler should come as second nature to you. Inside this electronic plastic-melting pen is a small motor that forces 3mm ABS or PLA filament through a heated nozzle. With the 3Doodler, you can draw in three dimensions by simply lifting the tip of the 3Doodler into the air.

While 3Doodler is obviously aimed at creating plastic objects by hand, we’re wondering if this device could be successfully adapted to work with 3D printers. The 3Doodler team put a very, very small and inexpensive extruder and hot end inside the 3Doodler, and they’ve got something on their hands we’d love to tear apart just to see how it ticks.

You can see the 3Doodler introduction video after the break.

Continue reading “3Doodler, A 3D Drawing Pen”

Solar Clock Uses Capacitors For Style And Function

solar-clock-uses-storage-capacitors-and-batteries

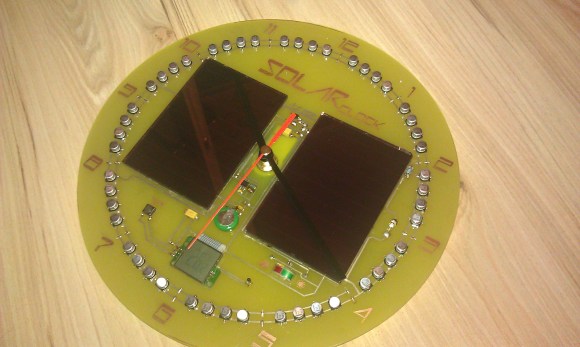
This solar clock was built using a lot of salvaged parts. We find it interesting that [Nereus] combined a ring of storage capacitors with a power cell (translated) to create a hybrid energy storage setup.

The machine translation makes it a bit rough to understand how this works, but the schematic helps quite a bit. The pair of solar cells, which were pulled from some cheap solar cellphone chargers, feed the bank of capacitors encircling the clock face. If placed in a room that gets plenty of sunlight the cells will top off the capacitors which then feed an ICL7663 regulator. We’d love to hear comments on this part choice, as it’s our experience that linear regulators are rather inefficient. But anyway, the regulated power feeds both the energy cell as well as the clock motor. When output from the regulator dips the battery picks up the slack. The project also includes a voltometer and thermometer which can be displayed on the tiny LCD screen just about the six o’clock tick mark.

Now if you want something completely battery-free you’ll have to check out [Jack Buffington’s] take on solar clock.

[Thanks Manekinen]

Hacked Auxiliary Port For A Car Stereo

hacked-auxiliary-port-car-stereo
We’re not sure if [Apachem25] is just lucky, or if installing Auxiliary ports on most car stereos is this easy. The dealership wanted $95 to put one in, but he managed to add a 3.5mm audio-in port to his car stereo for just a couple of bucks.

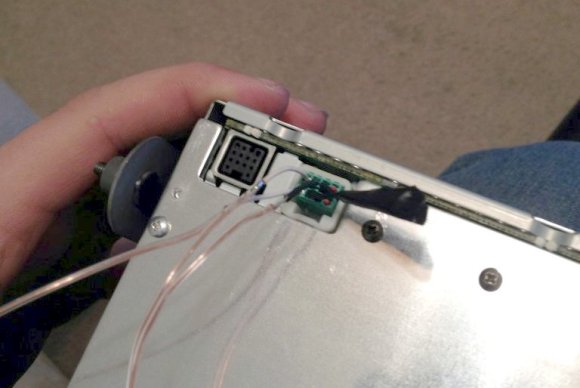
The connector on the back of his head unit is a 2×4 set of pins recessed in a protective plastic ring. It turns out that the audio connector cable for a PC CD-ROM drive has a 1×4 socket that is perfect for this. [Apachem25] simply clipped one of those cables in half and used both ends to interface with the Aux port. He found the pin-out for his particular model on the Internet. He needed a specific resistance value between two of the pins to get the deck to let him use the input. All that he needed was a quick bit of soldering. The left, right, and ground are brought around the side and soldered to an audio jack he added in the face plate of the unit.

If you’re still rockin’ the cassette deck our favorite automotive Bluetooth solution is still this one for a classic Beetle.

[via Reddit]

Diamond Ore Wall Lamp Brings Minecraft Into Your Home

diamond-ore-lamp

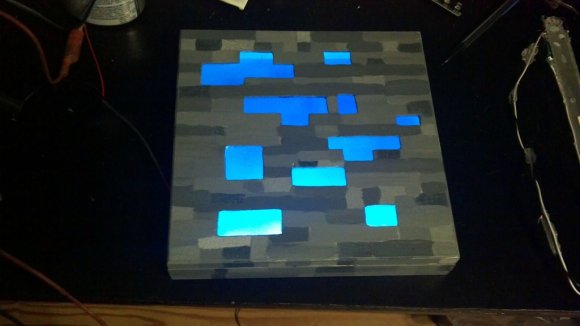
We were surprised to see all of the Christmas gifts that revolved around Minecraft. Seems like there’s a lot of stuff for sale, but we still like the DIY spirit that comes with making your own. [Thacrudd] recently finished this project. It’s a wall lamp that looks like Minecraft’s diamond ore.

The enclosure is a wood box that used to contain chocolates. After studying the pixel art texture for the game’s diamond ore blocks he marked out the pattern and headed over to the scroll to rough them out before finishing with files and a rasp. Next came paint, which was sourced as a sample from the home store. This left him with one shade of gray, but the variations were easy to add by mixing it with white or black.

A strip of white LEDs gives the lamp its inner glow. The openings have been covered with blue acrylic which keep the dust out while providing the appropriate hue.

[via Reddit]