Hackaday At DEF CON 21

DEF CON 21 Badge

I’ve arrived at the Rio Casino in Las Vegas, Nevada for DEF CON 21. Over the next couple of days, I’ll be talking about what I get up to here.

The main event today is registration, which means getting a neat badge. This year’s badge was designed by [Ryan Clarke]. According to the DEF CON booklet, they are “non-electronic-electronic” badges this year, and DEF CON will be alternating between electronic badges every other year.

The playing card design is printed on a PCB, and uses the silkscreen, solder mask, and copper layers to provide three colors for the artwork. The badge is a crypto challenge, featuring some cryptic characters, numbers, and an XOR gate. I don’t have any ideas about it yet, but some people are already working hard on cracking the code.

Tomorrow, I’ll be heading to a few talks including one on hacking cars that we discussed earlier, and one on decapping chips. I’ll also be checking out some of the villages. The Tamper Evident Village is premiering this year, and they’ll be showing off a variety of tamper proofing tech. I’ll also try to get to the Beverage Cooling Contraption Contest, where competitors build devices to cool beverages (ie, beer) as quickly as possible.

If you have any DEF CON tips, let me know in the comments.

How To Use CoIDE With LPCXpresso Board

lpcxpresso-coocox

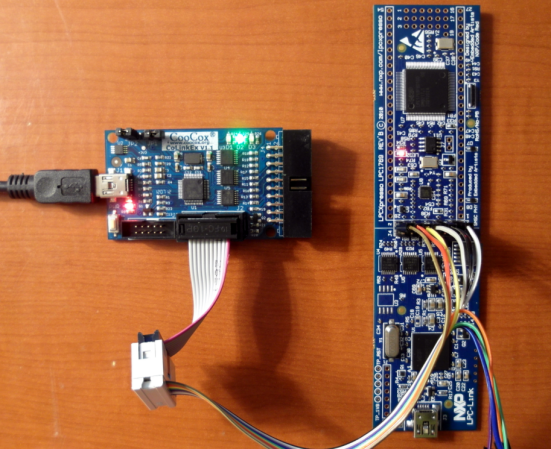
[James Lynch] picked up an LPCXpresso board because he wanted play around with ARM processors. The board, which is shown on the right, provides everything you need to get started. It even ships with a free IDE. But unfortunately the free version of that Code Red IDE is size limited. If he wanted to remove the restriction he would have to pony up $999 for a licensed version. A company might not think twice about this payment, but in the hobby realm that’s simply out of the question. Instead, [James] figured out how to use the CooCox programmer with the LPCXpresso hardware. To get at his 59-page guide on the process follow that link and hit the “Download Zip” button in the lower right for a copy of the PDF file.

The hack comes in two parts. First you need to alter the LPCXpresso board. There is a center line that separates the dev board form the debugger/programmer. These are connected with solder bridges between rows of a dual pin-header. [James] removed the bridges and added said pin header. This allows him to jumper the connections and use it as normal, or attach it to his CooCox programmer as seen above. The second part of the project walks through the process of getting the free CoIDE (also based on Eclipse) to compile and program code for the LPCXpresso.

We’ve seen this dev board here and there, notably in an oscilloscope build.

Blackhat: IOS Device Charger Exploit Installs And Activates Malware

ios-charger-malware

A team of researchers from Georgia Tech unveiled their findings yesterday at the Blackhat conference. Their topic is a power charger exploit that installs malware on iOS devices. Who would have thought that there’d be a security hole associated with the charging port on a device? Oh wait, after seeing hotel room locks exploited through their power jack this is an avenue that should be examined with all device security.

The demonstration used a charger and an BeagleBoard. Plugging in the charger is not enough to trigger the exploit, the user must unlock the screen while charging for it to go into action. But once that’s done the game is over. Their demo removes the Facebook app and replaces it with an infected impostor while leaving the icon in the same place on your home screen. They notified Apple of their findings and a patch will roll out with iOS7. So when would you plug your device into an untrusted charger? Their research includes a photo from an airport where an iPad is connected to the USB port of a public charging station.

The summary on the Blackhat site has download icons for the white paper and presentation slides. At the time of writing we had a hard time getting them to download but succeeded after several tries.

Laser Cigarette Lighter Makes Smoking Even More Dangerous

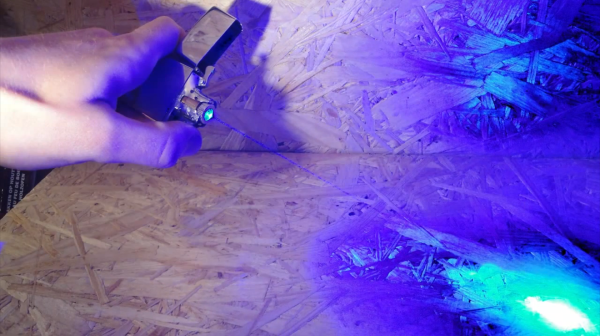
Dangers involved with using this laser cigarette lighter to start off your smoking session include shooting your eyes out and giving yourself a mean Harry Potter style forehead scar. This thing boasts a two Watt laser diode which has no problem burning everything that comes in contact with it.

[Masterjoa3000] shows you how it was built in the video after the break. You need to acquire the diode and support hardware which acts as a heat sink. These are press-fit together before wires are attached to the positive and negative leads. The housing is just a bit too wide for the wind shield on the lighter, but that is fixed by cutting a ‘V’ out of the center of that shielding. Next comes a minuscule driver board which is soldered to the diode and to a momentary push switch. The switch takes the place of the flint so that pressing down on the striking wheel activates the laser. The whole thing still fits in the unaltered outer case.

Here’s another take on the same idea with the laser pointing in a different direction.

Continue reading “Laser Cigarette Lighter Makes Smoking Even More Dangerous”

Making A Real Instrument Out Of A Kaoss Pad And Ribbon Controllers

swinger

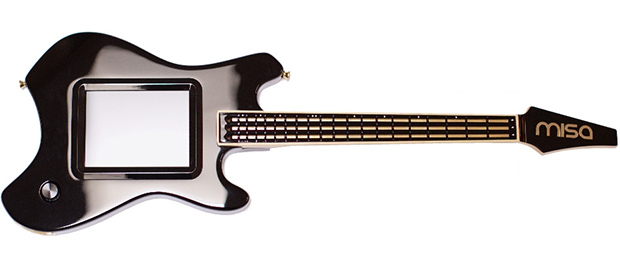
MIDI guitars have been around since the 80s, and nearly without exception they are designed as direct, one-to-one copies of their acoustic and electric brethren. [Michael] has been working on turning this convention on its head with the Misa Tri-Bass, a MIDI guitar designed to be the perfect guitar-shaped synthesizer interface.

The tri-bass doesn’t produce any sound itself; instead, it’s a polyphonic MIDI controller with three channels controlled by three ribbon controllers on the neck. The body contains a huge touch screen divided into four MIDI channels, essentially turning this guitar into an instrument designed for electronic music first, and not an acoustic instrument kludged into filling an electronic role.

Unlike a whole lot of other digital guitar-shaped MIDI controllers, the tri-bass is actually made out of wood. Yes, the neck is made out of maple (inlaid with the three ribbon controllers, of course), and the body comes directly from a tree, with the styling inspired by a forgotten retro-modern design. It’s an impressive piece of kit, and we can’t wait to see [Michael]’s handiwork in the hands of digital guitarists the world over.

You can check out a video of [Michael] rockin out below.

Continue reading “Making A Real Instrument Out Of A Kaoss Pad And Ribbon Controllers”

Vaporizer Rebuild

vaporizer-rebuild

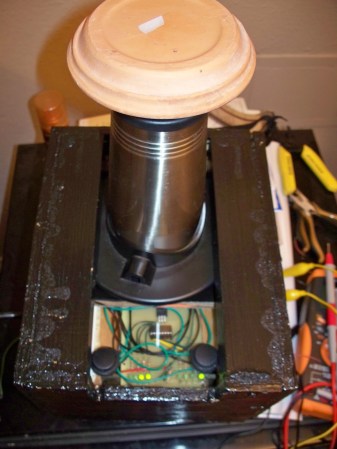
Wait! Don’t click away yet. Yes, this is a vaporizer project, but it has the distinction of being the most electronics engineering oriented post on the subject we’ve ever featured. [Mm Nn’s] vaporizer broke so he decided to fix it. After poking around inside it became clear that pretty much everything was trashed. So this ended up being a complete rebuild of all the support circuitry, with the heating element being the only electrical component he could salvage.

He started looking around for a power supply capable of driving the element from the Arizer V-tower vaporizer. He hoped that he could use a computer PSU but ended up having to buy one to suit; a Mean Well rs-100-24. He drives the system with a microcontroller (programmed in assembly) using PWM to adjust the element. Speaking of, there is a sensor built into the heating element that [Mm] isn’t using because he couldn’t figure out how to read from it. If you’ve got some ideas let us know in the comments.


HackRF, Or Playing From 30 MHz To 6 GHz

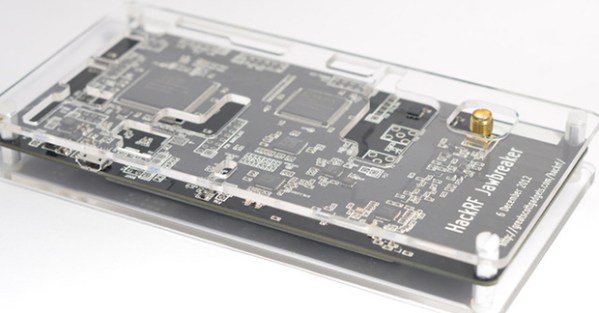
Up on Kickstarter, [Michael Ossmann] is launching the HackRF, an inordinately cheap, exceedingly capable software defined radio tool that’s small enough to lose in your laptop bag.

The HackRF was the subject of a lot of interest last time it was on Hackaday – the ability to receive up to 6GHz allows the HackRF to do a lot of very interesting things, including listening in on Bluetooth, WiFi, and 4G networks. Also, the ability to transmit on these frequencies means a lot of very interesting, and quite possibly slightly evil applications are open to anyone with a HackRF. Like the RTL-SDR dongles, the HackRF works with GNU Radio out of the box, meaning all those cool SDR hacks we’ve seen so far will work with this new, more powerful board.

Compared to the USB TV tuner cards that were so popular a year ago, the HackRF has 10 times the bandwidth, is able to receive up to 6GHz, and is also able to transmit. It’s only half-duplex, so to receive and transmit simultaneously you’ll need two HackRFs, or maybe wait for a hardware revision that will hopefully come sooner rather than later.

Below you can check out [Michael]’s presentation at Toorcon where the HackRF was unleashed to the world.

Continue reading “HackRF, Or Playing From 30 MHz To 6 GHz”