Putting Every Game Console In The Palm Of Your Hand

SNES

Casemodders extraordinaire [Downing] and [Hailrazer] are known for their fabulous builds that put just about every gaming console into a portable hand-held format. Everything from a Game Cube to N64s and a Sega Genesis have been conquered by the two, and for the last year they’ve been putting their heads together to make the best solution to portabalizing console gaming forever. It’s called the Cross Plane, and puts just about everything with an HDMI connection in the palm of your hand.

The build began as one of [Downing]’s more ambitious projects. He imagined a system that could play nearly every retro game on a small handheld device. After finishing this build, he set up a Kickstarter and called up his friend [Hailrazer] to get some feedback. Just hours before the Kickstarter launched, [Hailrazer] suggested making a device for modern consoles. [Downing]’s pride and joy was scrapped, but out of its ashes arose the Cross Plane.

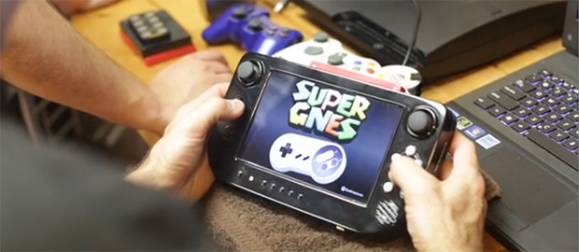
Inside the Cross Plane is a wireless HDMI receiver and a 7″ 720p display. This, along with a few buttons and analog controls, allow the Cross Plane to serve as a remote display and controller for an XBox 360, Playstation 3, and even a PC, for all that retro emulator goodness.

It’s a really, really cool project, and since the dream of an open Wii U controller seem to have died, we’re thinking this could be a great controller for an FPV quadcopter or other remotely operated vehicle.

3D Printering: Electronics Boards

If you’re gearing up to build a 3D printer, one of the first things you’ll need to look at is your options for electronics boards. Whether you decide to optimize for cost or capability, the choices you make during the planning stages of your build will drastically affect what the final project will look like and how it will behave.

There are a ton of electronics boards out there, so for this installation of 3D Printering, we’re going to take a look at what’s available. Hit the link below to give Hackaday more pageviews read the rest.

Continue reading “3D Printering: Electronics Boards”

A PC Rig That Belongs On The Wall Of An Art Museum

When Overclock.net user [Show4Pro] decided to upgrade his “old dusty rig”, he eschewed the conventional PC form factor and instead built an incredibly sexy custom wall-mounted case.

The six sticks of RAM, quad HDD/SSDs, and dual Radeon HD7970s are enough to make all but the most hard core gamer blush, but that was only the beginning here.  Using a Dremel tool, Show4Pro cut the frame from a piece of hardboard and coated it with a mock-carbon fiber vinyl sheet.  This backdrop acts to both hide the (many) cables and provide structural support to the components.  Custom light guides cut from an acrylic sheet are back lit with LEDs and serve as a border for each of the components.

Laying all of the boards flat on the frame required the use of PCIe risers to move the video cards away from the mother board.  Long PCIe connectors are very susceptible to EMI though, and Show4Pro ran into a few stability problems that he eventually had to resolve with some high-end shielded risers.

Besides that one minor hiccough, the project went off without a hitch and it looks like his 100+ hours of work have really paid off.

Via Reddit.

My First Brainf*ck

fuck

There was a time – not too long ago – that a ‘my first computer’ required the use of machine code and an understanding of binary. While an introduction to computers is now just how to put a Raspberry Pi image on an SD card, a few people are keeping the dream of memorizing opcodes alive. One such person is [Johan von Konow], creator of My First Brainfuck, an ultra small, low-cost programmable computer.

My First Brainfuck is an Arduino shield designed to have all the features of a normal computer, but without all those messy mnemonics that make assembly programming so easy. This computer is programmed in Brainfuck, a purposely obtuse programming language that, while being incredibly esoteric and difficult to program in, can be very, very rewarding.

[Johan] has a short tutorial showing how his computer works and how the Brainfuck language operates. There are only eight commands in Brainfuck, perfect for such a minimal user interface, but with enough patience, nearly anything can be written in this difficult language.

Right now there are a few examples showing how to play a scale on the on-board buzzer, displaying a Larson scanner on the LEDs, and a few more programs will be published in the future.

Cheap Guitar Amp Repaired By Replacing The Distortion Circuit

cheap-amp-distortion-repair

It’s an understatement that [Troy] is not impressed with the distortion circuitry built into this guitar amp. He picked it up for $40 on Kijiji (basically local classified ads run by eBay) so he wasn’t afraid to get elbow deep in its inner workings to see what was going on. It only took him a few minutes to solder together the distortion circuitry that fixed it. Figuring out what needed fixing is another story.

[Troy] uses some colorful language and metaphors to illustrate his disdain for the sound of the overdrive option. He hooked it up to an oscilloscope and his trained eye immediately tells him that it’s not working as it should. After studying the PCB and working out a schematic he reworked the circuit with this pair of diodes and a resistor. It still uses a bit of filtering on the board, but does away with all of the other cruft. What remains is a cheap amp, but one that actually functions.


Machining An Orrery

What in the heck is an Orrery? If you’re looking at the image above we’re sure you’ve already figured it out (kudos to the big brains that knew the word). For those that don’t get it, an Orrery is a mechanical device that represents the movements of planets and moons. We never thought of building one ourselves. After seeing the machining process for what’s shown above we’re not sure if we’re excited, or scared off by all the work that went into it.

You might want to bust out the Chromecast and hit the sofa for this one. There are dozens of YouTube videos showing the build. From cutting sheet stock into round slugs, to making teeth, teeth, teeth, and more teeth it’s not just the gears that go into this one. You’re also going to needs the orbs themselves.

We have fond (perhaps scary) memories of the first time we saw an Orrery as a part of the set in The Dark Crystal.

Continue reading “Machining An Orrery”

Homemade LED Helmet

LEDHelmet

We’ve all seen Daft Punk helmet builds, but [George’s] project is a homemade LED helmet that takes no shortcuts and packs the visor full of hundreds of individual lights. He started with a prototype that uses a PIC 18F4580 microcontroller connected to a MAX7221 LED driver, which gave him control over some dot matrix displays to test the wiring and sample script. He then used this prototype setup to develop a scrolling text function.

With testing complete, [George] wired hundreds of LEDs into 8×8 block sections, using a cardboard jig to keep everything straight. He could have stopped there, but [George] took the build further, adding an LCD display and a 7-segment clock module to the inside of the helmet, in view of the wearer. The clock displays the helmet’s current beats per minute rate, while the LCD shows the content being displayed (pattern, text / Pacman, stripes). It’s possible to see out between the bottom of the display and the chin of the helmet. If you need better visibility we’d recommend a bike helmet matrix that isn’t as dense.

You can watch a video of the helmet running different patterns below. (Warning: music). When you’re done with that, why not LED all the things: from Infinity Mirrors to LED Sneakers.

Continue reading “Homemade LED Helmet”