Hackett’s Tripod And Some Advice on abstraction

hackettTripod

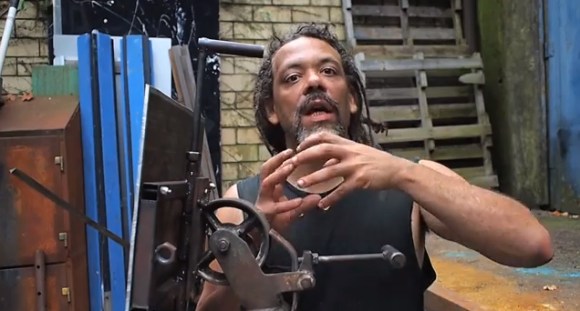
[Hackett] calls it a “transmission problem.” You’ve scavenged the pieces for your build, but nothing fits. Metric and standard hardware clash, a successful weld is as reliable as duct-taping. You’ll hear about plenty of these obstacles as [Hackett] tries to tackle a tripod build in this video.

He was contacted by a group looking to make a bicycle-mounted portable projector. Their request: build them an easy-to-use tripod on a shoestring budget that is strong enough to hold a 30-pound projector. Garbage and scrap turn into a functional device as [Hackett] grinds and welds the tripod together.

The video’s greatest contribution, however, is the advice near the end.

You need to retrain your eye, so you’re not looking at a thing as to what it is, what it’s branded, what it’s originally intended for. What you’re looking at is what it is at the core, and once you start looking at things for what they really, really are, you have the power to completely remake the world.

A desire to re-contextualize everyday stuff is probably the reason you’re a Hackaday reader. Hopefully [Hackett’s] succinct advice strikes some chords and encourages you to keep abstracting and re-purposing the world around you. If you’re new to hacking and need somewhere to start, why not build a robot?

Continue reading “Hackett’s Tripod And Some Advice on abstraction”

FlowFree Goes Life Sized At Maker Faire NY

Maker Faire 2013SetupWillow Glen MakersTeam PathfinderFlow*26

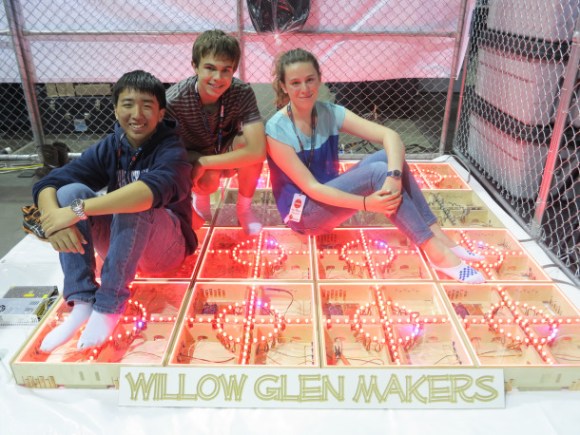
What began as a smartphone game turned into a Maker Faire New York 2013 project for the [Willow Glen Makers]. FlowX26 is a life sized version of the game FlowFree. [The Willow Glen Makers] wanted to build an extendable, easy to set up grid of floor tiles to emulate the game. A CNC machine was employed to create a plywood framework. Not visible in the picture is the fact that each cross member is cut slightly concave.  This concavity allows the clear plastic top to deflect just enough to activate a micro switch inside the tile. The switch sends a signal to the tile’s Arduino Mega controller. The Mega then uses this data to control an array of RGB LEDs.

The next problem was interconnection and communication between the tiles. [The Makers] used copper tape, along with a 3D Printed latch system between each tile side. Six connections per side allow power and data to be transmitted throughout the grid.

Continue reading “FlowFree Goes Life Sized At Maker Faire NY”

What’s Inside A 555?

555

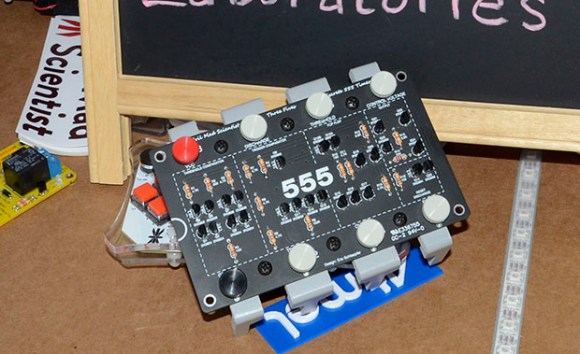
The 555 timer chip is a ubiquitous piece of technology that is oft-considered the hardcore way of doing things. Of course, the old timers out there will remind us that discrete transistors are the badass way of doing things, and tubes even more so. It’s not quite at the level of triodes and transformers, but Evil Mad Scientist’s discrete 555 kit is still an amazing piece of kit.

Instead of transistors and resistors etched into silicon as in the OG 555, [Windell] over at EMS turned the basic circuit inside a 555 into a mega-sized version using discrete components. Your parts bins need new scale if you’re going to work with this and other up-scaled hobby electronic components.

Although the integrated stand that makes the whole package look like an overgrown DIP doesn’t break out the signals on the board, it does include some neat screw terminals for alligator clips and bits of wire so this kit can be used in a circuit. Because it uses discrete components, you can also take a meter or scope to check out how a 555 chip works from the inside.

World Maker Faire 2013: The Sub-$500 Deltaprintr

There are a few delta bot 3D printers out there such as the Rostock which, while being a very nice printer, is still a little expensive. When [Shai] from SUNY wanted to use a 3D printer for his artistic and academic pursuits, he decided to build his own printer. Thus the Deltaprintr was born.

Instead of printed parts, the Deltaprintr uses laser cut and machined parts for just about all of its bill of materials. The three motors mounted in the base are connected to the delta arms with Spectra fishing line, thus getting rid of the ludicrous cost of belts of the requisite length.

Everything is Open Source, and the guys behind the project should be putting their printr up on Kickstarter sometime next month. Word is the entire thing should be sub-$500, and a little bit of guessing tells me that doesn’t mean $499.

Trash To Treasure Bluetooth Radio And Tube Amp Build

trash-to-treasure-internet-radio

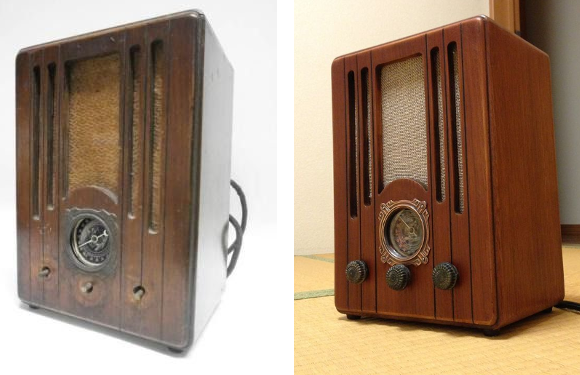
The before image doesn’t look all that bad but we were still impressed with what went into the restoration of this radio. Perhaps restoration isn’t the right word since it didn’t manage to hold on to any of the original internals. This is more resurrection of a retro radio case for use as a Bluetooth radio.

At first look we didn’t notice that the original knobs were missing. The speaker fabric is ripped and the glass on the tuning dial is broken as well. [Yaaaam] happened to have another antique radio with interesting knobs — but he didn’t just transplant them. He made a mold of one knob and cast three replacements for the radio. After refinishing the wood he replaced the fabric and things were really starting to look up.

All of the electronic components were removed and a new tube amp was built on the original metal chassis. It uses a Bluetooth module for input which facilitates using your smart phone as the playback device without involving any wires or other nonsense. Two problems popped up after the project was completed. The first replacement power supply overheated. The second replacement had a different problem, needing some additional shielding to prevent noise from creating unwanted… noise.

This looks so much better than modern injection molded plastic shelf systems. But there are some fun wireless hacks out there for those too.

A $100 Stereolithography 3D Printer

The Hackaday tip line has been blowing up with a new Kickstarter for a 3D printer. Although this is a pretty common occurrence around here, this printer is actually very interesting: it’s quite possibly the simplest and cheapest laser resin printer ever.

Most of the 3D resin printers we’ve seen, like the Form1 use mechanical means to raise a print up to the next slice. At $100, the Peachy printer doesn’t have the budget for such luxuries as servos or motors, so the layer height is increased by dripping salt water over the liquid resin. The X and Y axes are controlled with mirrors and voice coils, allowing this printer’s electronics to be controlled by a computer’s sound card. It’s really amazing in its simplicity, and from the looks of it the Peachy can produce some fairly good prints.

For a great explanation of how the Peachy printer works, you can check out the video below.

Continue reading “A $100 Stereolithography 3D Printer”