Hackaday Is Going To The NYC Maker Faire!

maker

In just a few short days, the greatest hackers and makers from all around the globe will descend on the Hall of Science in New York City to show off their wares. Our new guy [Adam] and myself will also be there, giving these makers our unending support, putting up a few posts about what they built, and giving out some Hackaday swag.

Continue reading “Hackaday Is Going To The NYC Maker Faire!”

Disarm: Turning Guns Into A Mechanised Musical Orchestra

[Pedro Reyes] is a visual artist who lives in Mexico City. His most recent project was called ‘Disarm’ – a unique exhibit that combined dismantled weapons with sculpture and technology.

The army in Mexico seizes firearms on a regular basis and they are typically either buried or destroyed. But this time a friend working for the National Crime Prevention Commission thought to ask [Pedro] if he could use them for something. A few hundred non-functional guns later, and [Pedro] has a fully automated mechanical orchestra. The articles don’t go into much information about how it works, but it looks like solenoids are mostly utilized to actuate the various instruments. The entire setup is then controlled by a computer, but there’s not much information on the interface design.

When asked about the project, [Pedro] explained his reasoning: “The beautiful thing about ‘Disarm’ as a project is that it combines music, with sculpture, and at the same time, with technology. This is the redemption of metal that could have taken your life or mine. So they are better as musical instruments.”

Watch the 8 minute documentary on ‘Disarm’ by the Creators Project after the break. The weapon-based orchestra sounds pretty good!

Continue reading “Disarm: Turning Guns Into A Mechanised Musical Orchestra”

Hackaday Links: September 15, 2013

hackaday-links-chain

First a quick announcement. We changed our “Kickstarter” category to “Crowd Funding“. We get a huge number of tips about crowd funding projects. We’re always interested in details. If you’re trying to get your crowd funding campaign on our front page make sure you’ve shared as many gritty project details (development process, problems/successes along the way, etc.) as possible . We usually prefer if this is done in a separate blog post from the campaign page itself.

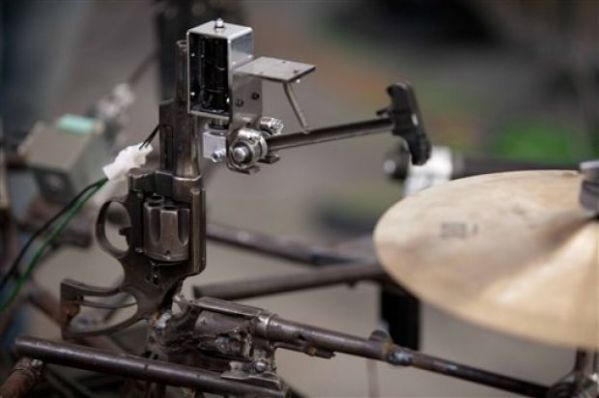
Here’s a peephole hack that purportedly cost four grand. It uses a full on DSLR for the peephole hardware. Add a motion sensor and maybe you’ll be able to learn the faces of the neighbors who live on your floor. [via Gizmodo]

[Matthias] tells us that support for Rigol DS1052E oscilloscopes has been included in the 3.11 version of the Linux Kernel. Prior to this, getting the hardware to work on Linux was a hack, and a buggy one at that. For what it’s worth, here’s confirmation that support was added.

A post about reverse engineering the FitBit Aria Wi-Fi scale was sent in by [Christopher]. This makes us wonder if you could patch into a digital scale, using your own electronics to spoof the FitBit version?

We always keep our paperboard six-pack carriers so that we have a way to transport our homebrew beer. But rolling into a party with this laser-cut beer caddy which [Daniel] designed looks a lot cooler.

Texas Instruments has an MSP430 Selection Guide (PDF) which we found interesting. The first nine pages or so are pretty much just marketing, but several pages of parametric tables found after that make for a great collection of data on the hardware families. [via Dangerous Prototypes]

[Antoine] spared no expense building a coffee table that showcases his old motherboards. The illuminated glass and wood art piece rang in at around $400 in materials. We’re a little more minimalist with our home decor. We still want something along the lines of this LED matrix version.

Speaking of LED matrices, [Mario] dropped off a link to his LED Space Invaders game in the comments of last week’s Game of Light post. What we can’t figure out is why so many people hesitate to send in a tip about their awesome projects?

Turning A Raspi Into AdBlock

pi

There’s nothing quite as annoying as seeing bandwidth wasted on unimpressive flash animations, irrelevant ads, and animated GIFs. The bad news is these ads are the sole source of income for a lot of your favorite websites – Hackaday included. The good news is you can turn these ads off with a Raspberry Pi, a WiFi adapter, and a little bit of fun in the terminal.

This build creates a wireless access point with a WiFi adapter plugged in to a Raspberry Pi. With an Ethernet cable plugged in, this effectively turns the Raspi into a wireless router.

To configure the software to block ads, it’s a simple matter of installing dnsmasq from the command line and making sure all the ads on your favorite webpages time out. This means a fairly big hit on the performance of your new DIY router, but with the installation of Pixelserv you can host a 1-pixel transparent GIF image that replaces all the ads and renders them invisible.

It’s a great project if you don’t like watching ads on your PS3, XBox, tablet, or other non-PC Internetting device. If people stealing your wireless connection is a problem, it shouldn’t be hard to make every image upside down or blurry for those rogue WiFi pirates.

The Easy Or Hard Way To Build A PWM Dimmer

From what you would gather from Hackaday’s immense library of builds and projects over several years, the only way to do PWM is with a microcontroller, some code, a full-blown IDE, or even a real-time operating system. To some readers, we’re sure, this comes naturally and with an awesome toolchain it can be as easy as screwing in a light bulb. There is, of course, an easier way.

[Jestin] needed to vary the current on a small 12 Volt load. Instead of digging out an in system programmer, he turned to the classic 555 chip. With a single pot, it’s easy to vary the duty cycle of the 555 and connect that to a MOSFET. Put a load in there, and you have a very easy circuit that’s a fully functioning PWM dimmer.

If all you have are a few scraps in your part drawers, this is a very, very easy way to set up a dimmer switch. We’re also loving [Jestin]’s improv aluminum tube enclosure, as seen in the video below.

Continue reading “The Easy Or Hard Way To Build A PWM Dimmer”

Tiny Chess Playing Computer

We have covered many chess computers in the past, but we think this might just be the smallest. Enter the PIC Blitz: A tiny low-cost low-power computer that can play lightning chess.

It’s based on a PIC16F628A microcontroller, which only has 3.5kbytes of flash and a mere 224 bytes of RAM. For comparison, Boris (one of the first consumer chess computers), utilized an 8-bit microprocessor with 2.5 kbytes of ROM and 256 bytes of RAM.

PIC Blitz has a full fledged chess library: it knows all the moves, all the basic openings and even changes its evaluation function weights as the game progresses to keep the game interesting. The creator [Mark Owen] quips about some of the additional techniques he utilized to make up for the limited processing power; including “pondering time”, a difficult and slow user interface, and of course, a barely-comprehensible LCD.

If you’re interested he has released the files under Creative Commons, and has a link to the PCB layout on the project page – we won’t link it directly though, since it goes straight to a download.

[Thanks Martin!]

3D Printed Injection Molds

A team at Budapest University has successfully created a functional injection mold for prototyping by using a Stratasys 3D printer.

Prototype injection molds are expensive. They are typically machined out of steel or aluminum which is both costly and time consuming, due to the complex geometries of most molds. [Dr. Jozsef Gabor Kovacs] works in the Department of Polymer Engineering at Budapest University, which is where he came up with the innovative approach of using 3D printing to produce a prototype mold.

The mold was printed in Digital ABS PolyJet Photopolymer plastic using a Objet Connex 3D printer. The injection material used was polyacetal; which has a fairly low melting point of 175°C. By using this method they were able to go from a prototype mold to a test part in less than 24 hours. We don’t even want to think about how expensive that would be to expedite from a machine shop.

After the break you can watch the entire production process from printing to molding.

Continue reading “3D Printed Injection Molds”