Arduino Christmas Lights

Here’s a cool hack to get you in the December holiday mood! Arduino controlled Christmas lights!

It all started because [Anx2k] had some leftover LED’s from one of his other projects, so he decided to make use of them as permanently mounted Christmas lights. He’s installed them underneath his tiled roof, and run all the wires into his attic where he has an electrical box serving as the main control hub. He uses an Arduino Uno to control them, and a 460W computer power supply to provide the juice. The LED modules themselves are Adafruit RGB pixel strings. There’s actually three of the LED modules per tile — two shining up to illuminate the tile, and one shining out.

He’s set up a ton of different patterns to run, and they are pretty awesome! Check out the video after the break.


Continue reading “Arduino Christmas Lights”

DIY Thermal Imaging Camera

Thermal imaging cameras – those really useful devices that give you Predator vision – are incredible tools. If you’re looking for heat escaping your house through a window, or just trying to figure out where your electronics project will explode next, they’re invaluable, if expensive, tools. [Kaptein QK] figured out an easy and cheap way to make your own thermal imaging camera using nothing just a few dollars worth of parts.

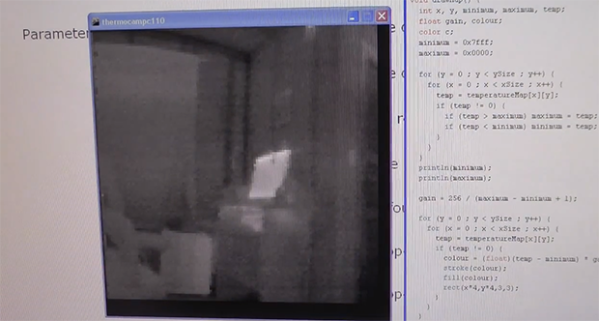
[Kaptein] based his camera off of a non-contact IR temperature gun. This device is useful for spot checking temperatures, but can’t produce an IR image like it’s $1000 cousins. By taking the thermopile out of this temperature gun, adding an op-amp, an A/D converter, and connecting it to an Arduino Nano with pan and tilt servos, [Kaptein] was able to slowly scan the thermopile over a scene and generate an image.

In the video below, you can see [Kaptein]’s scanning camera in action reading the ambient temperature and creating an imaging program for his PC. It works very well, and there a lot more [Kaptein] can improve on this system; getting rid of the servos and moving to mirrors would hopefully speed everything up, and replacing the 8-bit grayscale display with colors would give a vastly improved dynamic range.

Continue reading “DIY Thermal Imaging Camera”

Levitating Wireless LED Ring

magnetic levitation

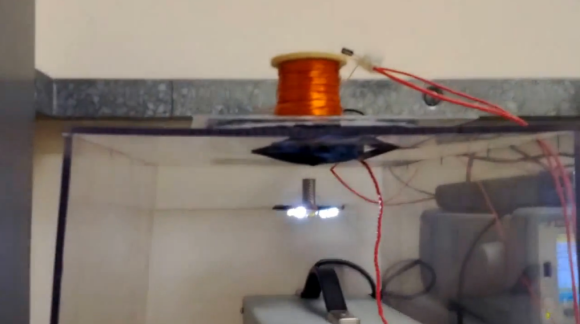
Here’s an impressive example of a completely home built magnetic levitation setup… with wireless power transmission to boot!

[Samer] built this from scratch and it features two main sub-systems, a electromagnet with feedback electronics and a wireless power transfer setup.

The ring of LEDs has a stack of neodymium magnets which are levitated in place by a varying magnetic field. This levitation is achieved by using a Hall effect sensor and a PID controller using a KA7500 SMPS controller.

The wireless power transmission uses a Class E DC/AC inverter that operates at 800KHz. Two coils of wire pass the current between the stand and the LEDs.

It’s very similar to a build we featured last year, but it’s a great hack, so we had to share it! Check out the video after the break.
Continue reading “Levitating Wireless LED Ring”

A Shell For The Stellaris & Tiva

cli

When [antoker] is working on a microcontroller project, he often has to write short bits of test code to make sure everything in his circuit is working properly. This is a time-consuming task, and a while back he started on a small side project. It’s a command line interface for a microcontroller that allows him to send short commands to the uC over a serial connection to play around with the ADC, UART, and GPIO pins.

[antoker]’s tiny Unix-like environment is based on modules  that can keep track of the time, print the current commands and stack to a terminal, and query things like the current speed of the uC and the available Flash and RAM.

This tiny shell also has scripting capabilities and a jump function, making this a true programming language, however minimal it is. Right now [antoker]’s work is available for the TI Stellaris and Tiva series microcontrollers, and a video of a scripted Larson scanner is available below.

Continue reading “A Shell For The Stellaris & Tiva”

DIY Pringles Can Speaker

Looking for a fun weekend project? How about making your own speaker from scratch using some very basic materials?

[Go Repairs] makes a bunch of how-to videos for Instructables in a style very reminiscent of the classic Art Attack from the 90’s — very clear, concise and he’s even got the accent!

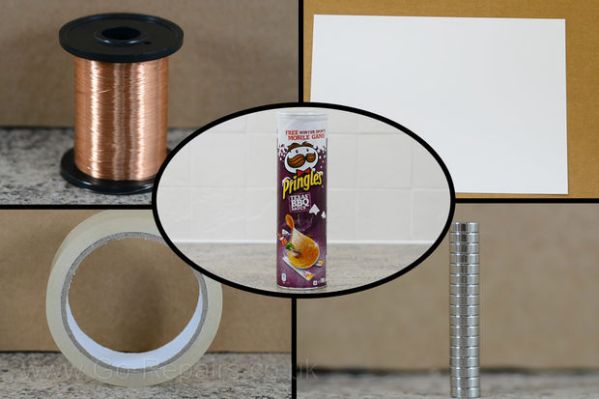
The project requires only what you see in the photo above. The lid forms a simple plastic cone of the speaker, the magnets are the core, and using some paper, tape, and enamelled wire a very basic voice coil is constructed. Don’t expect amazing sound quality out of it, but it certainly looks like a fun project for junior hackers as it requires no fancy tools or equipment!

Stick around after the break to watch the video — does it remind you of Art Attack also?

Continue reading “DIY Pringles Can Speaker”

Arduino-Powered Steampunk Steam Gauge

steampunkGauge

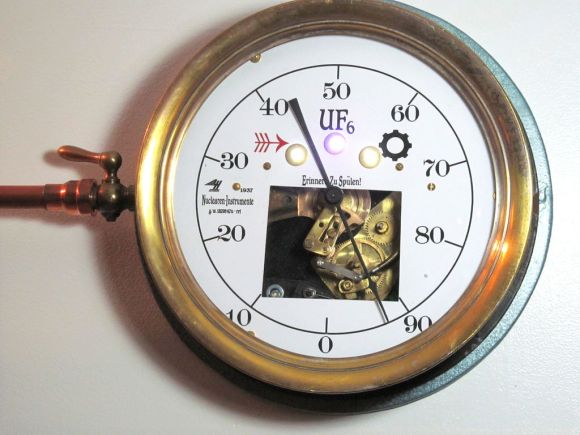
[Murphy’s_Lawyer] had some empty space on the wall in his kitchen, so he decided to fill it with a whirring Steampunk gizmo: an Arduino-driven steam gauge.

The build began as an old 10″ Ashcroft pressure gauge sourced from eBay, which [Murphy’s_Lawyer] dissected to determine the state of its guts. Finding the gauge’s Bourdon tube intact, he got to work constructing a method of generating motion without the need for actual steam. The solution was to mount a continuous rotation servo between the tube and the case. The servo lacked the strength to flex the tube on its own, so [Murphy’s_Lawyer] fashioned a simple lever out of brass to help it along.

The electronics consist of an Arduino Uno and an accompanying homemade PCB. The code for the Uno generates random motion for twirling the servo, and three LEDs built into the face reflect values generated for speed, pause and run time. The final upgrade came in the form of a new dial face, which provides some updated text as well as a cutout square that lets you see the previously obscured gears in action. Check out the video below, then see another Steampunk overhaul: the Edwardian Laptop.

Continue reading “Arduino-Powered Steampunk Steam Gauge”

Smartphone Controlled Paper Plane!

We’ve heard of making remote controlled paper airplanes before, but it looks like someone finally figured out one of the best ways to do it. It’s called the PowerUp 3.0, and it’s a smartphone controlled plane module you can strap to almost any paper plane you make.

[Shai Gotein] is the inventor and is both a pilot and an aviation enthusiast, with over 25 years experience. Back in 2008 he was volunteering to teach Aerodynamics to kids, and he realized how handy it would be to have a small plane capable of indoor flight to explain aviation concepts — so he started designing one. The first iteration (PowerUp 1.0) received the ATA Best Hobby Award, but he didn’t stop there!  Continuing to refine his design, version 3.0 is now controllable via an iPhone or Android device using low-energy Bluetooth communications. This gives it about a 55 meter range, and the tiny battery lasts 10 minutes per charge. The best part is you get to design the plane!

Stick around after the break to see a paper plane do things you’d never expect!

Continue reading “Smartphone Controlled Paper Plane!”