Measuring temperature turns out to be a fundamental function for a huge number of devices. You furnace’s programmable thermostat and digital clocks are obvious examples. If you just needed to know if a certain temperature is exceeded, you could use a bimetalic coil and a microswitch (or a mercury switch as was the method with old thermostats). But these days we want precision over a range of readings, so there are thermocouples that generate a small voltage, RTDs that change resistance with temperature, thermistors that also change resistance with temperature, infrared sensors, and vibrating wire sensors. The bandgap voltage of a semiconductor junction varies with temperature and that’s predictable and measurable, too. There are probably other methods too, some of which are probably pretty creative.
Bimetalic coil by [Hustvede], CC-BY-SA 3.0.You can often think of creative ways to do any measurement. There’s an old joke about the smart-alec student in physics class. The question was how do you find the height of a building using a barometer. One answer was to drop the barometer from the top of the building and time how long it takes to hit the ground. Another answer — doubtlessly an engineering student — wanted to find the building engineer and offer to give them the barometer in exchange for the height of the building. By the same token, you could find the temperature by monitoring a standard thermometer with a camera or even a level sensor which is a topic for another post.
The point is, there are plenty of ways to measure anything, but in every case, you are converting what you want to know (temperature) into something you know how to measure like voltage, current, or physical position. Let’s take a look at how some of the most interesting temperature sensors accomplish this.
[Marco Reps] found an HT02 thermal imaging camera in his mailbox. He found the resolution was fine for looking at big objects but worthless for examining circuit boards. So he decided to just tear it into pieces — an urge we totally understand.
Inside was a thermopile sensor that was easy to reverse engineer. So [Marco] decided to rework a Raspberry Pi robot to use the camera and turn it into a heat seeker.
Inspiration can strike from the strangest places. Unearthing a forgotten Melexis MLX90614 thermopile from his ‘inbox,’ [Saulius Lukse] used it to build a panoramic thermal camera.
[Lukse] made use of an ATmega328 to control the thermal sensor, and used the project to test a pair of two rotary stage motors he designed for tilt and pan, with some slip rings to keep it in motion as it captures a scene. That said, taking a 720 x 360 panoramic image one pixel at a time takes over an hour, and compiling all that information into an intelligible picture is no small feat either. An occasional hiccup are dead pixels in the image, but those are quickly filled in by averaging the temperature of adjoining pixels.
The camera rig works — and it does turn out a nice picture — but [Lukse] says an upgraded infrared camera to captured larger images at a time and higher resolution would not be unwelcome.
Another clever use of a thermopile might take you the route of this thermal flashlight. if you don’t build your own thermal camera outright.
If you have ever entertained yourself by reading comprehensive electronic-theory textbooks you’ll have seen references to technologies that sound really interesting but which you will rarely hold in your hand. They may be dead-ends that have been superseded by more recent innovations, or they may be technologies that have found uses but in other fields from those in which they originally showed promise. What if you could take these crazy parts and actually build something?
If you’ve used a thermocouple thermometer or a semiconductor thermoelectric generator then you’ll have encountered the thermoelectric effect. Perhaps you’ve even operated a Peltier cooling element in this mode. When a circuit is made with two junctions between different types of conductor with a temperature difference between the two junctions, a current will flow in the circuit which is dependent on both the scale of the temperature difference and the properties of the conductors.
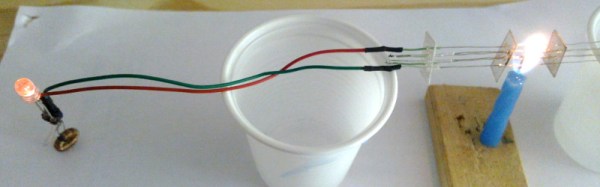
A thermopile is a collection of these thermoelectric junction circuits between metal conductors, arranged in series to increase the voltage. [Fedetft]’s thermopile uses chromel and alumel wires taken from a K-type thermocouple. He’s made six sets of junctions, and supported them with small pieces of mica sheet. Using the heat from a candle he found he could generate about 200mV with it, at about 3.7mW.
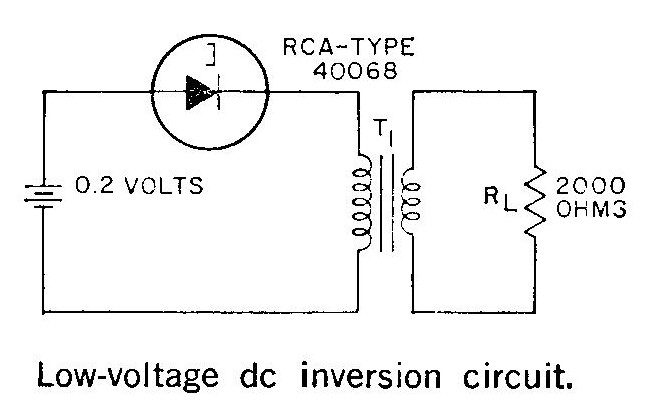
The RCA tunnel diode inverter circuit
Such a tiny source of electricity would be of little use to light an LED directly, so he needed to build an inverter. And that’s where the tunnel diode comes in. Tunnel diodes have a negative-resistance region that can be used to amplify and oscillate at extremely high frequencies in extremely simple circuits, yet they’re not exactly a device you’d encounter very often in 2016. [Fedetft] has a Russian tunnel diode, and he’s used it with a toroidal transformer in an inverter circuit he found in an RCA tunnel diode manual from 1963. It’s a two-component Joule Thief. The RCA manual is a good read in itself for those curious about tunnel diodes.
The resulting circuit produces a 15kHz oscillation with 4.5v peaks, and has just enough power to light an LED.
While it might seem pointless to barely light an LED from a brightly lit candle, the important part of [Fedetft]’s project is to gain some understanding of two of those technological backwaters from the textbooks. And we applaud that.
[Noe] over at Adafruit has a really great build that combines the Internet’s love of blinkey LEDs and rayguns with the awesome technology behind extraordinarily expensive thermal imaging cameras. It’s a light painting infrared heat gun, used for taking long exposure photographs and ‘painting’ a scene red or blue, depending on the temperature of an object.
While this isn’t a proper FLIR camera, with a DSLR and a wide open shutter, it is possible to take pseudo-thermal images by simply ‘painting’ a scene with the light gun. This is an absurdly clever technique we’ve seen before and has the potential to be a useful tool if you’re looking for leaks around your windows, or just want to have a useful cosplay prop.
The circuit inside this raygun is based on a contactless infrared sensor connected to an Adafruit Gemma, with the LEDs provided by a NeoPixel ring. There are two 3D printable cases – your traditional raygun/blaster, and a more pragmatic wand enclosure. With either enclosure, it’s possible to take some pretty heat map pictures, as seen in the video below.
Thermal imaging cameras – those really useful devices that give you Predator vision – are incredible tools. If you’re looking for heat escaping your house through a window, or just trying to figure out where your electronics project will explode next, they’re invaluable, if expensive, tools. [Kaptein QK] figured out an easy and cheap way to make your own thermal imaging camera using nothing just a few dollars worth of parts.
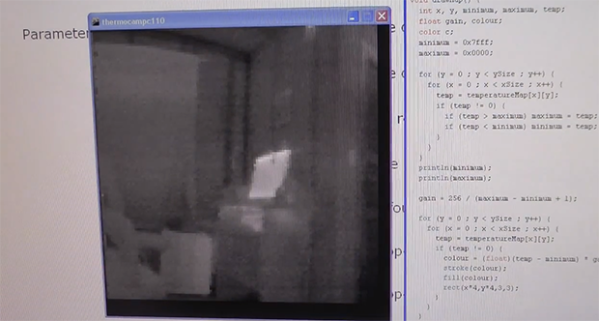
[Kaptein] based his camera off of a non-contact IR temperature gun. This device is useful for spot checking temperatures, but can’t produce an IR image like it’s $1000 cousins. By taking the thermopile out of this temperature gun, adding an op-amp, an A/D converter, and connecting it to an Arduino Nano with pan and tilt servos, [Kaptein] was able to slowly scan the thermopile over a scene and generate an image.
In the video below, you can see [Kaptein]’s scanning camera in action reading the ambient temperature and creating an imaging program for his PC. It works very well, and there a lot more [Kaptein] can improve on this system; getting rid of the servos and moving to mirrors would hopefully speed everything up, and replacing the 8-bit grayscale display with colors would give a vastly improved dynamic range.
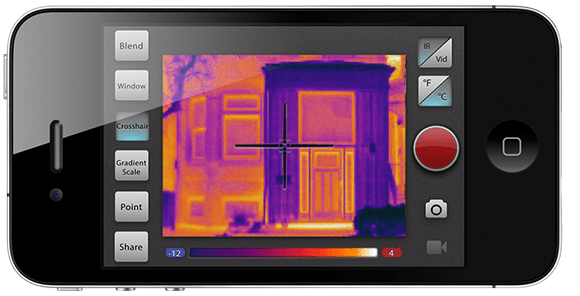
If you want to check your house for hot air leaks, take pictures of the heat coming off a rack of equipment, or just chase the most dangerous animal, [Arnie], through the jungles of central america, a thermal imaging camera is your friend. These devices normally cost a few thousand dollars, but the team behind the Mu Thermal Camera managed to get the price down to about $300.
The basic idea behind the Mu Thermal Camera is overlaying the output of an infrared thermopile – basically, an infrared camera – on top of the video feed of a smart phone’s camera. This is an approach we’ve seen before and something that has even been turned into a successful Kickstarter. These previous incarnations suffered from terrible resolution, though; just 16×4 pixels for the infrared camera. The Mu thermal camera, on the other hand, has 160×120 pixels of resolution. That’s the same resolution as this $2500 Fluke IR camera. After the indiegogo campaign is over, the Mu camera will eventually sell for $325.
We have no idea how the folks behind the Mu camera were able to create a thermal imaging with such exceptional resolution at this price point. The good news is the team will be open sourcing the Mu camera after their indiegogo run is over. W’e’d love to see those docs now, if only to figure out how a thousand dollars of infrared sensor is crammed into a $300 device.