Fail Of The Week: Reverse Engineering A Wireless Energy Monitor

fotw-wireless-energy-monitor-reverse-engineering

[Afonso] picked up a cheap energy use monitor a few years back. He really like the data it displays about his home’s electricity, using a sensor to gather this info and a display that communicates with it wirelessly. But there is no option to log or dump the data. He set out to reverse engineer the wireless protocol in order to extend the use of the system. As the name of this column implies, he failed to get this working.

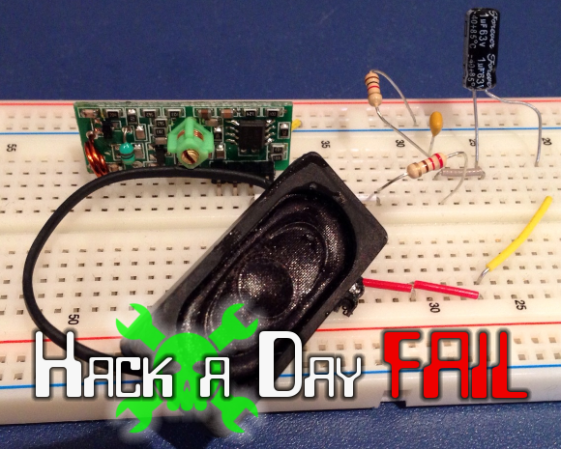
The hardware above is a 433Mhz transceiver that he rigged up as test hardware. It sounds like he’s assuming the monitor works on this band, which could have been his first misstep (we really don’t know). The speaker is there to give audible confirmation that he’s receiving something from the transmitter. This is where things start to get pretty weird. White noise was coming from the speaker, but when he stepped away from the bench it stopped. He was able to measure a regular pattern to the noise, and proceeded to place the speaker next to his computer MIC so that he could record a sample for further analysis.

Fail of the Week always aims to be a positive experience. In this case we’d like to have a conversation about the process itself. We agree that connecting a speaker (or headphones) should help get your foot in the door because your ear will recognize a rhythmic pattern when it is received. But with this noise, measuring the timing and recording a sample we’re not so sure about. Given the situation, how would you have soldiered on for the best chance at successfully sniffing out the communication scheme used by this hardware? Leave a comment below!


2013-09-05-Hackaday-Fail-tips-tileFail of the Week is a Hackaday column which runs every Wednesday. Help keep the fun rolling by writing about your past failures and sending us a link to the story — or sending in links to fail write ups you find in your Internet travels.

2D Room Mapping With A Laser And A Webcam

[Shane Ormonde] recently learned how to measure distance using just a webcam, a laser, and everyone’s favorite math — trigonometry. Since then he’s thrown the device onto a stepper motor, and now has a clever 2D room mapping machine.

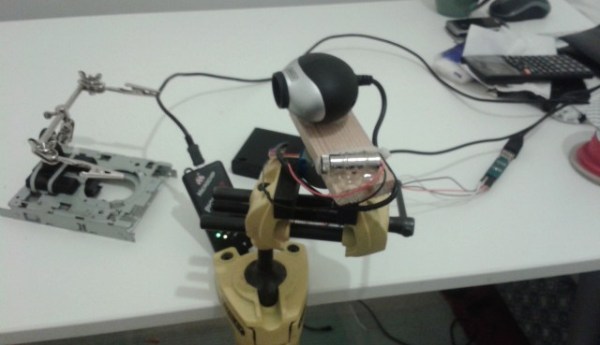
He learned how to create the webcam laser range finder from [Todd Danko], a project we featured 7 years ago! It’s a pretty simple concept. The camera and laser are placed parallel to each other at a known distance, axis-to-axis. On the computer, a python script (using the OpenCV library) searches the image for the brightest point (the laser). The closer the brightest point is to the center of the image, the farther the object. Counting pixels from the center of the image to the laser point allows you to calculate an angle, which can then be used to calculate the distance to the object — of course, this needs to be calibrated to be at all accurate. [Shane] does a great job explaining all of this in one of his past posts, building the webcam laser rangefinder.

From there it was just a matter of slapping the rangefinder onto a stepper motor, driving it with a small PIC, and running the calculations on the fly! His results are fairly impressive.

Continue reading “2D Room Mapping With A Laser And A Webcam”

RIVERWATCH: An Autonomous Surface-Aerial Marsupial Robot Team

cata

Every once in a while we get a tip for a project that really, really, really blows our minds. This is one of them.

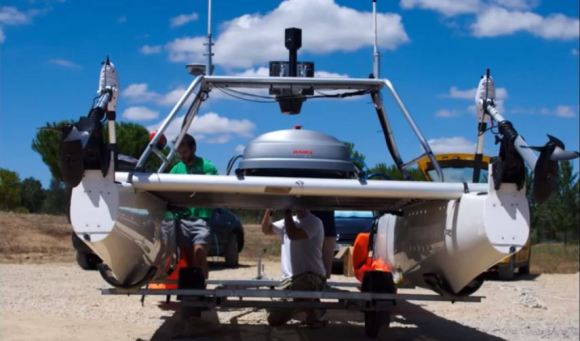
It looks like a basic catamaran with a few extra bells and whistles — except it is so much more than that. You’re looking at a fully Autonomous Surface Vehicle, complete with a piggybacking 6-rotor UAV. It’s decked out in cameras, sonar sensors, laser rangefinders, high accuracy GPS-RTK tracking, an IMU, oh, and did we mention the autonomous 6-rotor UAV capable of taking off and landing on it?

It all started out as a simple experiment within ECHORD (the European Clearing House for Open Robotics Development), and since then it has become a fully funded project at UNINOVA, a Centre of Technology and Systems in Portugal.

The purpose of the mind-blowing robot team is to collect data of river environments — think of it as Google Maps 2.0 — which is almost an understatement for what it is capable of.

You seriously have to watch the video after the break.

Continue reading “RIVERWATCH: An Autonomous Surface-Aerial Marsupial Robot Team”

S.A.M. The Safety Attention Monitor

Capture

Last term’s project at Chico State University hopes to reduce driver distraction by alerting you when it notices you aren’t paying attention (to the road!).

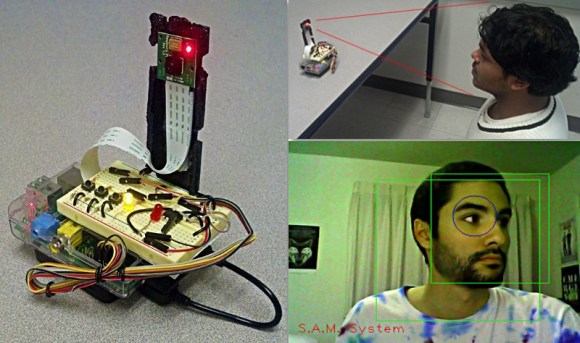
The team designed SAM using OpenCV to track your face in order to recognize when you aren’t watching the road. It alerts you through a variety of audible beeps and LED lights, and is programmed to only alert you after set time values — i.e. it’s not going to go off when you’re checking your blind spot, unless you’ve been checking it for over a certain length of time. It also has a silence button you can press for situations like looking around while you are parked.

The proof of concept device was built using a Raspberry Pi, the PiCam, and a breadboard to accommodate some manual controls, the buzzer, and LEDs. It also continuously records video of you on a 30 second loop, and in the event of an accident, it saves all the video — perhaps proving it was your fault. Can you imagine if all cars had this installed? On the plus side you wouldn’t have to argue with insurance companies — but if it really was your fault, well then you’re straight out of luck.

The FilaWinder

filawinder

The latest addition to the line of 3D printer accessories is the FilaWinder, a tool for winding your filament neatly onto a spool. If you’ve abandoned buying your filament by the reel in favor of making your own from cheaper pellets—such as the Lyman Extruder, the Filabot Wee, or other alternatives, including the winder’s companion product, the FilaStruder—then you’ve likely had to roll everything up by hand, perhaps after it flopped around on the floor first.

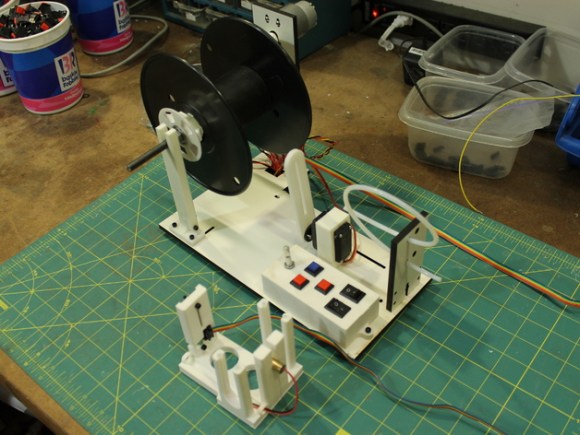
The FilaWinder spools for you while the filament extrudes, using a sensor to adjust the winding the speed to match extrusion rates as well as running it through some PTFE tube to gently coil it as it moves along. Perhaps most important, the FilaWinder provides a guide arm to direct the filament back and forth across the reel as it spools up, to keep it evenly distributed. Swing by their Thingaverse page for a list of printable pieces and their assembly guide can be found here, as well as on YouTube. You can see an overview video of the FilaWinder winding away after the break.

Continue reading “The FilaWinder”

Iowa Forensics Opts For A CSI Style Hack To Save Their Budget

Stungun

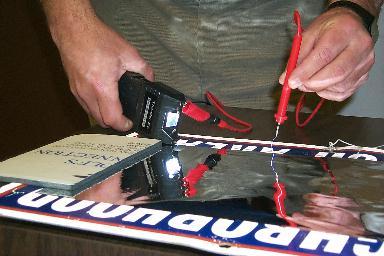
There’s a very effective way of lifting dusty fingerprints from the field, or in a lab. It’s called an Electrostatic Dust Print Lifter — but as you can imagine, it is rather expensive from a forensic supply store. [Bradley VanZee] — from the Iowa Division for International Association for Identification — realized how simple a tool it was, and made his own for just over $50.

But first, how does it work? Electrostatic print lifting is a non-destructive process where you develop an electrostatic field on a sheet of “lifting film” which attracts the dust particles to stick to the film. It’s capable of recovering impressions from both porous and non-porous surfaces — even ones not visible to the naked eye.

Commercial versions of the tool cost upwards of $600-$800 + lift film. The first hack they realized is that instead of using proprietary lift film, it is just as effective to use car window tint instead! The second hack is even more clever — using a 80,000V tazor, some electrical leads, and some tinfoil you can create your own version of the tool. The aluminum foil acts as a ground, and the object you are inspecting is sandwiched between it and the lifting film. Holding the tazor with one electrode to the foil, you can trace the film using the other electrode at a distance, which induces an electrostatic charge in the film, attracting and capturing the dusty fingerprints. Allow the static to discharge, and store the film in a safe place to be digitized later!

Now obviously this is only really effective for flat objects, but it’s still a brilliant hack — especially to save your budget!

[Thanks John!]

Automatically Sorting Beads By Color

beadsorter

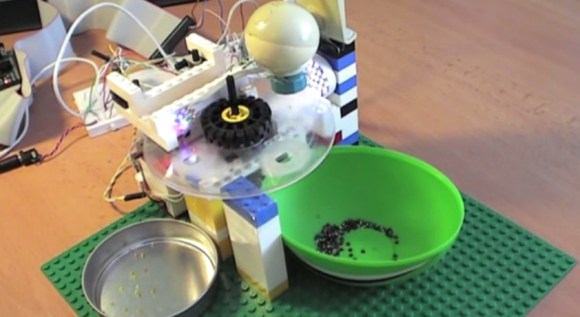
[Tomas] wanted to try building something mechanical with electronic control, and ended up with this sorter that organizes beads into one of two containers based on color. He built most of the structure from popular interlocking plastic bricks, then added a stepper motor salvaged from an old scanner and two plastic discs.

The two discs sit on top of each other. The bottom one is stationary and has two holes drilled in it, with a container sitting below each hole. The top disc has a smaller, bead-sized hole and rotates from its starting position—where it collects one bead—to a camera for analysis. After the camera determines the color of the bead, the disc rotates again to position itself over one of the two sorting holes in the disc below, and the bead falls into the awaiting container. The device is controlled by the MSP430 microcontroller on a FITKit (translated), which is the development platform of choice for [Tomas’s] school.

[Tomas] originally attempted to determine the color of beads by using 3 different color LEDs and a light-dependent resistor, but switched to using a webcam and a Java program to capture images and calculating average hues. You can find more details and the source code on his site, but first see the short video below.

Continue reading “Automatically Sorting Beads By Color”