Gesture Based Security Lock

1

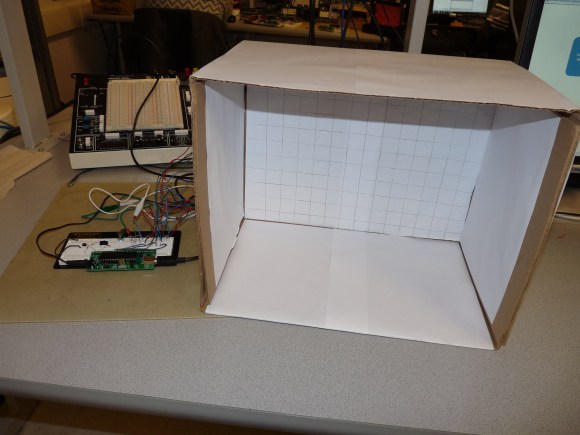
A team of students from Cornell University are looking into alternative ways of creating a security system that can be locked or unlocked by using physical gestures in an enclosed space.

It is the final year project for [Ankur], [Darshan] and [Saisrinivasan] in their MEng of Electrical and Computer Engineering. The system prototype is capable of recording a gesture and then comparing the gesture with future gestures to lock or unlock the system. Consider it like a secret handshake to get into the office!

To analyze the gesture they are using four SparkFun proximity sensors setup in a linear array to sense the distance a hand is moved. An ATMega1284P is used to convert the analog sensor signal to digital for further processing. The project is extremely well documented, as it appears to be the final report for the project.

A short video after the break shows off the prototype and gives a good explanation of how the system works.

Continue reading “Gesture Based Security Lock”

Un-crapifying A Car Stereo

11161323212

[Noah Farrington] has just accomplished a major milestone in his life, purchasing his first car! A glorious 2001 Ford Focus wagon. While it may be a fully loaded luxury vehicle, it is missing one thing poor [Noah] can’t live without. An aux-in port.

He had a few options for rectifying the situation. Live with it as is, hack the strange Ford media protocol out of the back, or fool the CD player into playing his input. Naturally he chose the third option.

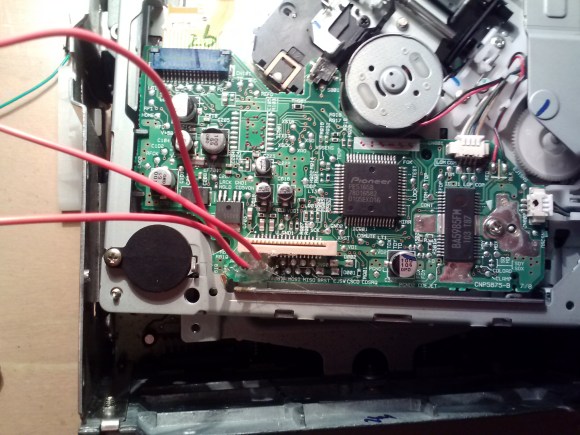
His first challenge was removing the deck from the car. People told him he’d have to buy fancy stereo removal tools — he made do with tent pegs and coat hangers. Using the same method as described in a past aux-in hack, he identified the audio in leads on the CD player’s ribbon cable. By carefully soldering in his own aux-in plug, he’s almost ready for business! Unfortunately, the CD player also needs to think that it is on for it to properly output the audio. [Noah] chose the simple solution — record a silent CD to always leave in the deck.

Stick around after the break to see it in action.

Continue reading “Un-crapifying A Car Stereo”

Controlling Ten Thousand RGB LEDs

RGB LEDs are awesome – especially the new, fancy ones with the WS2812 RGB LED driver. These LEDs can be individually controlled to display red, green, and blue, but interfacing them with a microcontroller or computer presents a problem: microcontrollers generally don’t have a whole lot of RAM to store an image, and devices with enough memory to do something really cool with these LEDs don’t have a real-time operating system or the ability to do the very precise timing these LEDs require.  [Sprite_tm] thought about this problem and came up with a great solution for controlling a whole lot of these WS2812 LEDs.

[Sprite] figured there was one device on the current lot of ARM/Linux boards that provides the extremely precise timing required to drive a large array of WS2812 LEDs: the video interface. Even though the video interface on these boards is digital, it’s possible to turn the 16-bit LCD interface on an oLinuXino Nano into something that simply spits out digital values very fast with a consistent timing. Just what a huge array of RGB pixels needs.

Using a Linux board to drive RGB pixels using the video output meant [Sprite_tm] needed video output. He’s running the latest Linux kernel, so he didn’t have the drivers to enable the video hardware. Not a problem for [Sprite], as he can just add a few files to define the 16-bit LCD interface and add the proper display mode.

[Sprite_tm] already taken an oscilloscope to his board while simulating 16 strips of 600 LEDs, and was able to get a frame rate of 30 fps. That’s nearly 10,000 LEDs controlled by a single €22/$30USD board.

Now the only obstacle for building a huge LED display is actually buying the RGB LED strips. A little back-of-the-envelope math tells us a 640×480 display would be about $50,000 in LEDs alone. Anyone know where we can get these LED strips cheap?

Continue reading “Controlling Ten Thousand RGB LEDs”

Fail Of The Week: AFSK Build Doomed By Rail Noise

fotw-afsk-rail-noise

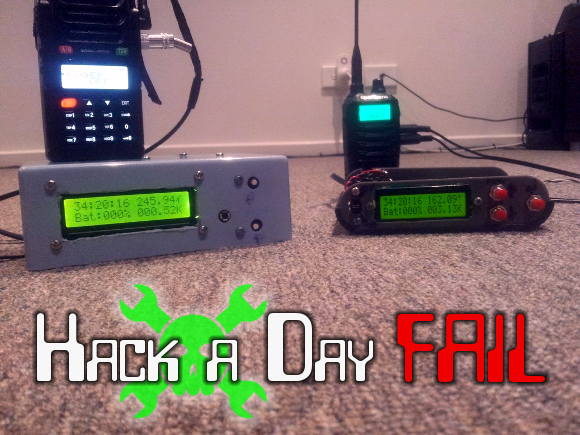
[Scott] and his buddies were having some fun with their handheld transmitters one day when they decided it was time to build some add-on hardware that could transmit and receive location data. They set their sights on a set of Audio Frequency Shift Keying units that could each encoded and decipher location from the counterpart.

The build got off to an easy start, centering around an Arduino board with a GPS module for capturing precise location data. Next it was time to implement AFSK. On the transmitting side this was done by bit banging the output pins. After a look at the resulting signals on an oscilloscope the team was able to tune the firmware for a pretty tight 1200 and 2200 Hz output. But trouble was brewing on the decoding side of the equation.

The first decoding attempt used the FreqMeasure library written by [Paul Stoffregen]. After no success they moved to a hardware solution in the form of the XR-2211 FSK Demodulator chip. It should have been simple, feed it the signals and read the digital output pins to capture the desired data. This is the point at which you need to click the project link at the top to soak in all of the gory details. Long story short, a noisy power rail was causing sporadic performance of this chip. By the time this issue was discovered interest had waned and the project was ditched as a failure. Was there a quick fix that could have salvaged it such as adding a filtering circuit for that chip? Let us know how you would get this back on track by leaving a comment below.

[Thanks Lewin]


2013-09-05-Hackaday-Fail-tips-tileFail of the Week is a Hackaday column which runs every Wednesday. Help keep the fun rolling by writing about your past failures and sending us a link to the story — or sending in links to fail write ups you find in your Internet travels.

QtLedTest – Software To Evaluate OLED Displays

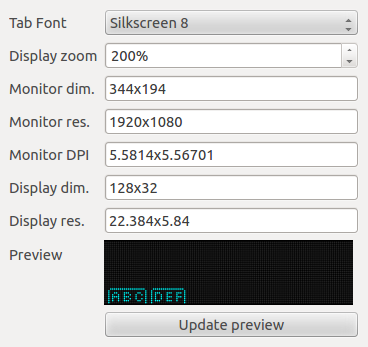
A few days ago we featured the USBPass, an offline password keeper made with very few components. At the end of our write-up we mentioned that [Josh] was already working on another version of his hardware, which involved adding an OLED screen to the platform. To help him pick one he created QtLedTest, a Qt-based tool that simulates different OLED displays and GUI layouts for them. Internally QtLedTest is composed of QLedMatrix (a widget that simulates LED matrices), an SSD1306 OLED controller simulator, a simple graphics drawing library and some functions to draw text on the simulated screen. [Josh] used Fontbuilder together with a program he made in order to convert fonts he had found on the internet to C files. All the source code [Josh] made can be found on Github and should be updated in coming weeks as the final program is a bit slow to render the simulated screens.

Once, Twice, Three Times A Nixie

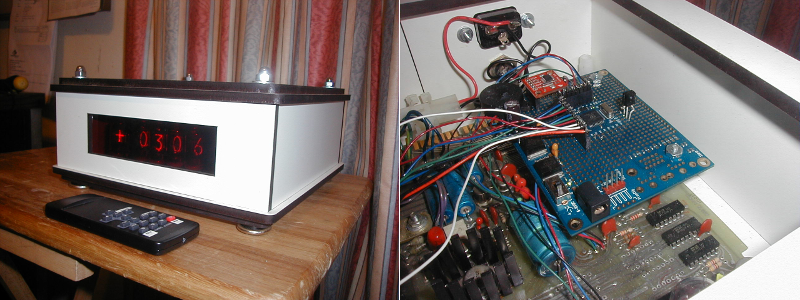
Try as he might, [Localroger] can’t seem to throw away a certain board that started life in one of the first digital industrial scales, the NCI DigiFlex model 5775. He recently gave it a third career as a nixie clock with an alarm.

[Localroger] says the board dates to about 1975. It’s all TTL, no microprocessor anywhere. He was headed to the Dumpster with it in the mid-1980s, but realized that he could hack it into something useful. Since the display wasn’t multiplexed, it would be fairly easy. He used it as a BCD tester for about 10 years until the method fell out of fashion.

After a decade on the shelf, [Localroger] started off for the Dumpster once more with the board. The nixie tube display cried out for another chance to glow, so he decided to repurpose it into a remote-controlled bedside clock with an alarm. He installed a Parallax Propeller Protoboard with headers for easy removal and subsequent servicing of the 5775 board. He added a few things to the protoboard: a piezo element for the alarm, a SparkFun RTC module, an IR receiver, and vertically-oriented header so the PropPlug can be plugged in from the top. But that’s not all. [Localroger] designed a custom melamine-finished MDF enclosure and laser cut it, giving the edges a nice contrast. It’s so tough, he can put his ceramic lamp on top of it to save space on the nightstand.

Nixie tubes are becoming more scarce all the time. If you can’t find any, we humbly suggest rolling your own.

[Thanks Localroger!]

Glowing Balloon Blimps

_B093896

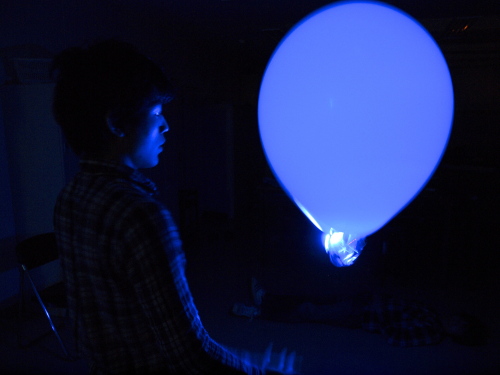
Looking for a neat decoration for your next soirée? How about floating fleet of glowing balloon blimps?

[Kensho Miyoshi] — an avid reader of Hack a Day — needed an art installation project in Tokyo, he came up with these clever glowing balloon blimps.

They feature a mini gondola hanging from the bottom of a regular balloon which holds a small motor with a propeller, an Arduino Pro Mini, LEDs, an ultrasonic sensor and of course, a battery. They float up to a certain height with the LEDs shining bright, and when the ultrasonic sensor trips, it all turns off and the balloon sinks gently back to the ground. The process repeats, and in a completely dark room it looks like a series of glowing bubbles forming and floating away, again and again.

To see the floaty, glowy, balloon blimps, stick around for a video after the break.

Continue reading “Glowing Balloon Blimps”