Hackaday Links: January 19, 2014

hackaday-links-chain

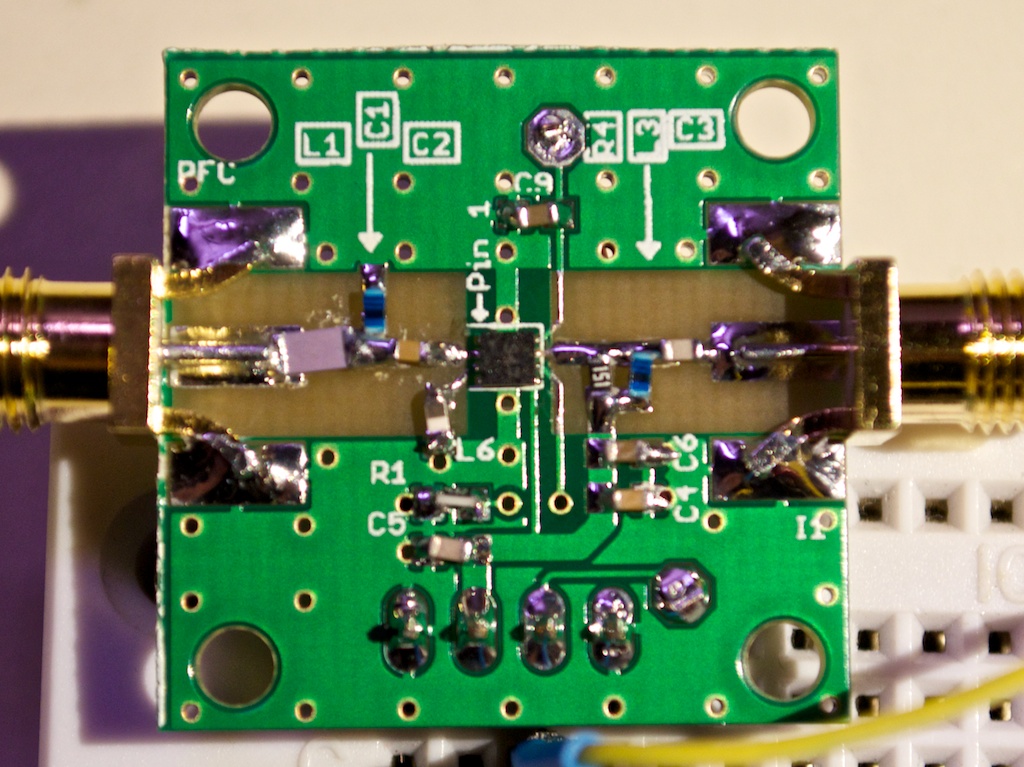
[Nick] wrote in to tell us about his first blog post. He’s showing off a PWM LED driver he build around a 555 timer. This project uses a lot of basics; some 555 experience, PCB etching, and surface mount soldering. We’d like to know more about the blue substrate on his circuit board!

After seeing the BOM spreadsheet with KiCAD integration a couple of weeks back, [Vassilis] sent in a link to his own Excel-based Bill of Materials helper. We’re wondering if anyone has a similar tool that will work with Open Office?

While we’re on the topic of downloadable documents, here’s a reference PDF for all types of DC measurements. The collection is a free offering from Keithley. [Thanks Buddy]

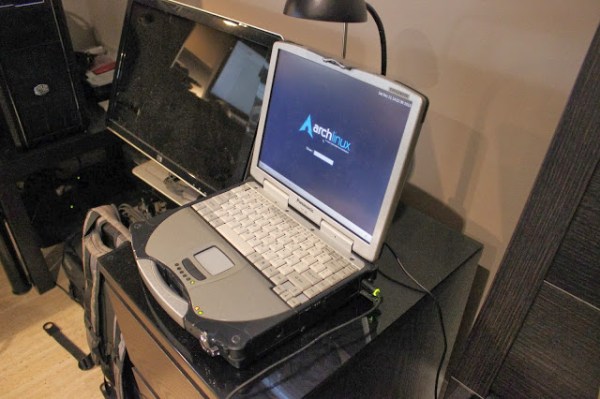
Since you’re brushing up on your knowledge you may also be interested in a free online microcontroller course offered by UT Austin. They’re targeting the Tiva C Launchpad as the dev board for the class.

This website seems to be a little creepy, but the teardrop shaped 3D printed music box which is being shown off is actually rather neat.

Hackaday Alum [Phil Burgess] threw together a point and shoot camera for Adafruit. It’s a Raspberry Pi, camera board, touchscreen display, and USB battery all rubber banded together. The processing power of the RPi is used to add image processing effects which are shown off in the demo video.

We don’t own a DeLorean. If we did, we’d probably follow the lead of Queen’s University Belfast and turn it into and electric vehicle. [Thanks Jake]

The 3D photocopiers are coming. Here’s a hacked together proof-of-concept from [Marcelo Ruiz]. After laser scanning the part is milled from floral foam.


Making A 20dB Low Noise Amplifier For A 400MHz Radio

[Will] recently tipped us about a 400MHz Low Noise Amplifier (LNA) module he made. His detailed write-up starts by explaining the theory behind an amplifying chain. Assuming a 50 Ohm antenna system receives a -70dBm signal, the total peak to peak voltage would be less than 200uV (.0002 volts). If the first amplifying stage doesn’t consist of an LNA, then the added noise would later be amplified by the other elements of your system.

[Will] then detailed how he picked his LNA on Digikey, mainly by looking for one that had a less than 1dB Noise Figure. His final choice was the Sky65047: a small budget-priced 0.4-3.0GHz low noise amplifier with a theoretical gain of 20dB at 400MHz. He made the PCB you can see in the picture above, removing the soldermask on the signal path in order to lower the permitivity. Because of a few mistakes present in the application note, it took [Will] quite a while to get his platform up and running with a 20dB gain but a 4.5dB NF. He also measured the input return loss using a directional coupler, which ended up being quite close to the datasheet’s 14dB number.

Dallas Makerspace Tour

[Paul] sent us this video tour of the Dallas Makerspace made by member [Andrew Floyd], who walks us around and provides narration for a very impressive space. Once inside the 6000 sq ft facility, he takes us past the entrance lounge and into the electronics room, which has more electronics component storage than visible wall space, and down the hall to show off some laser-cut and 3d-printed creations.

Every makerspace has its specialties, and the Dallas gang shows off their awesome darkroom (complete with creepy, lurking Nic Cage) and blacksmith/forge work areas. They even have bi-weekly blacksmithing classes from a local master blacksmith. The space has since expanded, conquering their next-door-neighbors to expand project storage, add a biolab, a second classroom, a conference room, and more.

Enjoy the video after the break, and then head over to their website for more info: dallasmakerspace.org.

Continue reading “Dallas Makerspace Tour”

Three Axis Position Indicator With Digital Calipers

[Malte] just finished a little project for his Wabeco F1200 milling machine: a compact external display for three digital sliding calipers (Translated from German). As you may have already guessed, [Malte] was lucky enough to be able to fit disassembled calipers onto the machine and use them for positioning. Before embarking on this adventure, he noticed that there were similar projects present on the internet, but all of the calipers used had different data interfaces and protocols. The calipers that [Malte] bought have a mini USB connector, even though the interface itself isn’t USB. As he couldn’t find any information on that interface, he turned to his oscilloscope to decode the protocol.

[Malte] then built an AVR-based platform that reads out the three calipers and shows the position data on the dot matrix LCD shown above. The AVR firmware is written in a mixture of Basic and assembler language. The source code, schematics, and other resources can be downloaded from the project’s web page. We are impressed on the professional aspect of the final result.

Continue reading “Three Axis Position Indicator With Digital Calipers”

Reviving A Stubborn Laptop Battery

We’ve all gotten bored of certain toys and left them on the shelf for months on end. But what do you do when this prolonged period kills the batteries? Well if you’re [Andrew] you take apart the battery pack and bring it back to life!

[Andrew] picked up one of those Panasonic Toughbooks awhile back and although it’s hardly a top of the line laptop specs-wise, it does have some pretty cool features: it’s shock-proof, splash-proof, and extreme-temperature-proof. It even had a touch screen before touchscreens were cool. Despite its durability, however, the laptop was left to sit for a bit too long, and the battery pack no longer accepted a charge.

[Andrew] quickly disassembled the battery pack and began measuring the cells with his trusty multimeter, assuming just one cell had gone bad. Curiously though, no cells reported 0V. What he did find was that each cell and sub-pack reported 2.95V, which is 0.05V below the “safe operating limits” of typical lithium ion cells. Continue reading “Reviving A Stubborn Laptop Battery”

An Elegant Kegerator For Less Than $100

keg

Looking for a fun weekend project? How about making your very own kegerator for about $100? Well, minus the keg of course.

First you’ll need a run of the mill mini-bar fridge. These can be had for free if you prowl student neighborhoods at the end of a semester; it’s amazing what you can find being thrown out. Next you’ll have to modify it a bit: remove the shelving and pop a hole in the top. The trickiest part is building the top out of wood, although [jypuckett] shows us that it’s really not that difficult, and wood stain is your friend!

The most expensive part of the build is probably going to be the fittings, hoses, and tap, but that’s a small price to pay for your very own kegerator.

While it’s not quite as fancy as this over-engineered kegerator, the six-tap freezer chest kegerator, or as vintage as this 1950’s General Electric fridge kegerator, it is a great example of making one for cheap, that works, and looks good.

It also raises the question: if it’s this easy to make, why haven’t you made one yet?!

The Tiniest SD Card Locker

sdlocker-tiny

In case you weren’t aware, that little ‘write protect’ switch on your SD cards probably doesn’t do anything. It’s only a switch, really, and if an SD card reader doesn’t bother to send that signal to your computer, it’s completely ineffective. Then there’s the question of your OS actually doing something with that write protect signal.

The better way to go about write protecting an SD card is using the TMP_WRITE_PROTECT bit on the SD card’s controller. [Nephiel] came up with an amazingly small device to set that bit, with the entire circuit fitting inside an old Playstation memory card.

[Nephiel] based his project on [Karl Lunt]’s SD Card Locker we saw late last year. [Karl]’s SD Locker uses an ATMega328 microcontroller, a pair of AA batteries, and an SD card socket to perform the bit toggling. This is still a very small device that fits inside an Altoids tin, but [Nephiel] thought he could make it smaller.

The new and improved version uses an ATTiny85 for SPI access to the SD card. A single button and LED serves as the user interface: with the LED off, the SD card is writable. Press the button, the card is locked, and the LED lights up.