Embeded Sieve Of Eratosthenes: Hunting Primes On ARM

Embeded Sieve of Eratosthenes

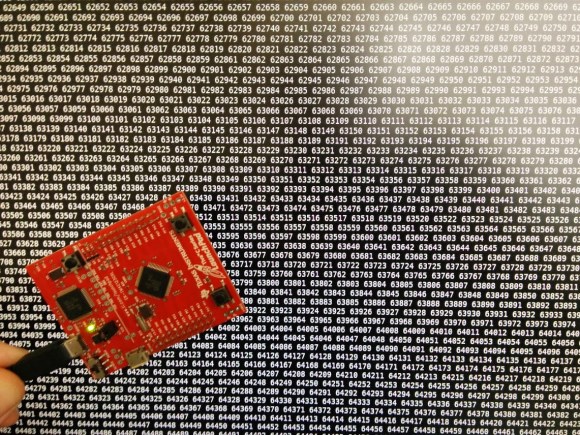
I ended up with just enough time over the weekend to pull together a quick project. I implemented the Sieve-of-Eratosthenes on an ARM chip.

If you haven’t heard of the Sieve of Eratosthenes then you really need to work your way through Project Euler. That’s where I first learned about this method of finding prime numbers. You begin with a list of all numbers, find a prime, then remove all multiples of that prime from the list. The real trick with doing it on a microcontroller is to figure out how to store a large list of numbers in a limited space. The gist of my method was to use a boolean array (I call it a bit-packed array but that may be the wrong way of saying it). The details are found in my project linked at the top.

‘Why?’ is almost always the wrong question to ask around here. But in this case, I did this because I wanted to try out the Bit Banding functionality of the ARM core. These chips have alias addresses that map to a single bit in the SRAM and also some of the peripheral registers. This allows read or write access for a single bit using a single instruction. Turns out that one side effect of 32-bit architecture is having addresses to burn.

Mechanical Iris Will Make You Want A Laser Cutter Even More

Mechanical irises are very intricately designed mechanisms that are mesmerizing to see in action — and if you have a laser cutter, you could make one in less than 10 minutes.

Our “Teacher of Science”, Instructables’ user [NTT] has revised a previous Instructables design on a mechanical iris to improve it. The original design used three layers of components and dowel pins for every joint. What [NTT] has done is reduced this to two layers, and eliminated half of the pins required by designing clever circular cutouts. The result is a very slick mechanical iris that is very easy and quick to build — provided you have the tools.

Stick around to see the original iris open and close — unfortunately there’s no video of the new design — but we think you can imagine the differences.

Continue reading “Mechanical Iris Will Make You Want A Laser Cutter Even More”

Monitoring Your Gas Consumption With A JeeNode And A NRF24L01+

[Sven337] just blogged about a gas consumption monitoring setup he finished not long ago. As his gas meter was located outside his apartment and nowhere near any electrical outlet, a battery-powered platform that could wirelessly send the current consumption data to his Raspberry Pi was required. His final solution therefore consists of a JeeNode coupled with the well known nRF24L01+ wireless transmitter, powered by 3 supposedly dead alkaline batteries.

[Sven337] carefully looked at the different techniques available to read the data from his meter. At first he had thought of using a reflective sensor to detect the number 6 which (in France at least) is designed to reflect light very well. He then finally settled for a magnetic based solution, as the Actaris G4 gas meter has a small depression intended for magnetic sensors. The PCB you see in the picture above therefore has a reed sensor and a debug LED. The four wires go to a plastic enclosure containing the JeeNode, a couple of LEDs and a reset switch. Using another nRF24L01, the Raspberry Pi finally receives the pulse count and reports it to an eeePC which takes care of the storage and graphing.

Humble Beginnings Of A Pick And Place Machine

beginnings

[Pete’s] invented a product called an AIR Patch Cable designed to interface with an airplane’s intercom, and is looking to manufacture and assemble them himself — unfortunately, the circuit boards are tiny, and SMD components aren’t exactly the easiest to install. So he decided to build a pick and place machine to do it for him!

It’s not finished yet, but [Pete] has reached a major milestone — he’s finished the base CNC machine aspect of it. He opted for a kit build for the major mechanical components, the Shapeoko 2 — its a solid design and if you decided to make something from scratch it’d probably cost much more and take a lot longer.

From there he began selecting his electronics individually. He’s chosen the Big Easy Driver by Sparkfun to control his stepper motors, which supports a maximum size of NEMA 17 steppers, so he bought five of those too. To control it all, he’s using LinuxCNC which is an excellent choice — and if you’re not crazy about Linux, you can actually download Ubuntu 10.04 with LinuxCNC pre-installed for you to make it super easy — you’ll just need an old dedicated PC to use.

Continue reading “Humble Beginnings Of A Pick And Place Machine”

Hackaday Links: March 23, 2014

hackaday-links-chain

[Jack] sent us a link to a Metropolitan Museum of Art video showing off a mechanized desk that plays music and has a ton of hidden compartments. Furniture makers of yore built hidden compartments in furniture all the time. After all, there weren’t credit cards back in the day and you had to keep important documents, cash, and everything else on hand. What strikes us is that this mates woodworking of the highest caliber with precision mechanics.

Before you get rid of that old box spring, ask yourself if you need to store dimensional goods. If you rip off the outer fabric, the network of wire inside makes a reasonable lumber rack.

And since we’re talking trash, we enjoyed seeing this water bottle wire spool minder which [Daniel] sent our way.

You know those portable DVD players you can hang from a headrest to entertain the kids on long trips? Well [John’s] broke, and like chasing the dragon, once you’re hooked on watching videos during car trips there’s no going back. Luckily he was able to throw a Raspberry Pi at the problem. He now has a portable OpenElec XBMC device controlled via a smartphone.

[Jaromir] posted some breakout board footprints that you can use. It’s not the footprints that impress us, but the idea of using them to fill up board space when spinning a new PCB. [Thanks Sarah]

LEGO Gachapon. Need we say more? Okay, truth be told we had to look it up too; Wikipedia says it’s spelled Gashapon. These are coin-operated machines that dispense toys inside of plastic capsules. This one’s made of LEGO and it’s awesome.

[Mikhail] actually built his own ballast resistors for some HeNe laser tubes. This is a bit easier than it might sound at first, as they are much lower power than the tubes used in cutters. But none-the-less an interesting, and successful, experiment.

This Machine Sucks Balls

The best career choice anyone could ever make – aside from the richest astronaut to ever win the Super Bowl – is the designer of the kinetic art installations found in science centers that roll billiard balls along tracks, around loops, and through conveyors in a perpetual display of physics and mechanics. [Niklas Roy] isn’t quite at that level yet, but he has come up with a new twist on an old idea: a machine that literally sucks balls from a ball pit into transparent tubes, sending them whizzing around the installation space.

The installation consists of eighty meters of plastic tubing suspended in the staircase of Potocki Palace in Kraków. Electronically, the installation is extremely simple; a PIR sensor turns on a vacuum cleaner whenever someone is in the ball pit. This sucks balls up through a hose, around the space, and into a bin suspended over the pit. Pull a lever, and the balls stored in the bin are dispensed onto the person vacuuming up thousands of balls below.

Image source, with video below.

Continue reading “This Machine Sucks Balls”

Say Watt? A Talking Multimeter?

talkingMultimeter

After a request from one of his friends, [Mastro Gippo] managed to put together a talking multimeter to be used by blind persons working in electronics. He wanted a feature-rich meter that had serial output, and recalling this Hackaday article from a few years back led him to find a DT-4000ZC on eBay, which has serial output on a 3.5mm jack. (Though, he actually recommends this knockoff version which comes with excellent documentation).

It turns out there aren’t many talking meter options available other than this expensive one and a couple of discontinued alternatives. [Mastro Gippo] needed to start from scratch with the voice synthesizer, which proved to be as easy as recording a bunch of numbers and packing them onto an SD card to be read by an Arduino running the SimpleSDAudio library.

He found a small, battery-powered external speaker used for rocking out with music on cell phones and hooked it up to the build, stuffing all the electronics into an aluminum case. Stick around after the jump for a quick video of the finished product!

Continue reading “Say Watt? A Talking Multimeter?”