Ask Hackaday: Wiping Your Bum With An Arduino?

TP

Over or under? Standing or sitting? Truly, toilet paper has been the focus of the most irreconcilable arguments ever. The folks on the Arduino Stack Exchange have a far more important question: how do you trigger an alarm when your TP supply is low?

[user706837] asked the Internet this question in response to his kids never replacing an empty roll. This eliminates the most obvious means of notifying someone of an empty roll – looking at it before you sit down – and brings up a few interesting engineering challenges.

Most of the initial ideas deal with weight or some sort of light sensor that can differentiate between the white TP and the brown roll. A much, much more interesting solution puts a radioactive source in the TP holder’s spring-loaded rod and uses a sensor to detect how much TP is left. A quick back-of-the-wolfram calculation suggests this might be possible, and amazingly, not too dangerous.

We’re turning this one over to you, Hackaday readers. How would you design an empty toilet paper alarm? Bonus points awarded for ingenuity and cat resistance.

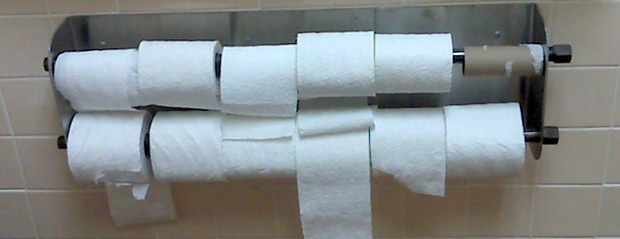
Image source, and also one of the longest and most absurd Wikipedia articles ever.

Fetching Etchings For Stainless Steel

What do you do when you have a 10-gallon brew kettle (or any other stainless steel or aluminium thing) with no volume markings (or Hack a Day logos)? If you’re [Itsgus], you use science to etch some markings with a few household items and a 9V and you call it a day.

[Itsgus] used 1/4c vinegar and 1/4tsp of salt to form an electro-etchant and applied it with a Q-tip connected to the negative terminal of a 9V. He used tape to connect a wire between the positive terminal and the kettle. The vinegar dissolves the salt, creating negatively charged ions. Connected correctly to a 9V, the process removes metal where the current flows. If you were to connect it in reverse,  you would add a small amount of metal.

The process only takes a few seconds. When the etchant starts to sizzle and bubble, Bob’s your uncle. Even though the stainless steel’s natural coat re-oxidizes over the etches, you should probably wash that thing before you brew. If you prefer adding metal to removing it, try electroplating copper on the cheap.

Another Awesome Electronics Lab In A Box

541522_563430640341406_263300971_n

We called, and [Brian Zweerink] answered! Here’s another awesome example of making an electronics lab in a box!

But first off, who the heck is [Brian Zweerink]? He’s a fellow who helped us win the Redbull Creation Challenge of 2012 by building and programming the circuits for The Minotaur’s Revenge Dueling Labyrinths! We really need to do stuff like that again… What do you guys think?

Anyway, back to the hack. [Brian’s] version of the Make Your Electronics Lab in a Box, is similar, but also unique. What we like about his version is the electrical outlets inside the box for plugging in tools, the super-handy-stash-away-magnifying-lamp, and the size of his box; lots of room for storing components up on the top shelf! The only thing he’s missing is his oscilloscope, which was a bit too deep for the box, so it had to stay separate.

What do you guys think?

[via Reddit]

Vintage Vertical Nixie Clock

verticalNixieClock

There’s no shortage of Nixie-related projects online, but this vertical wall clock is a solid build and looks pretty sleek. [andreas] actually sourced the wood from an old handrail, into which he drilled six holes for the tubes with 30mm bits, then treated it with some woodworm poison after noticing holes his drill wasn’t responsible for.

The schematic is what you’d expect for a Nixie clock, designed with 123D circuits. [andreas] provides both top and bottom layers in a high-res PDF if you’d prefer to etch your own boards at home rather than order a PCB from the man. He took the finished board and soldered all the components in place, using tape to prevent some short circuit possibilities and mounting the result onto a pair of black plastic rails. The entire assembly mounts to the wooden case and is rounded off with glued-on end caps and a back cover. As always, be aware of the danger presented by the high voltage requirements of Nixie Tubes, and don’t go licking the components.

A Cocktail Shaker With Android And Arduino

drinks

The most rewarding part of any project must be sitting down to see the fruits of your labors set in action for the first time and relaxing with a nice drink. [Tony DiCola] is really showing off his ability to think ahead, because his smart cocktail shaker takes care of the post-build celebration, measuring out drinks with exacting precision.

The build measures out precise amounts of any liquid with the help of a small electronic scale [Tony] picked up from Harbor Freight. Instead of trying to interface with the electronics in the scale, he instead connected a INA125 instrument amplifier to the load cell. An Arduino micro measures the weight on the load cell, and with the known densities of gin, vermouth, and Kahlua, [Tony] can get a very good idea of how much liquid is in the cocktail shaker.

The really neat part of this build is the interface: [Tony] wrote an Android app for his tablet that talks to the Arduino with an Adafruit Bluefruit Bluetooth adapter. The app receives the current weight on the load cell, displays the current amount of liquor in the cocktail shaker, and provides step-by-step instructions for making any cocktail.

It’s a handy little device to keep around the liquor cabinet, and with an absurd amount of pumps and valves could easily become the basis for a very cool cocktail bot.

Continue reading “A Cocktail Shaker With Android And Arduino”

Automated Phone Cracker/App Tester Steps It Up A Notch

delta bot cracks your passwords

Delta robots like this automated phone tester are awesome: high speed, accuracy, and mesmerizing to watch. [Justin Engler], a security researcher from ISEC Partners (also speaks at DEFCON on occasion) needed a robot to help with repetitive testing. He contacted the folks over at Marginally Clever to see if they could help him out, and they came up with this slick delta robot.

Normally they build these robots out of plywood, but [Justin] requested a bit more of a modern look, and although it looks blue, it’s actually clear acrylic: they haven’t removed the protective film yet.  The robot is quite functional, but [Justin] plans on upgrading it in the future to increase the top speed. It currently has a built-in camera, using OpenCV to watch the log-in screen as it tries every combination as quickly as possible.

Stick around to see it in action!

Continue reading “Automated Phone Cracker/App Tester Steps It Up A Notch”

The Tannin DIY MIDI Controller

tannin-ctlr

[Shantea] needed a DJ controller. While there are commercial controllers out there, none of them fit what he was looking for. He solved the problem by building the Tannin DIY MIDI controller. Tannin features 19 buttons, 16 potentiometers, and 4 LEDs. Buttons can send different MIDI messages for short presses and long presses. Pots can send 6 note on/off messages as well as MIDI control messages depending on their position. The LEDs blink in beat with the MIDI in clock. Everything is programmable and can be mapped thousands of different ways. The heart of the system is an Arduino Nano. [Shantea] used the hairless-midi library to convert MIDI to serial. The Arduino interfaces to a PC via serial over USB. On the host PC side, he ran loopbe30 to create a virtual MIDI cable to Traktor, his DJ software.

We love a build that looks just as good on the inside as on the outside, and Tannin doesn’t fail to impress in this respect. The frame is MDF, and the control panel is laser etched plastic on 3mm of Plexiglass. We really like Tannin’s flavone flair. Inside the case, wiring is kept organized and neat by zip ties and strips of wood below the button grid. [Shantea] had some noise issues connecting pots to flying wires, so he used a custom printed circuit board with a ground plane to gang the pots into 2 banks of 8. The results are something any controllerist would be proud of. Click past the break to see Tannin in action.

Continue reading “The Tannin DIY MIDI Controller”