Fixing Apple TV’s Terrible UI

IR

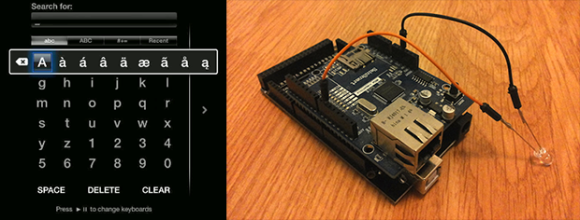
Despite Apple’s unfailing dedication to UI, they still sometimes manage to put out some stinkers. The latest of these is the ‘keyboard’ for the search interface in the Apple TV. It’s an alphabetical keyboard, laid out in a square with the obvious frustration that goes along with that terrible idea. [Lasse] was frustrated with this design and realized searching anything with the Apple TV IR remote is a pain. His solution was to build his own version of the Apple TV remote with a web interface, powered by an Arduino.

Inspired by the Apple Remote Arduino Shield we featured a few years ago, [Lasse] stuck an IR LED int the pins of Arduino with an Ethernet shield, current limiting resistors be damned. The web UI is the innovative part of this build. He’s hosting a simple website on the Arduino that allows him to type – with a real keyboard – a search query into the website, and have the Arduino take care of moving the Apple TV cursor around to select each letter.

The web UI has all the features found on the Apple TV remote, including the swipe gestures, and has a really slick brushed metal texture to boot. You can check out the video of [Lasse]’s project typing text into an Apple TV hilariously fast below.

Continue reading “Fixing Apple TV’s Terrible UI”

A 7″ Touchscreen TV Remote Control From Scratch

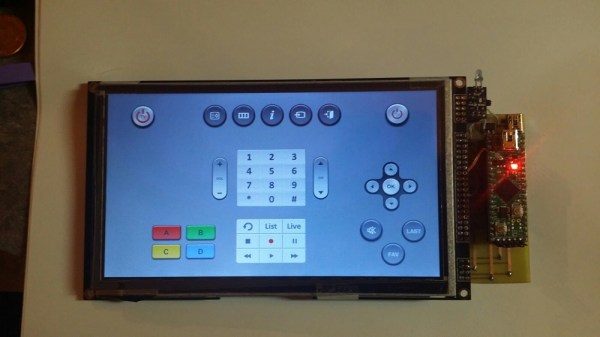
[Jason] always wanted a touchscreen TV remote control. He could have pressed an older Android tablet into service, but he wanted to roll his own system. [Jason] gathered the parts, and is in the process of building his own 7″ touchscreen setup. He started with a 7″ LCD capacitive touchscreen. He ordered his display from buy-display.com, a Far East vendor.

[Jason’s] particular display model comes mounted on a PCB which includes controllers for the display and touchscreen, as well as some memory and glue logic. The LCD controller board has quite a few jumpers to support multiple interfaces and options. While the documentation for the display was decent, [Jason] did find a few errors. After getting in touch with tech support at buy-display, he wrote a simple application which determines which jumpers to set depending on which hardware interfaces are selected from drop down lists.

With the LCD sorted, [Jason] still needed a processor. He selected the venerable Microchip PIC32MX series. This decision allowed him to use a Fubarino for the early prototypes, before switching to his own board as the system matured. [Jason] was able to get a simple GUI up and running, with standard remote buttons to control his TV and cable box. Code is on his Github repository.

[Jason’s] most recent work has centered on cutting the cord. He’s switched over from DC power to a 2600 mAh LiPo battery. Click past the break to see [Jason] test out his fully wireless work in progress.

Continue reading “A 7″ Touchscreen TV Remote Control From Scratch”

Smart Microwave Shows You How It’s Done

xlarge

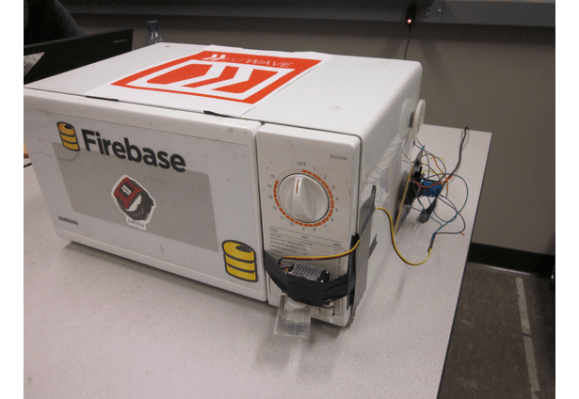
Do you still have technical difficulties with your microwave? Never know how long to put that half eaten hot-pocket in for? With the nextWAVE (trademark pending) you don’t need to know! Simply scan the bar code and let the nextWave do its thing — wirelessly!

[Kashev Dalmia], [Dario Aranguiz], [Brady Salz] and [Ahmed Suhyl] just competed in the HackIllinois Hackathon 2014, and their project was this awesome smart microwave. It uses a Spark Core Microcontroller to control the microwave and communicate wirelessly over Wi-Fi. They’ve developed an Android app to allow you to scan bar codes, which are then looked up in a Firebase Database to determine the optimum (crowd sourced) cook time. To make it easy for anyone to use, an app link NFC tag is placed on the microwave for easy installation.

It even automatically opens the door when it’s done — and plays Funky Town! Oh and it also has a Pebble app to show you the time remaining on your food. We think this Raspberry Pi microwave might give it a run for its money though…

Continue reading “Smart Microwave Shows You How It’s Done”

Electric Imp Locks And Unlocks Your Door Automatically

2013-11-19 14.23.18

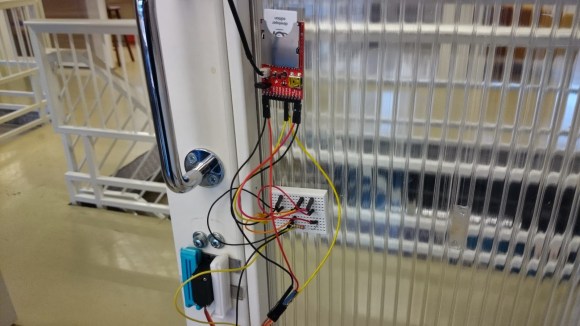
When the folks over at PinMeTo moved into a new office, they were dismayed to find out an extra key would run them a whopping 500 sek (~$75 USD). Instead, they decided to build their own automatic door lock using the Electric Imp system.

If you’re not familiar, the Electric Imp is a small SD card designed to provide internet (Wi-Fi) functionality to consumer devices. While it looks like an SD card, you cannot just plug it into any SD card slot and expect it to work — it still needs a prototyping board. We’ve seen it used to make a wireless thermal printer, or even make a tweeting cat door to let you know of any feline intruders!

Anyway — back to the hack. To move the lock cylinder they’re using a basic RC servo connected directly to the Imp. A flex sensor is installed on the side of the door over-top the lock — this provides feedback to the Imp whether or not the door is in fact locked. The Imp then communicates to Everymote to allow for keypad access from your mobile phone.

It probably ended up costing more in time and money than a new key, but hey, it looks like it was a fun project to do!

MountainBeest – A Theo Jansen Creature Comes Alive In My Garage

About a year ago, a member of my family sent me a video featuring [Theo Jansen’s] StrandBeest, knowing that I was interested in all kinds of wacky and hackish inventions. My initial reaction was something to the effect of “wow that’s a neat device, but that guy is a little crazy.” For better or worse, the idea that this was an incredible invention turned over in my head for some time. Eventually, I decided that I needed to build one myself.  Apparently I’m a little crazy as well.

Theo’s original beest runs on a complicated linkage system powered by wind. He was nice enough to publish the linkage lengths or “eleven holy numbers,” as he calls him at the bottom of this page. He doesn’t, however, really explain how the connections on his PVC power transmission system work, so I was left to try to figure it out from his videos.  As you’ll see from build details and video to follow, this isn’t trivial. Keep reading past the jump to learn the adversity that I encountered, and how it was overcome in the end.

Continue reading “MountainBeest – A Theo Jansen Creature Comes Alive In My Garage”

Steering Sound With Phased Array

entiresystem

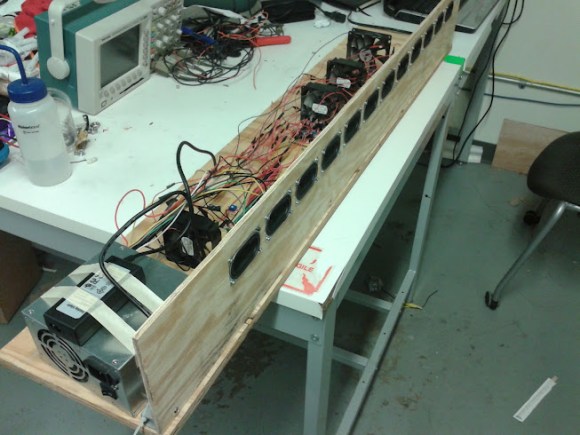
[Edward] and [Tom] managed to build an actual phased array speaker system capable of steering sound around a room. Powered by an Atmega 644, this impressive final project uses 12 independently controllable speakers that each have a variable delay. By adjusting the delay at precise intervals, the angle of maximum intensity of the output wave can be shifted, there by “steering” the sound.

Phased arrays are usually associated with EM applications, such as radar. But the same principles can be applied to sound waveforms. The math is a little scary, but we’ll walk you through only what you need to know in case you’re ever in need to steer sound with a speaker and a servo phased array sound system.

Continue reading “Steering Sound With Phased Array”

Bare-metal Programming On The Teensy 3

Teensy

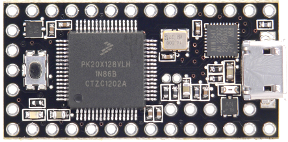
The Teensy 3.x series of boards are amazing pieces of work, with a tiny, breadboard-friendly footprint, an improbable number of IO pins, and a powerful processor, all for under $20. [Karl Lunt] loves nearly all the features of the Teensy 3, except for one: the Arduino IDE. Yes, the most terrible, most popular IDE in existence. To fix this problem, [Karl] set up a bare-metal development environment, and lucky us, he’s chosen to share it with us.

[Karl] is using CodeBench Lite for the compiler, linker, assembler, and all that other GCC fun, but the CodeSourcery suite doesn’t have an IDE. Visual Studio 2008 Express is [Karl]’s environment of choice, but just about every other IDE out there will do the same job. Of course a make utility will be needed, and grabbing the docs for the Freescale K20 microcontroller wouldn’t be a bad idea, either.

The end result is [Karl] being able to develop for the Teensy 3.X with the IDE of his choice. He was able to quickly set up a ‘blink a LED’ program with the new toolchain, although uploading the files to the Teensy does require the Teensy Loader app.