This Useless Machine Now Plays With Fire

The Useless Machine, Candle Edition

Useless machines are a lot of fun, if not just a little overdone. Looking for a new twist, [bd594] decided to try making one that integrates a candle — it works quite well!

While not quite as impressive as some of [bd594’s] previous projects, like his rendition of Bohemian Rhapsody on old school computer equipment, we like how he used regular DC motors in this design, instead of servos (the easy way).

A PICAXE14M2 microcontroller controls the H-Bridge responsible for the geared DC motors (taken from a Mac floppy drive), and a light sensor checks for the flame. He’s also made use of some NPN transistors to invert some logic levels to show you if you’re running low on I/O pins, its always possible to incorporate some other discrete components like a transistor to achieve your design.

Among others, some great alternative spins on the “useless machine” include the moody useless machine, an even more useless machine (featuring 8 switches!), a pull-string version, and even a rather ridiculous elevator button pressing useless machine!

Stick around to see this one put out the candle (Caution: Very exciting).

Continue reading “This Useless Machine Now Plays With Fire”

Knitted Circuit Board Lends Flexibility To E-Textiles

What could be better than sewing a circuit into wearable fabric? How about rolling your own circuit-ready knits? Chicago-based artist and assistant professor [Jesse] has done just that by perfecting a method for knitting solderable circuit boards.

This can be done by hand or with a knitting machine. The basic idea is that 2-3 strands of 34-36AWG bus wire are knitted into mercerized cotton yarn in rows, mimicking a piece of stripboard. Once the knitting is blocked and the component layout chosen, the floating bus wire strands between the rows are cut as you would cut unneeded stripboard traces. When it’s all done, [Jesse] used iron-on backing to protect her skin from scratches and lead transfer.

Her tutorial covers a simple LED circuit with a battery and a sliding switch, though she describes in detail how this can be expanded for more complex circuitry and offers good suggestions for working with different components. She also advocates feeding the bus wire from a spool rack to maintain tension and recommends stretching a piece of nylon stocking over the spool to keep it from unfurling all over the place.

This is the most aesthetically appealing e-textile work we’ve seen since this electro-embroidery piece or this blinky LED necklace, and it’s fascinating to watch the e-textile world unfold. Watch [Jesse]’s short videos after the break where she demonstrates a simple blinky knit as well as a lovely pulsing heart collar.

Continue reading “Knitted Circuit Board Lends Flexibility To E-Textiles”

Miter Saw Stop Saves Time And Aggravation

V Wheel Adjustable Miter Saw Stop

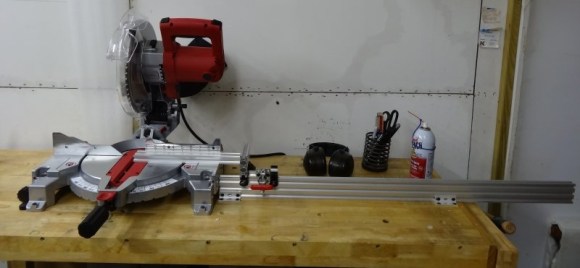
Miter saws are great tools for cutting pieces of wood at a variety of angles. If you have ever cut a really long piece on a miter saw there is no doubt you’ve either propped up the extended end on a pile of scrap wood or asked someone to hold the dangling piece so you could get an accurate cut. Doing either is a little hokey and is a general pain in the butt.

[Kram242] started a project that could eliminate these problems and also provides a solution to consistent length cuts of multiple pieces. It’s an adjustable stop that is sure to make miter saw cuts much less annoying.

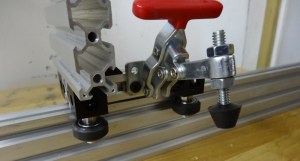
The rig is extremely simple and consists of a piece of aluminum extrusion, v-wheel carriage and lever-actuated clamp. The movable carriage lets the operator quickly position the stop to ensure the wood is cut at the appropriate location. This stop also makes it easy to cut several pieces of wood to the exact same length.

If we had to make any suggestions for improvements it would be to add supports to the carriage that emulate the saw bed and backstop as well as an adhesive measuring tape guide.

V Wheel Adjustable Miter Saw Stop

Oculus Rift + Head Tracking = The Ultimate Drone Experience

oculus rift quad

What happens when you strap a stereoscopic camera onto a drone and transmit the video feed directly to your Oculus Rift? A pretty amazing experience, that’s what!

Several students from the Norwegian University of Science and Technology recently finished a term project dubbed Oculus FPV. In it, [Erik Hals], [Jacob Prescott], [Mats Svensson], and [Mads Wilthil] succeeded in combining virtual reality, a head mounted display, and a UAV for a great result.

Drones with cameras are the next big step in search and rescue, remote inspection, and many other use cases in other environments that are typically inaccessible for a human to poke around. What we really like about this project is they also mounted the stereoscopic cameras on a gimbal, allowing for full head movement — this means the pilot can “park” (read “hover”) his drone in remote locations, and then look around, without having to worry about performing complex aerial acrobatics to get the right camera angle.

Continue reading “Oculus Rift + Head Tracking = The Ultimate Drone Experience”

Roll With Dicebot, The Tweeting Dice Roller

dicebot

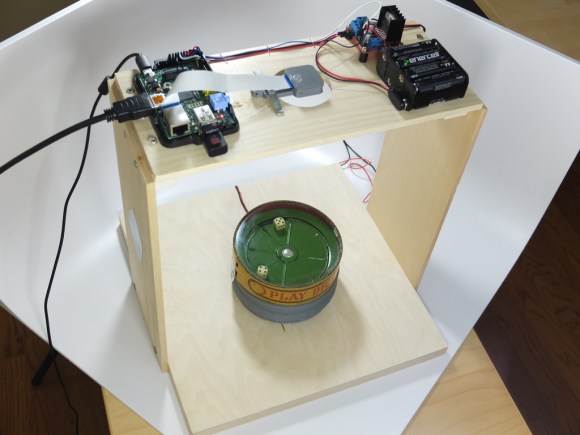
[David] modernized a 1920’s dice rolling game to bring us DiceBot, a twitter enabled dice rolling robot. DiceBot started with an antique dice tin. The original tin was human controlled. Pushing a button on the side of the tin would spin the bottom, rolling the dice.

It’s a bit hard to push a button from across the world, so [David] added a small motor to spin the tin. He connected the motor to a simple L298 motor driver chip, and wired that up to a Raspberry Pi. The Pi runs a few custom Ruby scripts which get it on the internet and connect to the Twitter API.

Operation is pretty straightforward. A tweet to @IntrideaDiceBot with the hashtag #RollTheDice will cause the Dicebot to spin up the dice. Once things have settled, DiceBot captures an image with its Raspberry Pi camera. The dice values are checked using OpenCV. The results are then tweeted back, and displayed on DiceBot’s results page.

Continue reading “Roll With Dicebot, The Tweeting Dice Roller”

I2C From Your VGA Port

Breakout board for VGA to I2C

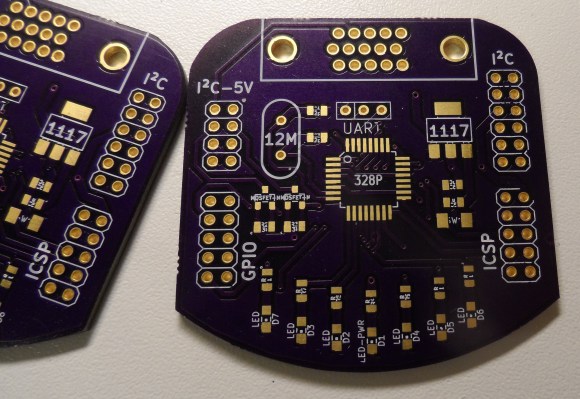
VGA, DVI, and HDMI ports use Display Data Channel (DDC) to communicate with connected displays. This allows displays to be plug and play. However, DDC is based on I2C, which is used in all kinds of electronics. To take advantage of this I2C port on nearly every computer, [Josef] built a VGA to I2C breakout.

This breakout is based on an older article about building a $0.25 I2C adapter. This adapter hijacks specific lines from the video port, and convinces the kernel it’s a standard I2C device. Once this is done, applications such as i2c-tools can be used to interact with the port.

[Josef] decided to go for overkill with this project. By putting an ATmega328 on the board, control for GPIOs and LEDs could be added. Level shifters for I2C were added so it can be used with lower voltage devices. The end product is an I2C adapter, GPIOs, and LEDs that can be controlled directly from the Linux kernel through an unused video port.

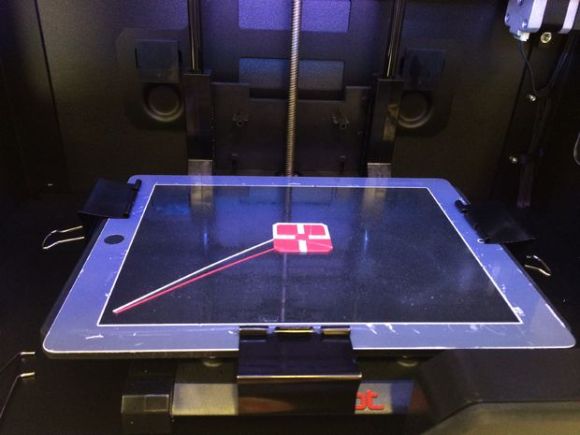
3D Printing Directly Onto Your IPad Screen

ipad 3d printing bed

Corning’s Gorilla Glass is very scratch resistant, shatter resistant, heat resistant, and even flexible material — it’s actually a perfect candidate to be used as a print bed material. The only problem is it’s not typically sold outside of consumer products, but that’s when [cvbrg] realized an iPad’s replacement screen would fit his maker-bot perfectly.

One of the biggest problems people encounter with 3D printing usually involves the print bed. Sometimes the prints don’t stick, the edges peel, or it even gets stuck on there too well when it’s done! A popular solution is a borosilicate glass bed, which typically helps with adhesion and surface finish — but again, sometimes the prints don’t want to come off! Sometimes parts can even tear up pieces of the glass bed when you’re trying to remove them. People usually counteract this with Kapton tape, which can become a headache in its own right — trying to apply it bubble free, tearing it, doing it all over again…

Using an iPad’s screen (only about $15 on eBay), means you can hack and jab at the print bed all you want without fear of breaking it – It even has a bit of flex to it to help pry your parts off. Did we mention it also has a very uniform flatness, good thermal conductivity, and resistant to pretty much all solvents?

Continue reading “3D Printing Directly Onto Your IPad Screen”