Makerspace Tours: HexLab In Tarzana, California

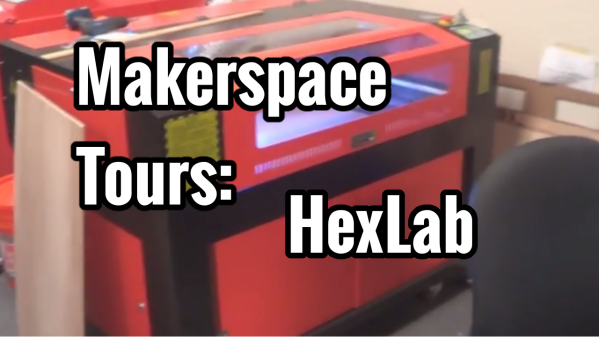
This time around, we dive into the world of 3D printing and laser cutting at a local community-driven space near Van Nuys, California. We were invited to visit HexLab Makerspace by [Jonathan] and [Mike] who own and run the company. They showed us the large selection of resources that they have made available to the public. This includes a variety of 3D printers, laser cutters, industrial sewing machines, 3D scanners, computer workstations, wood working tools, manual metal lathes, heaps of testing equipment, a leather embossing/hot stamping machine, and even a plastic injecting machine. And yes, they have a ventilator too.

With all this equipment, HexLab has the ability to prototype practically anything that floats into the mind of someone walking in the door. Specialties include paper craft, costume tailoring, laser etching wood products, manufacturing acrylic glass objects, and much more.

What makes this place different from a lot of other makerspaces is the history of the company. Originally, they started as a Research and Design firm about 14 years ago and have recently opened up the doors to the outside community. Because they began as a business that was previously similar to a hackerspace, they had already acquired the necessary tools for the space. The change makes the tools accessible to entrepreneurs, artists, designers, and musicians alike. This has bred a fantastic teaching environment where the community helps each other through the learning process.

In the future, HexLab plans to continue hosting classes and has even hinted at an up-coming mobile project that is certain to spark a local and portable maker movement. Eventually, they would like to help develop a sustainable model that can be given out to other makerspaces in an effort to assist in the creation of additional places like this. In the meantime though, we look forward to seeing how the community grows through them, and what types of amazing products with be produced out of their space.

Melting Chocolate – FOR SCIENCE!

The Ultimate Fondu Melting Pot

[Patrick Herd] was in Sweden recently and decided to help out a team of high school students in the International Young Physicist Tournament — The challenge? Chocolate Hysteresis.

Chocolate what? When chocolate melts, it doesn’t actually re-solidify at it’s melting point — in fact, it’s quite below that. The challenge here is figuring out a scientific way of measuring the time (and temperature) it takes to return to a solid state. This in itself is kind of tricky considering you have to accurately measure the temperature and be able to empirically tell if its solid or liquid.

The first scientific apparatus they came up with was the Chocolate Rig V1 – a very simple peltier heated and cooled calorimeter. They used an Arduino to control the temperature and a motor shield to power the peltier plate. It kind of worked but they discovered it was difficult to assess the physical state of the chocolate. This is when [Patrick] started doing some research and discovered rotary viscometry.

Continue reading “Melting Chocolate – FOR SCIENCE!”

Table-Top MAME Cabinet Dubbed “The Water Cooler”

Table-Top MAME Cabinet Dubbed "The Water Cooler"

[Greg] wanted to build a MAME cabinet. Not one of those monsters that take up a bunch of floor space, mind you: this one would be table-top size. He admits he could have made his game system out of new, currently available, off the shelf parts, but part of the design goal was to reuse old hardware that was kicking around. It was important to [Greg] to keep unnecessary waste out of the landfill.

An old PC motherboard was pulled out of an old desktop. It’s not fast enough for use as an everyday computer but it will be totally sufficient for a MAME machine. The project’s screen is an old 13 inch Gateway CRT computer monitor. Notice that it is turned 90 degrees so that it is taller than it is wide. This screen orientation lends itself better to certain types of games. The monitor’s plastic casing was removed before some measurements were taken. SketchUp was used to plan a basic idea of the cabinet.

Table-Top MAME Cabinet Dubbed "The Water Cooler"

The controls consist of a joystick and 4 buttons. During past projects, [Greg] has had experience with the least-expensive arcade controls available on eBay. Well, you get what you pay for. This time around he ponied up the extra cash for some high quality controls and is satisfied with the purchase. These buttons were wired straight into a PS/2 keyboard so the computer does not know the difference between the keyboard keys or recently added controls… another great re-use of old obsolete hardware.

The cabinet is made from MDF, glued and screwed together. The limited wood working tools available wasn’t a show stopper for this dedicated builder. For example, the square hole for the joystick was made by removing most of the material with a spade drill bit before using a chisel to clean up the edges. Doing it this way was a little tedious, but you have to do what you have to do sometimes. Once the entire cabinet was finished, several coats of paint were added in a yellow and blue water-theme. Black rubber molding finishes off the edges of the cabinet nicely.

PID Controlled Glue Gun

Internals of a glue gun controlled with a PID controller

Hot glue falls into the same category of duct tape and zip ties as a versatile material for fixing anything that needs to be stuck together. [Ed]’s Bosch glue gun served him well, but after a couple of years the temperature regulation stopped working. Rather than buying a new one, he decided to rip it apart.

With the old temperature regulation circuit cooked, [Ed] looked around for something better on eBay. He came across a cheap PID temperature controller, and the Frankengluegun was born.

A thermocouple, affixed with some kapton tape and thermal paste, was used to measure the temperature of the barrel. Power for the glue gun was routed through the PID controller, which uses PWM to accurately controller the temperature. All the wiring could even be routed through the original cord grips for a clean build.

Quality glue guns with accurate temperature control are quite pricey. This solution can be added on to a glue gun for less than $30, and the final product looks just as good.

Bluetooth Low Energy Beacons In A Flock Of Birds

birds_ready

No, not real birds! [Kyle] works in operations at a web company and needed a way to send alerts to his fellow coworkers, so he modified a flock of Audubon Society plush birds to respond to a Bluetooth beacon.

Using NRF24L01+ Bluetooth Low Energy modules, [Kyle] installed one each in these battery-powered singing birds. The devices are presumably powered off of the battery that comes with the birds, but the use of the BTLE module means the batteries won’t discharge as rapidly.

[Kyle] also built an API that works over HTTP or IRC, which means that the employees in the office can activate everyone else’s birds over a simple and intuitive interface. The birds can be activated one at a time, or all together in “panic” mode as one giant flock (in case of an emergency in the office). They can also be activated one at a time on a specific hour to simulate the Audubon Society’s bird call clock.

He calls the device equail and it’s a very unique notification system with a lot of applications. All of [Kyle]’s code and documentation of his project are available on his github site. He also used this primer on BTLE to get started, and this guide on sending data over BTLE to help get the project in the air.

Thumbnail that say The Hacklet

Hacklet #11- Cameras

11

We preempt this week’s Hacklet to bring you an important announcement.

Hackaday.io got some major upgrades this week. Have you checked out The Feed lately? The Feed has been tweaked, tuned, and optimized, to show you activity on your projects, and from the hackers and projects you follow.

We’ve also rolled out Lists! Lists give you quick links to some of .io’s most exciting projects. The lists are curated by Hackaday staff. We’re just getting started on this feature, so there are only a few categories so far. Expect to see more in the coming days.

Have a suggestion for a list category? Want to see a new feature?  Let us know!

Now back to your regularly scheduled Hacklet

There are plenty of cameras on Hackaday.io, from complex machine vision systems to pinhole cameras. We’re concentrating on the cameras whose primary mission is to create an image. It might be for art, for social documentation, or just a snapshot with friends.

pinstax[theschlem] starts us off with Pinstax, a 3D Printed Instant Pinhole Camera. [theschlem] is using a commercial instant film camera back (the back for a cheap Diana F+) and 3D printing his own pinhole and shutter. He’s run into some trouble as Fuji’s instant film is fast, like ISO 800 fast. 3 stops of neutral density have come to the rescue in the form of an ND8 filter. Pinstax’s pinhole is currently 0.30mm in diameter. That translates to just about f/167. Nice!

largeformat

Next up is [Jimmy C Alzen] and his Large Format Camera. Like many large format professional cameras, [Jimmy’s] camera is designed around a mechanically scanned linear sensor. In this case, a TAOS TSL1412S. An Arduino Due runs the show, converting the analog output from the sensor to digital values, stepping the motor, and displaying images in progress on an LCD. Similar to other mechanically scanned cameras, this is no speed demon. Images in full sunlight take 2 minutes. Low light images can take up to an hour to acquire.

democracy[Jason’s] Democracycam aims to use open source hardware to document protests – even if the camera is confiscated. A Raspberry Pi, Pi Cam module, and a 2.8″ LCD touchscreen make up the brunt of the hardware of the camera. Snapping an image saves it to the SD card, and uses forban to upload the images to any local peers. The code is in python, and easy to work with. [Jason] hopes to add a “panic mode” which causes the camera to constantly take and upload images – just in case the owner can’t.

digiholgaThe venerable Raspberry Pi also helps out in [Kimondo’s] Digital Holga 120d. [Kimondo’s] fit a Raspberry Pi model A, and a Pi camera, into a Holga 120D case. He used the Slice of pi prototype board to add a GPIO for the shutter release button, a 4 position mode switch, and an optocoupler for a remote release. [Kimondo] even added a filter ring so he can replicate all those instagram-terrific filters in hardware. All he needs is to add a LiPo battery cell or two, a voltage regulator, and a micro USB socket for a fully portable solution.

openreflex

Finally, we have [LeoM’s] OpenReflex rework. OpenReflex is an open source 3D printed Single Lens Reflex (SLR) 35mm film camera. Ok, not every part is 3D printed. You still need a lens, a ground glass screen, and some other assorted parts. OpenReflex avoids the use of a pentaprism by utilizing a top screen, similar to many classic twin lens reflex cameras. OpenReflex is pretty good now, but [Leo] is working to make it easier to build and use. We may just have to break out those rolls of Kodachrome we’ve been saving for a sunny day.

That’s it for this week’s Hacklet! Until next week keep that film rolling and those solid state image sensors acquiring. We’ll keep bringing you the best of Hackaday.io!

Why Should You Enter The Hackaday Prize? Because [Ben Heck] Says So.

[Ben Heck] is well-known in the circles we frequent for being a consummate modder, tinkerer, builder, and hacker. We’ve seen his XBox 360 laptops, portabalized PS3s, the ultimate glue gun, and shutter shades that are too cool for [Kanye]. Now he’s telling us about something else that’s really cool – The Hackaday Prize.

All you need to be in the running for prizes that range from a thousand dollars in electronic components to milling machines to a trip to space is build a project that is open, connected (smoke signals count), and documented on hackaday.io. Think you don’t have time to submit an entry before the first round cutoff next week? You’re wrong. You can sit down and hit all the requirements in an hour. All you need is an idea at this point, and you have until November to actually build it.

Talking to Hackaday readers IRL gives us the impression that a lot of you have an idea for something cool and spaceworthy, but you just need a kick in the pants to write it down and start building it. Here it is. Go.