[Sprite_TM] Puts Linux In A Clock Radio

[Sprite] needs an alarm clock to wake up in the morning, and although his phone has an infinitely programmable alarm clock, his ancient Phillips AJ-3040 has never failed him. It’s served him well for 15 years, and there’s no reason to throw it out. Upgrading it was the only way, with OLED displays and Linux systems inside this cheap box of consumer electronics.

After opening up the radio, [Sprite] found two boards. The first was the radio PCB, and the existing board could be slightly modified with a switch to input another audio source. The clock PCB was built around an old chip that used mains frequency as the time base. This was torn out of the enclosure along with the old multiplexed LCD.

A new display and brain for the clock was needed, and [Sprite] reached into his parts drawer and pulled out an old 288×48 pixel OLED display. When shining though a bit of translucent red plastic, it’s can be a reasonable facsimile of the old LEDs. The brains of the clock would be a Carambola Linux module. After writing a kernel module for the OLED, [Sprite] had a fully functional Linux computer that would fit inside a clock radio.

After having a board fabbed with the power supplies, I2C expanders, USB stereo DAC, and SPI port for the OLED, [Sprite] had a clock radio that booted Linux on an OLED screen. In the video below, [Sprite] walks through the functions of the clock, including setting one of the many alarms, streaming audio from the Internet, and changing the font of the display. There’s also a web UI for the clock that allows alarms to be set remotely – from a phone, even, if [Sprite] is so inclined.

Continue reading “[Sprite_TM] Puts Linux In A Clock Radio”

Nice Looking DIY Magnetic Stirrer

DIY Magnetic Stirrer Looks Professional

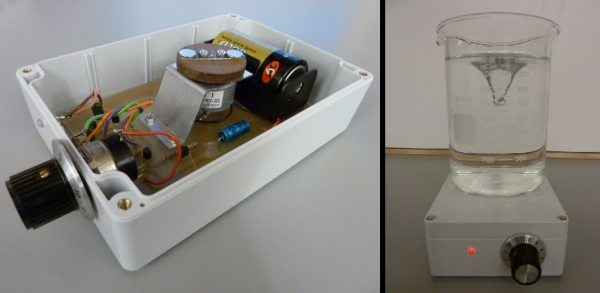
Stirrers are used in chemistry and biology labs to mix containers full of liquids. Magnetic stirrers are often preferred over the mechanical types because they are more sterile, easier to clean and have no external moving parts. Magnetic stirrers quickly rotate a magnet below the glass beaker containing the liquids that need mixing. The magnetic field travels effortlessly through the glass and reacts against a small magnetic cylinder called the stir bar. The spinning stir bar mixes the contents and is the only part of the mixer that touches the liquids.

[Malcolm] built his own magnetic stirrer. Unlike some DIY stirrers out on the ‘web, this one gets an “A” for aesthetics. It’s clean white lines allow it to look right at home in the professional laboratory. The graduated knob looks good and is functional too as the the potentiometer it is attached to allows multiple mixing speeds. Surprisingly, a D-size battery is all that is needed to power the stirrer. Most of the parts required for this project can be found in your spare parts bin. [Malcolm] has written some excellent instructions on how he made the stirrer including a parts list and schematics.

Want to make a magnetic stirrer but aren’t into chemistry or biology? No worries… I pity the fool who don’t build one of these….

Sweet Stepper Of [Jeremy]’s Rocks Out With Its Box Out

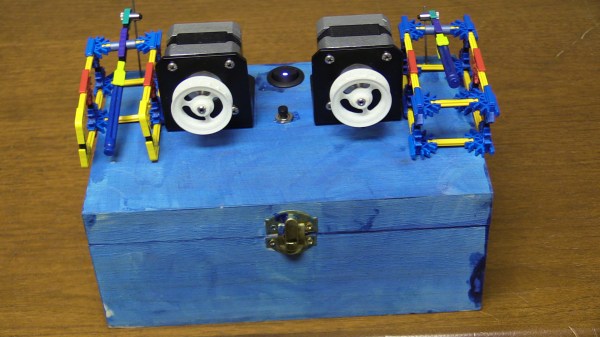
Inspired by the floppy drive orchestras of others, [Jeremy] has built a Pi-driven MIDI music box with stepper motor resonators and outlined the build on hackaday.io.

Control for the motors comes from an Iteaduino Mega 2560. The music starts as a MIDI file, gets processed into a text file, and is played over serial by a Raspberry Pi. He’s added percussion using K’NEX instruments and 9g servos, which we think is a nice touch. It can be powered via LiPo or from the wall, and [Jeremy] baked in protection against blowing up the battery. As he explains in the tour video after the break, the box is clamped to a wooden table to provide richer sound.

[Jeremy]’s favorite part of the build was enclosing the thing as it was his first time using panel-mount components. Stick around to see a walk-through of the guts and a second video demonstrating its musical prowess.

Continue reading “Sweet Stepper Of [Jeremy]’s Rocks Out With Its Box Out”

Building A Vector Monitor Controller

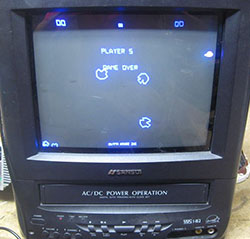
[fredkono] has a few vintage Atari arcade boards sitting around, and without the rest of the arcade machine – especially the XY CRT – these boards would continue to gather dust. The solution to this terrible shortage of vintage video games was to build a vector monitor from scratch. No, that doesn’t mean building a new CRT, but it does mean rewiring the yoke and building a CRT controller board for tubes salvaged from small, old TVs.

Nearly all the CRTs you’ll find at your local goodwill or surplus shop are raster displays. The CRTs used in the old Atari games were vector displays and extremely similar to the tubes found in old oscilloscopes. [fred] turned the CRT found in an old 9″ color TV into a vector monitor by rewinding the yoke.

With the tube rewired, it was only a matter of connecting the custom deflection circuit boards and getting the old arcade boards running. The images drawn with the new yoke deflector board are great and produce fine, crisp lines of some of the most famous video games in history.

3&DBot Robot 3D Printer

3D Printer Gets Wheels, Leaves Trail Of Plastic Boxes

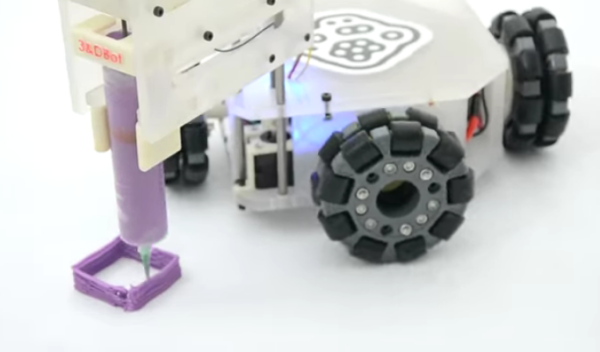
The limitation of 3D Printer build volume is over. The folks over at NEXT and LIFE Labs have created a prototype robot with a 3D print head attached to it. Unlike a traditional 3D Printer that moves the print head around within the confines of a machine, the 3&DBot drives the print head around any flat surface, extruding as it goes.

Although the 3&DBot has 4 wheels, they are all stationary and face independent directions. Normally, this arrangement would only allow a vehicle to rotate in a circle. However, the wheels used here are not conventional, they are Mecanum-style with many mini-wheels around the main. This arrangement allows omnidirectional movement of the robot, depending on how each wheel is driven. If you haven’t seen this type of movement before, it is definitely worth watching the video after the break.

Sure, the print quality leaves something to be desired and the distance the print head is from the robot chassis may be a bit limiting but all new technology has to start somewhere. This is a great joining of two technologies. Don’t scoff, remember your Iphone 12 wouldn’t be possible without this.

Continue reading “3D Printer Gets Wheels, Leaves Trail Of Plastic Boxes”

Fail Of The Week: Robotic 1950 Mercury Boogies, Won’t Come Back From Dead Man’s Curve

[Dave] wanted to make an Arduino robot out of a remote-control 1950 Mercury. He removed the RC portion from the car and kept the drive and steering motors. The idea was to use three ultrasonic rangefinders in the grille real estate and move the car forward based on the longest distance detected.

He initially used a Seeed motor controller and some Grove cables soldered to his sensors to power the steering. It went forward, but only forward, and [Dave] decided the motor controller and the car’s steering motor weren’t playing well together.

[Dave] had the idea to use relays instead to both power the motor and determine polarity. Now, the Merc was turning and avoid obstacles about half the time, but it was also getting dinged up from hitting walls. He figured out that his sensor arrangement was making the car turn immediately and decided to give the program information from the wheels with a reed switch and a rare earth magnet. The only problem is that the caliber of magnet required to trip the reed switch is too heavy and strong. [Dave] and has concluded that he simply can’t exercise the kind of control over the car that he needs. and will build his own robot chassis.

Update: Check out a video of [Dave]’s car after the break.


2013-09-05-Hackaday-Fail-tips-tileFail of the Week is a Hackaday column which runs every Wednesday. Help keep the fun rolling by writing about your past failures and sending us a link to the story — or sending in links to fail write ups you find in your Internet travels.

Continue reading “Fail Of The Week: Robotic 1950 Mercury Boogies, Won’t Come Back From Dead Man’s Curve”

A DIY MIDI Wind Controller

MIDI is more than just keyboards and a matrix of buttons that plays samples; there are MIDI controllers for virtually every instrument that has ever existed, from guitars to harps and even woodwinds. [J.M.] didn’t like the features found in existing wind MIDI controllers, so he’s building his own with features that put it far beyond any commercial offering.

Woodwind MIDI controllers are relatively simple; put a pressure sensor in the mouthpiece and turn that data into note on and note off commands. A few buttons, or in [J.M.]’s case, resistive touch sensors, are easily mapped to different fingerings and notes for the instrument. An Arduino Nano takes care of all this hardware, and a 2.4 GHz radio module to communicate wirelessly to a base station.

Once at the base station, the MIDI data can be output to any number of synths and computers, but [J.M.] added a MIDI codec chip right in the device to play with only a set of headphones. It doesn’t sound great – about the same as an old Sound Blaster card – but with the mod and expression control a wind controller offers, it’s more than passable as a real woodwind.

Videos below.

Continue reading “A DIY MIDI Wind Controller”