Rewritable ROM For The Mac Plus

The Macintosh Classic – a small all-in-one computer with a 9″ monochrome screen –  was one of the more interesting machines ever released by Apple. It was the company’s first venture into a cost-reduced computer, and the first Macintosh to sell for less than $1000. Released in 1990, its list of features were nearly identical to the Macintosh Plus, released four years earlier. The Classic also had an interesting feature not found in any other Mac. It could boot a full OS, in this case System 6.0.3, by holding down a series of keys during boot. This made it an exceptional diskless workstation. It was cheap, and all you really needed was a word processor or spreadsheet program on a 1.44 MB floppy to do real work.

[Steve] over at Big Mess O’ Wires had the same idea as the Apple engineers back in the late 80s. Take a Macintosh Plus, give it a bit more ROM, and put an OS in there. [Steve] is going a bit farther than those Apple engineers could have dreamed. He’s built a rewritable ROM disk for the Mac Plus, turning this ancient computer into a completely configurable diskless workstation.

The build replaces the two stock ROM chips with an adapter board filled with 29F040B Flash chips. They’re exactly what you would expect – huge, old PDIPs loaded up with Flash instead of the slightly more difficult to reprogram EEPROM. Because of the additional space, two additional wires needed to connected to the CPU.  The result is a full Megabyte of Flash available to the Macintosh at boot, in a computer where the normal removable disk drive capacity was only 800kB.

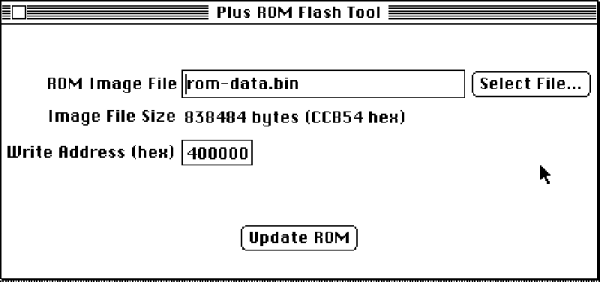
The hardware adapter for stuffing these flash chips inside a Mac Plus was made by [Rob Braun], while the software part of this build came from [Rob] and [Doug Brown]. They studied how the Macintosh Classic’s ROM disk driver worked, and [Rob Braun] developed a stand-alone ROM disk driver with a new pirate-themed startup icon. [Steve] then dug in and created an old-school Mac app in Metrowerks Codewarrior to write new values to the ROM. Anything from Shufflepuck to Glider, to a copy of System 7.1  can be placed on this ROM disk.

This isn’t the first time we’ve seen ROM boot disks for old Macs. There was a lot of spare address space floating around in the old Mac II-series computers, and [Doug Brown] found a good use for it. Some of these old computers had optional ROM SIMM. You can put up to 8 Megabytes  in the address space reserved for the ROM, and using a similar ROM disk driver, [Doug] can put an entire system in ROM, or make the startup chime exceptionally long.

M&M Sorting machine

Hate Blue M&M’s? Sort Them Using The Power Of An IPhone!

Some people really like eating specific M&M colors… You could spend hours sorting your packs of M&M’s into color specific piles, or you could build a machine to do it for you.

That’s exactly what [ReviewMyLife] decided to do, and it’s quite impressive! He’s using a rotating hopper to release M&M’s into a chute one-by-one, and then an iPhone to perform color recognition as the M&M falls past it. That information is then communicated over Bluetooth to the Arduino which actuates a high-speed electromagnetic gate to force the M&M down the right chute for sorting.

The machine works surprisingly well for a prototype that was hot glued together out of foam board, but fear not, he plans to upgrade it now that the proof of concept has been confirmed. He’s hoping to get rid of the iPhone and replace it with a Raspberry Pi for starters, 3D print some of the parts, and consolidate its power supply. Currently he’s using three separate supplies to power the Arduino, electromagnets, and the hopper motor — not very efficient!

Continue reading “Hate Blue M&M’s? Sort Them Using The Power Of An IPhone!”

ZX81 Emulated On An Mbed

This is a wonderful example of the phenomenon of “feature creep”. [Gert] was working on getting a VGA output running on an mbed platform without using (hardly) any discrete components. Using only a few resistors, the mbed was connected to a VGA display running at 640×480. But what could he do with something with VGA out? He decided to emulate an entire Sinclair ZX81 computer, of course.

With more than 1.5 million units sold, the Sinclair ZX81 was a fairly popular computer in the early ’80s. It was [Gert]’s first computer, so it was a natural choice for him to try to emulate. Another reason for the choice was that his mbed-VGA device could only output monochrome color, which was another characteristic of the ZX81.

[Gert] started by modifying a very lean Z80 emulator to make the compiled code run as efficiently as possible on the mbed. Then he went about getting a picture to display on the screen, then he interfaced an SD card and a keyboard to his new machine. To be true to the original, he built everything into an original ZX81 case.

This isn’t the first time we’ve seen a ZX81, but it is one of the better implementations of an emulated version of this system we’ve seen.

Thanks to [Jeroen] for the tip!

Smart CPR Dummy

Smart CPR Dummy Makes Sure You Do It Right

Have you ever taken a First Aid & CPR training course? Don’t you just love the realism of the dummy mannequins you get to practice on? [Park, Qurashi, & Chen], who are students of Cornell University, thought the dummies could use an intelligent upgrade.

It’s the final project for their electrical and computer engineering course ECE 4760. And what they’ve done is successfully created a budget friendly CPR not-so-dumb dummy using the venerable ATmega1284 microcontroller.

The dummy can sense when chest compressions are given, if the nose is plugged properly when breaths are given, if the head is tilted back properly to open the airway, and it even makes use of a microphone to detect if breaths are given properly! While it does this, it uses LED eyes and an LCD screen to provide training feedback to the student. Once the students are sufficiently practiced, it also has a “real” mode that doesn’t give you any feedback to make sure the students truly learned the technique. Continue reading “Smart CPR Dummy Makes Sure You Do It Right”

Developing Film With Lego

Developing film at home is most certainly a nearly forgotten art nowadays, but there are still a few very dedicated people who care enough to put in the time and study to this craft. [Jan] is one of the exceptional ones. He’s developing 35mm film with Lego (Dutch, Google translate).

For the build, [Jan] is using the Lego RCX 1.0, the first gen of the Lego Mindstorms, released in the late 90s. According to eBay, this is a significantly cheaper option for programmable Lego. The mechanics of the Lego film developer consisted of multiple tanks of chemicals. The film was loaded on a reel, suspended from a Lego gantry, and dunked into each tank for a specific amount of time.

A second revision of the hardware (translate) was designed, with the film loaded into a rotating cylinder. A series of chemicals would then be pumped into this unit with the hope of reducing the amount of chemicals required. This system was eventually built using the wiper fluid pump from a car. Apparently, the system worked well, judging from the pictures developed with this system. Whether it was easy or efficient is another matter entirely.

You can check out a video of the first revision of the Lego film developing system below.

Thanks [Andrew] for sending this in.

Continue reading “Developing Film With Lego”

Mini Tesla Coil Packs a Punch

Micro Tesla Coil Makes A Perfect Stocking Stuffer

Tesla coils are always a hit around here at the office. Giant ones that play music with modern-day chain mail wearing DJ’s, ones thrown together in garages by self-proclaimed mad scientists… But have you ever seen one that can fit in the palm of your hand?

[Ludic Science] just released this tutorial video on how to make it. It’s a miniature diagram of slayer circuitsolid state Tesla coil that’s based on the ever popular Slayer Exciter circuit that was first developed by [GBluer]. The beauty is it’s a very simple circuit to build. It consists of one power transistor, a few diodes, some resistors, and the coil. That’s it!

He even repurposes the magnet wire from a small relay, it’s literally a project you can build from scrap parts around the shop. Awesome.

Continue reading “Micro Tesla Coil Makes A Perfect Stocking Stuffer”

The Heathkit Mystery

Heathkit is a company that requires no introduction. From the mid-40s until the 90s, Heathkit was the brand for electronic kits ranging from test equipment, HiFis, amateur radio equipment, computers, to freakin’ robots. Their departure was a tragic loss for generations of engineers, electronic tinkerers and hobbyists who grew up with these excellent and useful kits.

Although Heathkit is dead, 2013 brought an announcement that Heathkit was back in the biz. A Facebook page was launched, a Reddit AMA was held, and the news was that Heathkit would rise from the dead in the first half of 2014. It’s now Christmas, 2014, and there’s no sign of Heathkit anywhere. Adafruit has been keeping a watchful eye on the on the (lack of) developments, and the only surprising thing to report is that there is nothing to report. There has been no new announcement, there are no new products, the “official” Heathkit website hasn’t been updated in a year, and no one knows what’s going on.

Adafruit has decided to dig into the matter, and while they’ve come up with a few items of note, there’s not much to report. A trademark for ‘HEATHKIT’ was filed October 27, 2014 – two months ago. An email was sent to the attorney of record and there has been no response.

This trademark was granted to Heathkit Company, Inc., incorporated in Delaware. Searching for any companies in Delaware using the Heathkit name returns exactly two results: Heathkit Company, Inc., and Heathkit Holdings, Inc.. Adafruit is probably going to pay the $20 to the Delaware Department of State to get the detailed information that includes Heathkit’s tax assessment and tax filing history.

The last bit of information comes from a whois on the heathkit.com domain. The relevant contacts have been emailed, and there are no further details. The Heathkit virtual museum was contacted for information, as was the news editor for ARRL.org. Nobody knows anything, or at least nobody is telling anybody anything.

To date, the only physical evidence of Heathkit’s rebirth is a geocache that was left at Brooklyn Bridge Park, announced during the Reddit AMA. This geocache was recovered by reddit user IFoundTheHeathKit, a throwaway account that had no posts before or since finding the cache. We have no idea what was in that geocache, what the ‘secret passphrase’ or set of instructions was, or if anything ever came of the promise to send one of the first new kits.

So there ‘ya go. A lot of words but no information. If you have any info, the Adafruit crew would like to have a word with you.

Update

The person who found the Heathkit geocache has been found:


The full comment referred to below is,

Hey, person who found the Heathkit geocache here. The secret passcode was an Einstein quote about radio vs wired communication (invisible cats), and they said they’d send me something in early 2014. Never had any communication except through FB, and they haven’t replied to any of my recent messages.

IFoundTheHeathKit might want to email Adafruit with a copy of all the emails.