Behold Lil’ Screwy, A Homebrew 100-Ton Press

Here we have a magnificent example of the power of the inclined plane. [Chris] has built Lil’ Screwy, a 100-ton home-built press for about $35 plus scrap on hand. He demonstrates its frightening power by punching a 17-mm hole through 8mm-thick steel using an Allen key.

As [Chris] explains in his hilarious video waiting for you after the jump, the force comes from using really big screws. Lil’ Screwy uses four 1-inch L7-rated ready rods with eight threads to the inch. The bolts run between two 1″ steel plates to form the press. In the top plate, he drilled 1″ holes. The bottom holes are drilled out 7/8″ and tapped so the two plates clamp together with awesome crushing power when you twist the giant coupling nuts.

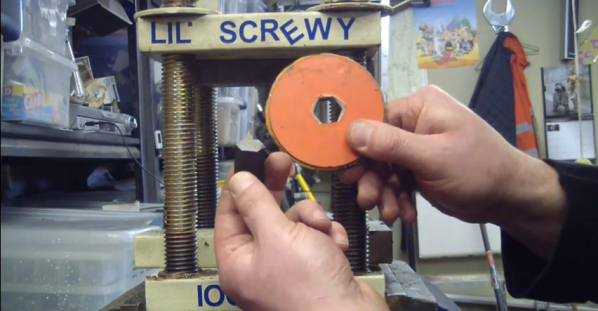
[Chris] milled a pocket in the underside of the top plate for a big neodymium magnet that will keep, for instance, a 17-mm Allen key in place while you punch a piece of steel with it. He has a ring of smaller ones embedded into the bottom plate to hold supports in place for broaching.

As a special bonus, [Chris] shows you how to stick it to the man when it comes to using that last bit of Never-Seez in the can, and also how to make your decals temporarily repositionable.

Continue reading “Behold Lil’ Screwy, A Homebrew 100-Ton Press”

The Kickstarter Space Cannon

cannon

As far as space travel and Kickstarter is concerned, we’ve seen crowdfunding projects for satellites in low earth orbit, impacting the moon, and even a project for a suborbital rocket. This one, though, takes the cake.  It’s a gun designed to send very small payloads into space on a suborbital trajectory.

The gun itself is an 8-inch bore, 45-foot long monster of an artillery piece. While the simplest way of shooting something down the length of a barrel would be exploding something in the breech, [Richard] is doing something a little more interesting. He’s broken down the propellent charges so instead of one giant propelling a bullet down a barrel, the projectile is constantly accelerated with a number of smaller charges.

The goal of the Kickstarter is to send a small payload into a suborbital trajectory. Later developments will include putting a small rocket motor in the dart-shaped bullet to insert the payload into an orbit.

This isn’t the first time anyone has attempted to build a gun capable of shooting something into space. The US and Canada DOD built a gun that shot a 180 kg projectile to 180 km altitude. The lead engineer of this project, [Gerald Bull] then went on to work with [Saddam Hussein] to design a supergun that could launch satellites into orbit or shells into downtown Tel Aviv or Tehran. [Bull] was then assassinated by either the US, Israeli, Iranian, British, or Iraqi governments before the gun could be completed.

Two videos from the Kickstarter are below, with a few more details on the project’s webpage

Continue reading “The Kickstarter Space Cannon”

8X8X8 Cube Invaders

F98YM6YHQQLNHN7.LARGE

Believe it or not, [Anred Zynch] had no soldering skills before starting this project! What we’re looking at here is an 8x8x8 LED cube set up as a Space Invaders style game with a Playstation 1 controller.

He was inspired by several other cubes like [Chr’s], and the Borg cube by [Das-Labour]. The project makes use of an Arduino Mega 2560 R3 to drive the 512-LED array, and an Arduino Uno to take care of the sound effects during game play. It’s kind of like Space Invaders — but in 3D!

Complexity of building and wiring it aside, [Anred] has provided great instructions and the code for the entire project, so if you’re looking to recreate it or something like it, you can! It’s also entered in an Instructable’s contest right now, so if you like it, we’re sure he’d appreciate the votes.

Continue reading “8X8X8 Cube Invaders”

Two-Wheel Balancing Robot Revived From The Dead

Capture

[Jouni] built a pretty nice little two-wheeled robot a while back — but he never got it working quite right. Taking inspiration and a bit of opensource code from another hacker featured here, he’s finished the bot, and it works great!

After seeing [Jose’s] 3D printed Air Hockey bot, he poked around the creator’s blog and discovered the B-Robot, a 3D printed, two-wheeled, stepper driven, balancing robot. As it turned out, it was incredibly similar to a robot [Jouni] had made himself previously!

[Jouni’s] robot features two NEMA-17 steppers, a 12v 2200mAh battery pack, an Arduino Pro Mini, a MPU6050 gyro and a FrSky receiver. Lucky for him, [Jose’s] B-Robot made use of the same steppers and gyro! Using some of [Jose’s] code from his GitHub, [Jouni] was able to bring new life into his little robot!

We’ve included videos of both the original project, and [Jouni’s] version. Aren’t opensource projects awesome?

Continue reading “Two-Wheel Balancing Robot Revived From The Dead”

Router Robot A Promising Playground For Young Hacker

router-robot-project

[Stephen Downward] has put together a very impressive Internet controlled robot. There are so many things about his video presentation (also embedded below) which we find delightful. Notably, it’s obvious that he knows what he’s talking about when discussing everything from the electronics chosen for the project, the mechanical assembly and the issues with its current state, as well as the software backend that gives him control of the rover.

The bulk of the rover is the Linksys WRT-54G router which he picked up at a thrift shop. This has been a popular model for building rovers for quite some time. [Stephen] is not driving directly from the router’s serial port, but that could be an adventure for him down the road. For now he’s using an Arduino Mega along with an Ethernet shield to connect the motors to his network. The IP camera on the front gives him the video feed to operate this completely over the Internet using his own program written in C#. He mentions that the CD wheels he has aren’t ideal because of their thin tread area (covered in masking tape) and the inaccurate mounting which leaves one of them at an angle. He’s hoping to design and print his own. He plans rent some time on a 3D printer at the local University when their 3D printing service comes back online.

We think the hardest part with robot building is getting your first platform up and running. Now that he’s got that it’s a matter of making improvements and add-ons. Since he’s got the I/O of the Mega at his disposal we’d like to see him implement a bunch of different sensor: line following, bump sensors, distance sensor, heck… maybe someday he’ll scavenge some Lidar for it!

Continue reading “Router Robot A Promising Playground For Young Hacker”

Meet ‘Raspberri’, Your Personal Voice Controlled Assistant

raspda

We’ve all seen the old movie scene where the executive calls his assistant on the intercom for some task or other. [Jan] may not be an executive, and he may not have an assistant. He does have Raspberri, his voice controlled personal digital assistant. Raspberri started life as a vintage Televox intercom box. [Jan] found it at a second-hand store, and snapped it up in hopes of using it in a future project. That project eventually happened when [Jan] got a Raspberry Pi and learned how to use it. He decided to build the Televox and Pi together, creating his own electronic assistant.

[Jan] started by adding a cheap USB sound card and WiFi module to his Pi. He also added a small 3 Watt audio amp board. The Televox used a single speaker as both audio input and output. [Jan] didn’t want to make any modifications to the case, so he kept this arrangement. Using a single speaker would mean dead shorting the audio amplifier and the sound card’s microphone input. To avoid this, [Jan] added a DPDT relay controlled by the original push-to-talk button on the Televox. The relay switches between the microphone input and the audio output on the USB sound card. Everything fit nicely inside the Televox case.

With the hardware complete [Jan] turned his attention to software. He went with PiAUISuite for voice input. Voice output is handled by a simple shell script which uses google voice to convert text to speech. For intermediate processing, such as scraping a weather website for data, [Jan] created custom python scripts. The end result is pretty darn good. There is a bit of lag between saying the command and receiving an answer. This may be due to transferring the audio files over WiFi. However,  [Jan] can always get away with saying his assistant was out getting him more coffee!

Continue reading “Meet ‘Raspberri’, Your Personal Voice Controlled Assistant”

Reverse Engineering A Bank’s Security Token

app

[Thiago]’s bank uses a few methods besides passwords and PINs to verify accounts online and at ATMs. One of these is a ‘security card’ with 70 single use codes, while another is an Android app that generates a security token. [Thiago] changes phones and ROMs often enough that activating this app became a chore. This left only one thing to do: reverse engineer his bank’s security token and build a hardware device to replicate the app’s functionality.

After downloading the bank’s app off his phone and turning the .APK into a .JAR, [Thiago] needed to generate an authentication code for himself. He found a method that generates a timestamp which is the number of 36-second intervals since April 1st, 2007. The 36-second interval is how long each token lasts, and the 2007 date means this part of the code was probably developed in late 2007 or 2008. Reverse engineering this code allowed [Thiago] to glean the token generation process: it required a key, and the current timestamp.

[Thiago] found another class that reads his phone’s android_id, and derives the key from that. With the key and timestamp in hand, he figured out the generateToken method and found it was remarkably similar to Google Authenticator’s implementation; the only difference was the timestamp epoch and the period each token lasts.

With the generation of the security token complete, [Thiago] set out to put this code into a hardware device. He used a Stellaris Launchpad with the Criptosuite and RTClib libraries. The hardware doesn’t include a real-time clock, meaning the date and time needs to be reset at each startup. Still, with a few additions, [Thiago] can have a portable device that generates security tokens for his bank account. Great work, and great example of how seriously his bank takes account security.