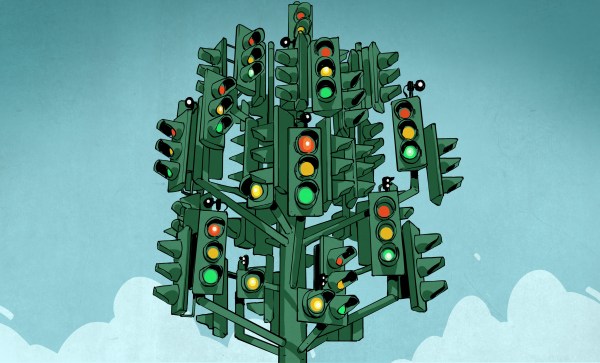
Traffic lights are so ubiquitous that we hardly give them a second thought, except to curse their existence when they impede us on our daily drive. But no matter how much it seems like traffic lights have the ability to read our minds and tell when we’re running late, they’re really not much more than a set of lights and a programmable controller. Simple in practice, but as usual, the devil is in the details, and for a system that needs to work as close to 100% of the time as possible, the details are important. Let’s explore the inner workings of traffic signals.
Electromechanical Timing
The traffic lights and crosswalk signals at an intersection are only the public user interface, of course. The interesting stuff is going on in the control box. There’s at least one at every intersection, usually a plain metal cabinet set back from the road, sometimes camouflaged with public bills or graffiti. But inside are the guts of what makes an intersection work and keeps vehicle and foot traffic moving smoothly and safely.
Unsurprisingly, most traffic signal controls started out as purely electromechanical devices. Cabinets were chock full of synchronous motors turning timing wheels with cams to cycle the intersection’s lights through the proper sequence. One old time controller that was common up until recently was made by Econolite, and the insides are a paragon of sturdy design.
For those not familiar with sailing, it might seem like an obsolete way to get around on the water. This isn’t 1492 anymore, and it’s pretty easy to go out and get a boat with a motor to get where you need to go. Sailboats, however, are still one of the most efficient ways to travel. There are essentially no fuel costs, and maintenance on them is often easier than on a boat with an engine. Not to mention the fun involved in flying a hull on a catamaran. Anyway, if you’re [gwilken], you can bring your sailboat even further into modern times by building your own sensor array for it.
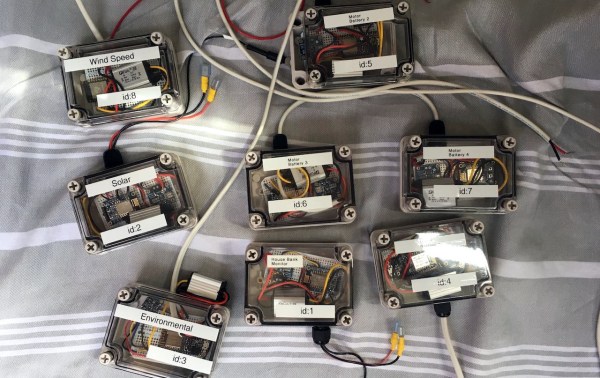
The ultimate goal of this project was to get all gauges and sensors reporting data to an iPad, rather than to random gauge clusters around the ship. This includes environmental conditions, speed, and motor status (most larger sailboats have a motor for getting around the marina). A Raspberry Pi ties it all together, including a GPS antenna for monitoring location. [gwilken] also includes a WiFi antenna and a cell antenna for maintaining a network connection for reporting all of this information. With this connectivity, he can also control some functions of the boat as well.
[gwilken] made the decision to ditch the conventional gas motor for a more energy-efficient electric motor. This also has the perk of being essentially maintenance-free, and can even charge his battery in regen mode while his boat is under sail. The sailboat is now fully equipped for the 21st century, in a similar way to another boat’s gauge cluster that was recently featured.
At this point, it’s not really correct to describe DEF CON as a single, gigantic conference for security, tech, and other ‘hacky’ activities. DEF CON is more of a collection of groups hosting villages, get-togethers, meetups, and parties where like-minded individuals share their time, company, electronic war stories, and whiskey. One of the largest groups measured by the number of rideable, inflatable unicorns is Queercon, a ‘conference within a conference’ dedicated to LGBT causes, a rager of a party, and a killer conference badge.
The Queercon badge is always a work of art, and this year is no exception. Last year, we took a look at an immaculate squid/cuttlefish badge, and a few years before that, the Queercon badge was a beautiful 3.5″ floppy embedded with far too many RGB LEDs. This year’s Queercon badge was equally as amazing, quite literally pushing badgecraft into another dimension. The folks behind the Queercon badge just wrote up their postmortem on the badge, and it’s an excellent example of how to push PCBs into the space of human interaction.
The development of the 2017 Queercon badge had a really tough act to follow. Last year’s Blooper squid/cuttlefish badge is a high point in the world of functional PCB art, and by January of this year, the team didn’t know where to take badgecraft next.
In the end, the QC badge team decided on a ‘failsafe’ design — it wasn’t necessarily going to be the best idea, but the design would minimize risk and development time.
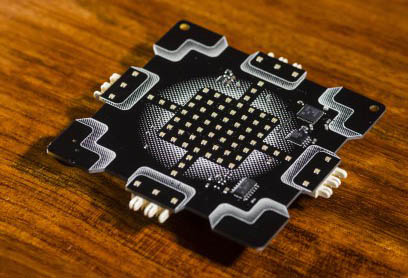
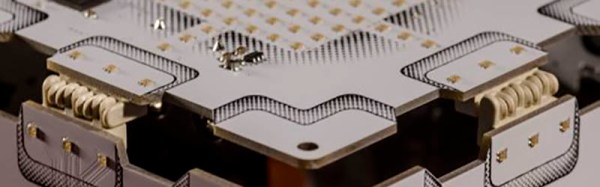
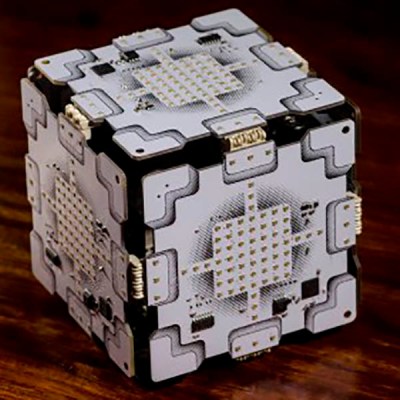
A single 2017 Queercon badge
The two obvious features of this badge are an incredible number of tiny RGB LEDs, and very strange hermaphroditic edge connectors, allowing these badges to be plugged together into a panel of badges or a cube. What does this badge do? It blinks. If you have five friends, you can make something that looks like the Companion Cube from Portal.
Hardware
The killer feature for this badge is a vast array of RGB LEDs. Instead of going with WS2812s or APA101s, the Queercon badge team found simple, 0604 RGB LEDs, priced at about $0.026 a piece. There are 73 LEDs in total, all driven by the same TI LED driver used in previous years, combined with two shift registers and 15 FETs to control the LED commons. Although the LED driver is able to address all 219, and even though the badge is powered by a 32-bit ARM Cortex M3 microcontroller, this is pretty much the limit of how many LEDs can be controlled with this setup.
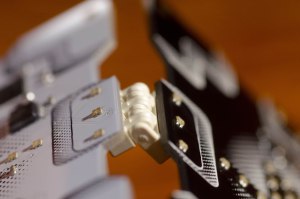
The Queercon badge always has a bit of interconnectedness built in, and this year is no exception. This year the badge uses a strange universal connector mounted along the four sides of the badge. When one badge is plugged into the other, they mate producing a ‘fabric’ of glowing badges. The range of motion on this connector allows for 180 degrees of rotation, but surprisingly most Queercon badge holders only assembled single planes of badges. It took a bit of cajoling from the badgemakers to get people to assemble a cube, and no other weird shapes were constructed out of multiple badges. If anyone likes this idea of interconnected badges, I would like to personally suggest equilateral triangles — this would allow for icosahedrons or hexagon-based solids.
A Game
A badge wouldn’t be complete without a game, and the Queercon badge has it in spades. The UI/UX/graphics designer [Jonathan] came up with a game loosely based on a game called ‘Alchemy’. Every badge comes loaded with a set of basic elements (air, fire, water, earth), represented as pixel art on the 7×7 RGB LED matrix. Combining these elements leads to even more elements — water plus fire equals beer, for example. Think of it as crafting in Minecraft, but with badges.
Starbucks was responsible for sponsoring a portion of Queercon this year, so ten special badges were loaded up with a fifth element: coffee. Elements derived from the coffee element required a Starbucks sponsor badge.
As we all expect from a DEF CON badge, there was a crypto challenge and contest. The full write up is available here, with the solution somewhat related to a cube of badges.
A Complete Success
When the badges came back from the fab house, the failure rate for this year’s Queercon badge was 0.7%. That’s an amazing yield for any independent hardware badge, and is honestly one of the most impressive aspects of this year’s Queercon. Failure modes during the con were probably related to spilling a drink on a badge, although there was a rash of failed CPUs. This is probably related to ESD, and during the con rework of failed badges was basically impossible because of drunk soldering in a dimly lit hotel room.
If there’s one failure of this year’s Queercon, it’s simply that it’s becoming too popular. From last year, Queercon saw 200% growth for the main party, which meant not everyone got a badge. That’s unfortunate, but plans are in the works for more inventory next year, providing DEF CON 26 isn’t cancelled, which it is. A shame, really.
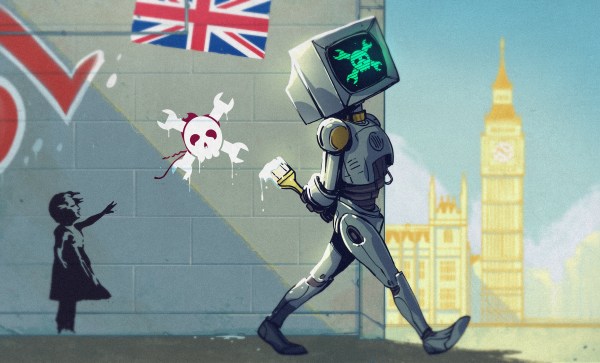
Hackaday’s first ever conference in the United Kingdom will take place on September 16th. Get your free ticket right now for the Hackaday UK Unconference!
An Unconference is the best way to put your finger on the pulse of what is happening in the hardware world right now. Everyone who attends should be ready to stand and deliver a seven-minute talk on something that excites them right now — this mean you. The easiest thing to do is grab your latest hack off the shelf and talk about that.
Talks may be about a prototype, project, or product currently in progress at your home, work, or university. It could also be an idea, concept, or skill that you’re now exploring. The point is to channel your excitement and pass it on to others in a friendly presentation environment where everyone will cheer as your story unfolds.
Hackaday doesn’t often have the opportunity to organize live events in Europe which is why we’re so happy to partner with DesignSpark, the exclusive sponsor of the Hackaday UK Unconference. DesignSpark is the innovation arm of RS Components and will have some staff on hand at the Unconference. They share our excitement in bringing together the Hackaday community throughout the UK. It is with their support that we are able to book an incredible venue and offer admission at no cost to all attendees. Hackaday events fill to capacity quickly, so get your ticket now before they are gone.
We have already asked a few of our friends in the area if they will be there. Seb Lee-Delisle who wowed us in Belgrade with his laser projection wizardry plans to be there. James Larsson is part of the crew that started the Flashing Light Prize and will be on hand. Phoenix Perry is always on the cutting edge of where people and technology meet and we can’t wait to hear her talk. Mike Harrison of Mike’s Electric Stuff will be around and likely teasing some secret Hackaday hardware he’s spearheading. James Bruton of XRobots (and a Hackaday Prize Judge) is coming, as is Saar Drimer who you may know as the person behind the beautiful hardware art of Boldport. Several Hackaday editors will be there; Elliot Williams, Jenny List, and I will all be on hand. All that’s missing is you.
We’ll flood into the Culture Space at Canada Water on the east side of London starting at 13:00. Tea, coffee, and snacks will be served throughout the afternoon and we’ll provide dinner as well. Anyone who is still standing when we close the doors at 21:00 is invited to join us at the pub afterward (we’ll get the first round).
As always, Hackaday’s success is based on the community of hackers, designers, and engineers that make it up. Please share the link to tickets on your social media and pester your friends to attend. Most importantly, don’t shy away from this speaking opportunity. We want to hear your story and this is the place to tell it. See you in London in just a few short weeks!
UPDATE: Wow, that didn’t take long. The tickets are claimed, but make sure you get on the waitlist. A lot can change in the next five week’s and we’ll be pestering all ticket holders to be there or give their seat up for someone on the waitlist.
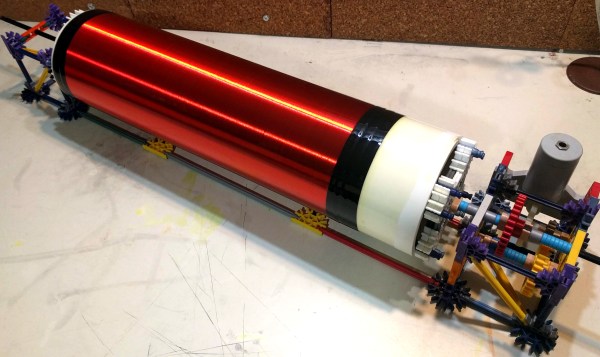
Instructables user [birdycrazy] built a winding rig from a PVC pipe and a bunch of K’Nex. He had recently started a Tesla coil project and needed an efficient way to wind the secondary coil. All of the designs for DIY winding rigs he found on the Internet required parts he didn’t have or simply cost a bunch of money. Then he realized he’d been building with K’nex a lot, and why not build a tool to help him?
He ended up investing only his K’nex elements and a length of 4” PVC pipe for the project. He used a K’nex 12V motor because it plugs in rather than requiring batteries. After the coil had been completely wound he set it to rotate the assembly over a period of several days while the varnish coating dried.
[Sjaak], in electronic hobbyist tradition, started to design a PCB business card. However, he quickly became disillusioned with the coloring options made available by the standard PCB manufacturing process. While most learn to work with a limited color palette, [Sjaak] had another idea. PCB decals for full-color control.
As [Sjaak] realized early in his PCB journey, the downside of all PCB business cards (and PCBs in general) is the limited number of colors you can use which are dictated by the layers you have to work with: FR4, soldermask, silkscreen and bare copper. Some people get crafty, creating new color combinations by stacking layers for hues, but even that technique doesn’t come close to a full palette.
The commercial off-the-shelf out of the box solution [Sjaak] found was decal slide paper. For those of you not prone to candle making or car decorating, decals are printable plastic film that can be used to decorate ceramics, glass or other smooth surfaces. Both clear and white versions can be found in most hobby stores. Once obtained, an inkjet or laser printer can print directly onto the photo paper-like material, lending the decals an infinite range of colors.
[Sjaak] bought clear film and designed his PCB with black soldermask and white silkscreen. Once the PCBs had come in, [Sjaak] got to work applying the decals with a transfer method by placing one into water, waiting a bit until the decal lets loose and then are carefully applied to a PCB. [Sjaak] reports that the process is a bit trickery because the film is very thin and is easily crinkled. But, difficulties overcome, the PCB then needs to dry for twenty-four hours. From there, it’s into the oven for 10 minutes at 248 degrees Fahrenheit (120 degrees Celsius) followed by an optional clear coating. Although the process is a bit involved, judging from his pictures we think the results are worth it, producing something that would stand out; which, in the end, is the goal of a PCB business card.
We get a lot of Kickstarter pitches in our email, but this one is different. First of all, it’s over. No biggie there. Secondly, it’s a laser-cut hurdy gurdy. What’s a hurdy gurdy? It’s a musical instrument that uses a wheel to vibrate strings. It has drone strings and a rudimentary keyboard for the melody. Think of it as ‘string bagpipes’ and you’re not that far off. This means you can laser cut (or 3D print, someone get on it) a hurdy gurdy, and that’s just awesome.
I wrote the previous paragraph without referencing Donovan. You’re welcome, Internet.
[Spencer] found a few very small seven-segment flip display units. This, of course, meant he had to build a clock. Right now [Spencer] is in the PCB design stage of the project, with the hope of finishing it before school starts. There is still an open question here: where do you get really tiny flip segment displays?
Perhaps we’ve said too much about the number one badge at this year’s DEF CON, but this is really the project that just keeps giving. [Hyr0n] thought it would be a great idea to have a shirt printed with the design of this year’s official Hackaday DEF CON badge. This seemed simple enough — all he needed to do was send the design off to a custom printed t-shirt place on the Internet and wait a week or two. This is where things got a little nuts. [Hyr0n] stole my intellectual property. My very intellectual property. Here’s a great tip for when a t-shirt place puts your order on hold because of a copyright: just say it’s creative commons, they’ll send it right on through.
The DIY-VT100 is a miniature VT100 (and VT102) terminal, because sometimes you need a standalone serial terminal. Soon, it’s going to be a Crowd Supply campaign. Who’s going to be the first to 3D print a look-alike VT100 enclosure for this little thing? Where can you get pre-bromiated filament?
We all know what the Atari 2600 is, but what is the Atari 2700? It’s an exceptionally rare prototype that used wireless controllers. One was found in a thrift store recently. [L064N] bought it for $30, and sold it on eBay for $3000.
Here’s a weird thing [Yann] sent in. The Rise mP6 was a non-Intel, non-AMD, non-Cyrix, non-VIA, x86 compatible CPU sold in the late 90s. What’s cool about it? Three parallel MMX instructions, and an easter egg hidden in the microcode. The principal engineer on the project, [Chris Norrie], decided he wanted to hide his name in the CPU, and managed to do it without anyone else catching on. If you put ‘NZ’ into eAX and execute CPUID, it returns “* Chris Norrie *”. That’s a hack, and it’s amazing.
 The Queercon badge is always a work of art, and this year is no exception. Last year, we took a look at