One Transistor RTL-SDR Upconverter

Even if you haven’t used one, you’ve probably seen the numerous projects with the inexpensive RTL-SDR USB dongle. Originally designed for TV use, the dongle is a software defined radio that many have repurposed for a variety of radio hacking projects. However, there’s one small issue. By default, the device only works down to about 50 MHz or so. There are some hacks to change that, but the cleanest way to get operation is to add an upconverter to shift the frequency you want higher. Sounds complicated? [Qrp-Gaijin] shows how to do it with a single transistor. You can see some videos of the results, below.

Actually, [Qrp-Gaijin] built an earlier version but wasn’t satisfied with the performance. He found that his original oscillator was driving an overtone crystal at its fundamental frequency. The device worked, but only because the oscillator was putting out harmonics, including the third harmonic at the actual needed frequency (49.8 MHz).

Continue reading “One Transistor RTL-SDR Upconverter”

Garage Distance Sensor Kicks Tennis Ball To Curb

Those with small garages might be familiar with the method of hanging a tennis ball from a ceiling to make sure they don’t hit the back wall with their car. If the car isn’t in the garage, though, the tennis ball dangling from a string tends to get in the way. To alleviate this problem, [asaucet] created a distance sensor that can tell him when his car is the perfect distance from the garage wall.

At the heart of the distance sensor is an HC-SR04 ultrasonic rangefinder and a PIC16F88 microcontroller. [asaucet] uses a set of four LEDs to alert the driver how close they are to the garage wall. [asaucet] also goes into great detail about how to use an LCD with this microcontroller for setting up the project, and the amount of detail should be enough to get anyone started on a similar project.

While this isn’t a new idea, the details that [asaucet] goes into in setting up the microcontroller, using the distance sensor, and using an LCD are definitely worth looking into. Even without this exact application in mind, you’re sure to find some helpful information on the project page.

Continue reading “Garage Distance Sensor Kicks Tennis Ball To Curb”

Shoot The Eclipse With A Phone And Do Not Go Blind

So you want to photograph Eclipse 2017 but you don’t want to rush out and buy an expensive DSLR just for the event? Not a problem, if you build this simple smartphone filter and occluder.

It all started innocently enough for [Paul Bryson] with his iPhone and a lens from those cheap cardboard eclipse glasses we’re starting to see everywhere. Thinking that just taping the filter over the stock lens would do, [Paul] got a painful faceful of sunshine when he tried framing a shot. Turns out the phone body was not big enough to blot out the sun, and besides, the stock lens doesn’t exactly make for a great shot. So with an iPhone telephoto lens affixed to a scrap of wood and a properly positioned filter, [Paul] has a simple rig that’ll let him get some great pre-totality shots of the eclipse, and it’ll be easy to bust out the phone for two minutes of totality selfies. Looks like this setup would be easy to adapt to other phones, too.

We’re all over Eclipse 2017, from Hackaday Eclipse Meetups in at least four different points along the path of totality to experiments on relativity to citizen science efforts so you can get in on the action too. Mark your calendars – August 21 will be here before you know it.

Imaging Magnetism With A Hall Effect Camera

[Peter Jansen] is the creator of the Open Source Tricorder. He built a very small device meant to measure everything, much like the palm-sized science gadget in Star Trek. [Peter] has built an MRI machine that fits on a desktop, and a CT scanner made out of laser-cut plywood. Needless to say, [Peter] is all about sensing and imaging.

[Peter] is currently working on a new version of his pocket-sized science tricorder, and he figured visualizing magnetic fields would be cool. This led to what can only be described as a camera for magnetism instead of light. It’s a device that senses magnetic fields in two directions to produce an image. It’s cool, and oddly, electronically simple at the same time.

Visualizing magnetic fields sounds weird, but it’s actually something we’ve seen before. Last year, [Ted Yapo] built a magnetic imager from a single magnetometer placed on the head of a 3D printer. The idea of this device was to map magnetic field strength and direction by scanning over the build platform of the printer in three dimensions. Yes, it will create an image of field lines coming out of a magnet, but it’s a very slow process.

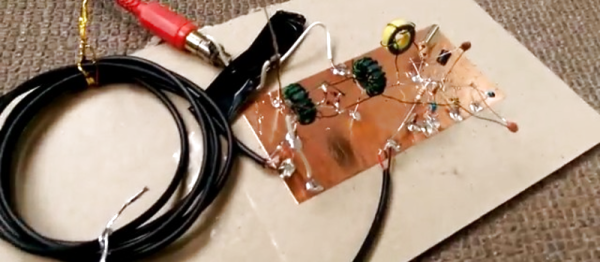
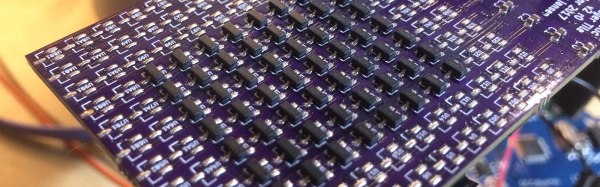
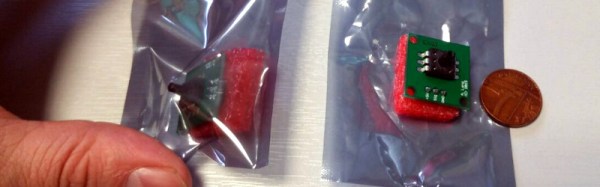
Instead of using just one magnetic sensor, [Peter] is building a two-dimensional array of magnetic sensors. Basically, it’s just a 12×12 grid of Hall effect sensors wired up to a bunch of analog multiplexers. It’s a complicated bit of routing, but building the device really isn’t hard; all the parts are easily hand-solderable.

While this isn’t technically a camera as [Peter] would need box or lens for that, it is a fantastic way to visualize magnetic fields. [Peter] can visualize magnets on his laptop screen, with red representing a North pole and green representing the South pole. Apparently, transformers and motors look really, really cool, and this is a perfect proof of concept for the next revision of [Peter]’s tricorder. You can check out a video of this ‘camera’ in action below.

Continue reading “Imaging Magnetism With A Hall Effect Camera”

RoadRunner running stroller

Hackaday Prize Entry: Powered Running Stroller Keeps You Running

Types of strollers called ‘running strollers’ exist to make it possible to bring your toddlers along for your run but try it with two four-year old, 38 lb young ones, against the wind, and up enough hills and you’ll quickly lose steam. [Andrew Clink]’s and his wife’s solution? Modify the stroller to be a self-powered roadrunner.

[Andrew]’s hackaday.io build logs are detailed, including design, calculations, schematics, 3D printing files, fails and retries, and more. Power is provided by a bank of lithium-ion batteries that drive a brushless motor. The motor turns the stroller’s front wheel using a toothed belt around a small motor pulley and a larger 3D printed wheel pulley, providing a 13.92:1 gear ratio. [Andrew] considered a number of methods for steering, and even tried a few, but given that his paths are mostly straight lines, small adjustments by hand are all that’s needed. For the possibility of the stroller getting away from him for whatever reason, [Andrew] wrote an iOS app for his phone that makes use of the Bluetooth LE Proximity profile (PDF). It communicates with a small remote using an nRF8001 Bluetooth connectivity IC and for added safety has a belt clip and a stop button.

Does it work? See for yourself in the video below. We’re sure [Andrew] and his wife will continue to be fit for a long time to come.

Continue reading “Hackaday Prize Entry: Powered Running Stroller Keeps You Running”

The Trouble With Cordless Power Tools

If you grow up around a small engineering business you are likely to gain something of an appreciation for power tools. You’ll see them of all ages, sizes, manufacturers, and technologies. When thinking of the power tools constantly on hand in the workshop of a blacksmith like my dad for instance, I’m instantly seeing a drill and an angle grinder. The drill that most comes to mind is a Makita mains powered hand drill, and given that I remember the day he bought it to replace his clapped-out Wolf in 1976, it has given phenomenal service over four decades and continues to do so.

41 years of hard use, and still going strong.
41 years of hard use, and still going strong…

Of course, the Makita isn’t the only drill in his possession. A variety of others of different sizes and speeds have come and gone over the years, and there is always one at hand for any given task. The other one I’d like to single out is I think the most recent acquisition, a Bosch cordless model he bought several years ago. It’s similar in size and capabilities to the Makita save for its bulky battery pack, and it is a comparably decent quality tool.

So, we have two drills, both of similar size, and both of decent quality. One is from the mid 1970s, the other from the end of the last decade. One is a very useful tool able to drill holes all day, the other is little more than a paperweight. The vintage model from the days of flared trousers is a paperweight, you ask? No, the not-very-old Bosch, because its battery pack has lost its capacity. The inevitable degradation due to aged cell chemistry has left it unable to hold enough charge for more than maybe a minute’s use, and what was once a tool you’d be glad to own is now an ornament.

Continue reading “The Trouble With Cordless Power Tools”

One Person’s Experience Of Having PCB Assembly Done In China

Those of us who have our PCBs manufactured by Chinese PCB fab houses will be used to seeing tempting offers to also assemble our completed boards. Send the Gerbers as normal, but also send a BoM, and for an extra slice of cash you can receive fully assembled PCBs instead of just bare boards. It sounds alluring, but leaves a few questions for those without the experience. How much will it cost, what will the quality be like, and will my boards work? [Alexander Lang] had a limited run of ten small pressure sensor boards to make, and since his board house had started an assembly service,  decided to take the plunge and opt for full assembly.

His first step was to assemble his BoM and send it with the Gerbers. He is at pains to stress that the BoM is key to the whole project, and getting it right with the correct packages and more than one source for each component is critical. The board house first charged him £32.05 ($41.76) to make his PCBs and stencil, and assess his BoM for a build quote. A few days passed, and then he had a quote for assembly, £61.41 ($80). He placed the order, the board house processed it and made the boards, and in due course his working PCB modules arrived.

This might sound at this point like an unexciting saga, but its very smoothness is the key to what makes it interesting. Those of us who have wondered about the risks involved in taking up such a service need to hear stories like this one as surely as we do stories of failure, because without them we’re flying blind. Whether £93.46 ($121.76) for ten small boards represents good enough value is another matter, but if surface-mount soldering is not your thing you might be interested to follow [Alexander]’s example. After all, it wasn’t so long ago that getting a cheap PCB made in China was a similar leap of faith.