Brazil Wins The Raspberry Pi Overclocking Olympics

[Alex Rissato] proudly reports that he now holds the record for highest benchmark score on HWBOT (machine translation); something he sees not only as a personal achievement but admirably, of national pride. Overclocking a Raspberry Pi is not as simple as achieving the highest operational clock rate. A record constitutes just the right combination of CPU clock, memory clock, GPU clock and finally the CPU core voltage. If you’ve managed to produce that special sauce, the combination must be satisfactorily cooled and most importantly be stable enough to pass an actual performance benchmark.
More POWAAA to the CPU!

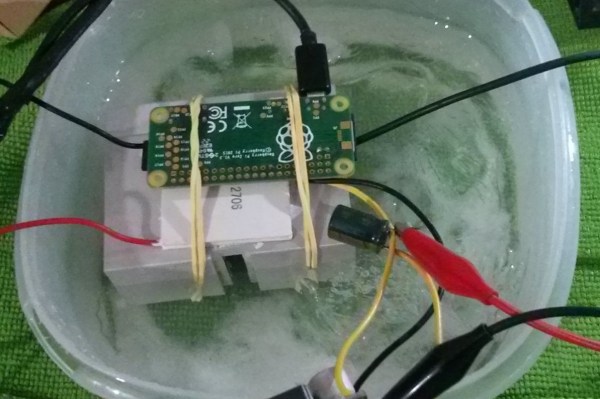
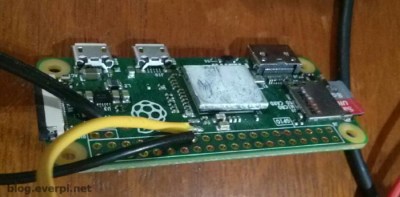
[Alex] realized that the main hurdle to achieving the desired CPU clock was the internally generated and hence restricted, CPU core voltage; This is externally LC filtered and routed back to the CPU on a stock Pi. [Alex] de-soldered the filter on the PCB and provided the CPU with an externally generated core voltage.

Next, the cooling had to be tended to. Air cooling simply wouldn’t cut it, so a Peltier based heatsink interface had to be devised with the hot side immersed in a bucket of salt water. All of this translated to a comfy 16C at a clock speed of 1600 MHz.

Was all the effort justified? We certainly think it was! Despite falling short of the Pi zero CPU clock rate record, currently set at 1620MHz,  [Alex] earned the top spot in the HWBOT Prime overclocking benchmark. Brazil can now certainly add this to its trophy cabinet, arguably overshadowing the 129 Olympic medals.

A Real Hacker’s IDE

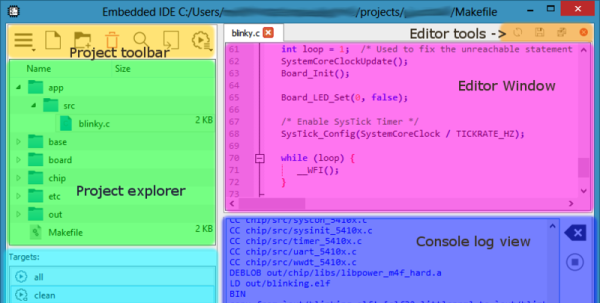
We don’t use a GUI IDE, but if we did, it would most certainly be something along the lines of [Martin]’s embedded-IDE project. We’ve always felt that most IDEs are just fancy wrappers around all the tools that we use anyway: Makefiles, diff, git, ctags, and an editor. [Martin]’s project makes them less fancy, more transparent, and more customizable, while retaining the functionality. That’s the hacker’s way — putting together proven standard tools that already work.

The code editor he uses is QScintilla, which uses clang for code completion. The “template” system for new projects? He uses diff and patch to import and export project templates. Because it uses standard tools all along the way, you can install the entire toolchain with sudo apt-get install clang diffutils patch ctags make on an Ubuntu-like system. Whatever compiler you want to use is supported, naturally.

We can’t see a debugger interface, so maybe that’s something for the future? Anyway, if you want a minimalistic IDE, or one that exposes the inner workings of what it’s doing rather than hiding them, then give [Martin]’s IDE a try. If you want more bells and whistles that you’re not going to use anyway, and don’t mind a little bloat and obscuration, many of our writers swear by Eclipse, both for Arduino and for ARM platforms. We’ll stick to our butterflies.

A Smart Switch Board For The ESP8266

With a plethora of IoT projects and inexpensive commercial smart light fittings and mains switches appearing, you might be forgiven for thinking that another offering in this crowded marketplace would be superfluous. But there is always room for improvement in any field, and in this particular one [Xose Pérez] has done just that with his Espurna board.

This board is a very well executed ESP8266 mains relay, with an on-board mains power supply and power monitoring. It was designed with his Espurna (“Spark” in Catalan) custom firmware in mind, which offers support for Alexa, Domoticz, Home Assistant and anything that supports MQTT or HTTP REST APIs.

Best of all, it’s a piece of open source hardware, so you can download everything you need from his GitHub repository to create your own. For the ultimate in convenience you can even order the PCB ready-made from OSH Park.

As a demonstration of the Espurna board in a real application, he’s produced a smart socket project neatly enclosed in a wall-wart style box with an inbuilt Euro style plug and socket.

We’ve featured [Xose]’s work several times before here at Hackaday, he’s something of an IoT wizard. Most recently there was his work with Alexa and the ESP8266, but before that was his MQTT LED array for his laundry monitor.

This Binary Keyboard Is For ASCII Purists

So, you’re a keyboard enthusiast. The ‘board that came from Dell, HP, or whoever made your computer is just not for you. You have an ancient IBM, a decal-free Das Keyboard, or another similarly esoteric text input device. Your typing can be heard three blocks away as the unmistakable clack of bent-spring switches reverberates around you, but you don’t care because you’re in the Zone.

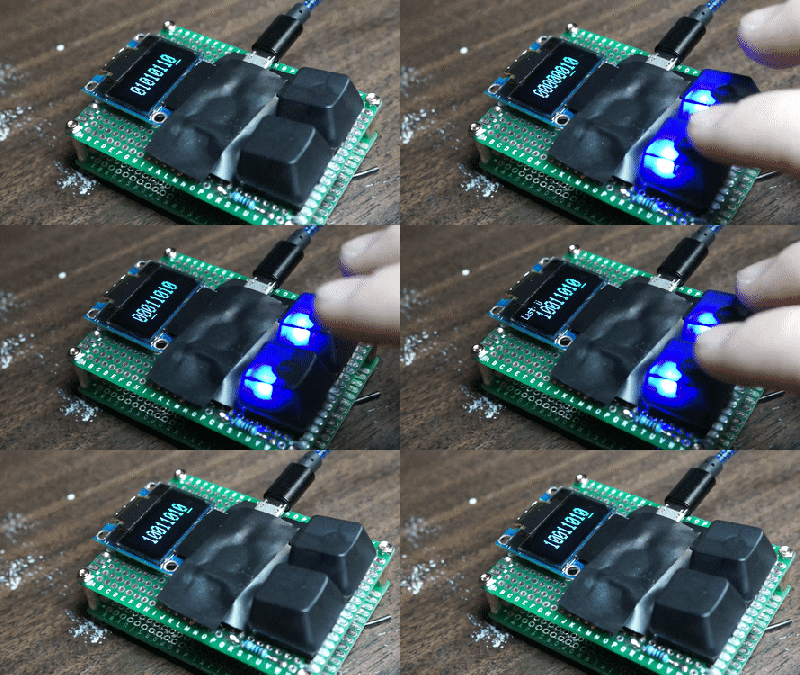
No keyboard can be as high-end as the one you already have, your position in the hierarchy of text entry is assured. But then along comes [Chris Johnston] with his project, and suddenly your desktop looks very cluttered. It’s a binary keypad with only a 0 key, a 1 key, and an OLED display. All input is as a series of binary bytes, so as a hardcore binary typist you’ll need to know your ASCII.
Behind the keys is an Arduino Pro Micro acting in USB HID mode, and running the code you can download from the GitHub link above. It’s a gloriously pointless input device, but we’re sure you’ll agree it has something of the 00110001 00110011 00110011 00110111 about it.

If you think you may have seen this before on Hackaday then you’re not quite right. We have had a binary keypad in the past, but that one had a return key and thus had three keys. This one’s a 2-key ‘board for binary purists.

[via /r/mechanicalkeyboards/]

Prisoners Build DIY Computers And Hack Prison Network

The Internet is everywhere. The latest anecdotal evidence of this is a story of prison inmates that build their own computer and connected it to the internet. Back in 2015, prisoners at the Marion Correctional Institution in Ohio built two computers from discarded parts which they transported 1,100 feet through prison grounds (even passing a security checkpoint) before hiding them in the ceiling of a training room. The information has just been made public after the release of the Inspector General’s report (PDF). This report is fascinating and worth your time to read.

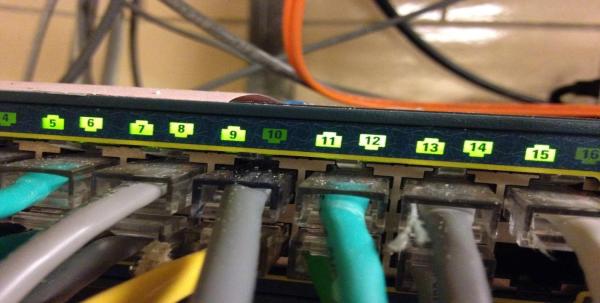
This Ethernet router was located in a training room in the prison. Physical access is everything in computer security.

Prisoners managed to access the Ohio Department of Rehabilitation and Corrections network using login credentials of a retired prison employee who is currently working as a contract employee. The inmates plotted to steal the identity of another inmate and file tax returns under their name. They also gained access to internal records of other prisoners and checked out websites on how to manufacture drugs and DIY weapons, before prison officers were able to find the hidden computers. From the report:

The ODAS OIT analysis also revealed that malicious activity had been occurring within the ODRC inmate network. ODAS OIT reported, “…inmates appeared to have been conducting attacks against the ODRC network using proxy machines that were connected to the inmate and department networks.” Additionally, ODAS OIT reported, “It appears the Departmental Offender Tracking System (DOTS) portal was attacked and inmate passes were created. Findings of bitcoin wallets, stripe accounts, bank accounts, and credit card accounts point toward possible identity fraud, along with other possible cyber-crimes.”

The prisoners involved knew what they were doing. From the interview with the inmate it seems the computers were set up as a remote desktop bridge between internal computers they were allowed to use and the wider internet. They would use a computer on the inmate network and use a remote desktop to access the illicit computers. These were running Kali Linux and there’s a list of “malicious tools” found on the machines. It’s pretty much what you’d expect to find on a Kali install but the most amusing one listed in the report is “Hand-Crafted Software”.

This seems crazy, but prisoners have always been coming up with new ideas to get one over on the guards — like building DIY tattoo guns, When you have a lot of time on your hands and little responsibility, crazy ideas don’t seem so crazy after all.

Hackaday Prize Entry: Another Internet Button

It’s long been a staple of future-gazing, the idea that we will reach a moment at which all of life’s comforts can be summoned at the press of a button. Through the magic of technology, that is, without the army of human servants with which wealthy Victorians surrounded themselves to achieve the same aim.

Of course, to reach this button-pressing Nirvana, someone has to make the buttons. There are plenty of contenders for the prize of One Button To Rule Them All, the one we’ll probably have seen the most of is Amazon’s Dash. Today though we’re bringing you another possibility. [Hendra Kusumah]’s A.I.B. (Another IoT Button) is as its name suggests, a button connected to the Internet. More specifically it’s a button that connects to IFTTT and allows you to trigger your action from there.

Hardware wise, it couldn’t be simpler. A button, a Particle Photon, some wires, and a resistor. Then install the code on the board, and away you go. With a small code change, it also works with an ESP8266. That’s it, it couldn’t be simpler. You might ask where the fun in that lies, but you’d be missing the point. It’s the event that you trigger using the button that matters, so why make creating the button a chore?

We’ve shown you many IoT buttons, just a couple of posts are this ESP8266 button and a look at  the second-generation Amazon Dash.

Organizers Of World Create Day Are Getting Something Special

World Create Day is this Saturday, and events are being organized all over the world. Anyone can set one of these up, and it’s not too late for you to have one in your own town — just fill out this form to become a host.

We’re sending swag out for everyone that gets together and hacks on World Create Day, things like stickers and a few other goodies. This year we’ve decided on a special thank you to the local organizers. Check out the mockups for these T-shirts. Our Art Director, Joe Kim, has created something truly amazing with this year’s images. You can only get one if you are the meetup organizer and you post pictures and a bit of back story about your World Create Day experience on your event page.

If you’ve been on the fence about being a host, take the leap and give it a try! It’s great fun to get together with other Hackaday folks in real life, and you’ll get this super-rare Hackaday shirt out of it.