
In the last installment, I told you I was building an open-source, split, ortholinear keyboard called the ErgoDox. I’m doing this because although I totally love my Kinesis Advantage, it has made me want to crack my knuckles and explore the world of split keyboards. Apparently there are several of you who want to do the same, as evidenced by your interest in the I’m Building an ErgoDox! project on IO. Thank you!
Well boys and girls, the dust has settled, the soldering iron has cooled, and the keycaps are in place. The ErgoDox is built and working. Now that it’s all said and done, let me tell you how it went. Spoiler alert: not great. But I got through it, and it keyboards just like it’s supposed to. I’m gonna lay this journey out as it happened, step by step, so you can live vicariously through my experience.

Ode to Diodes
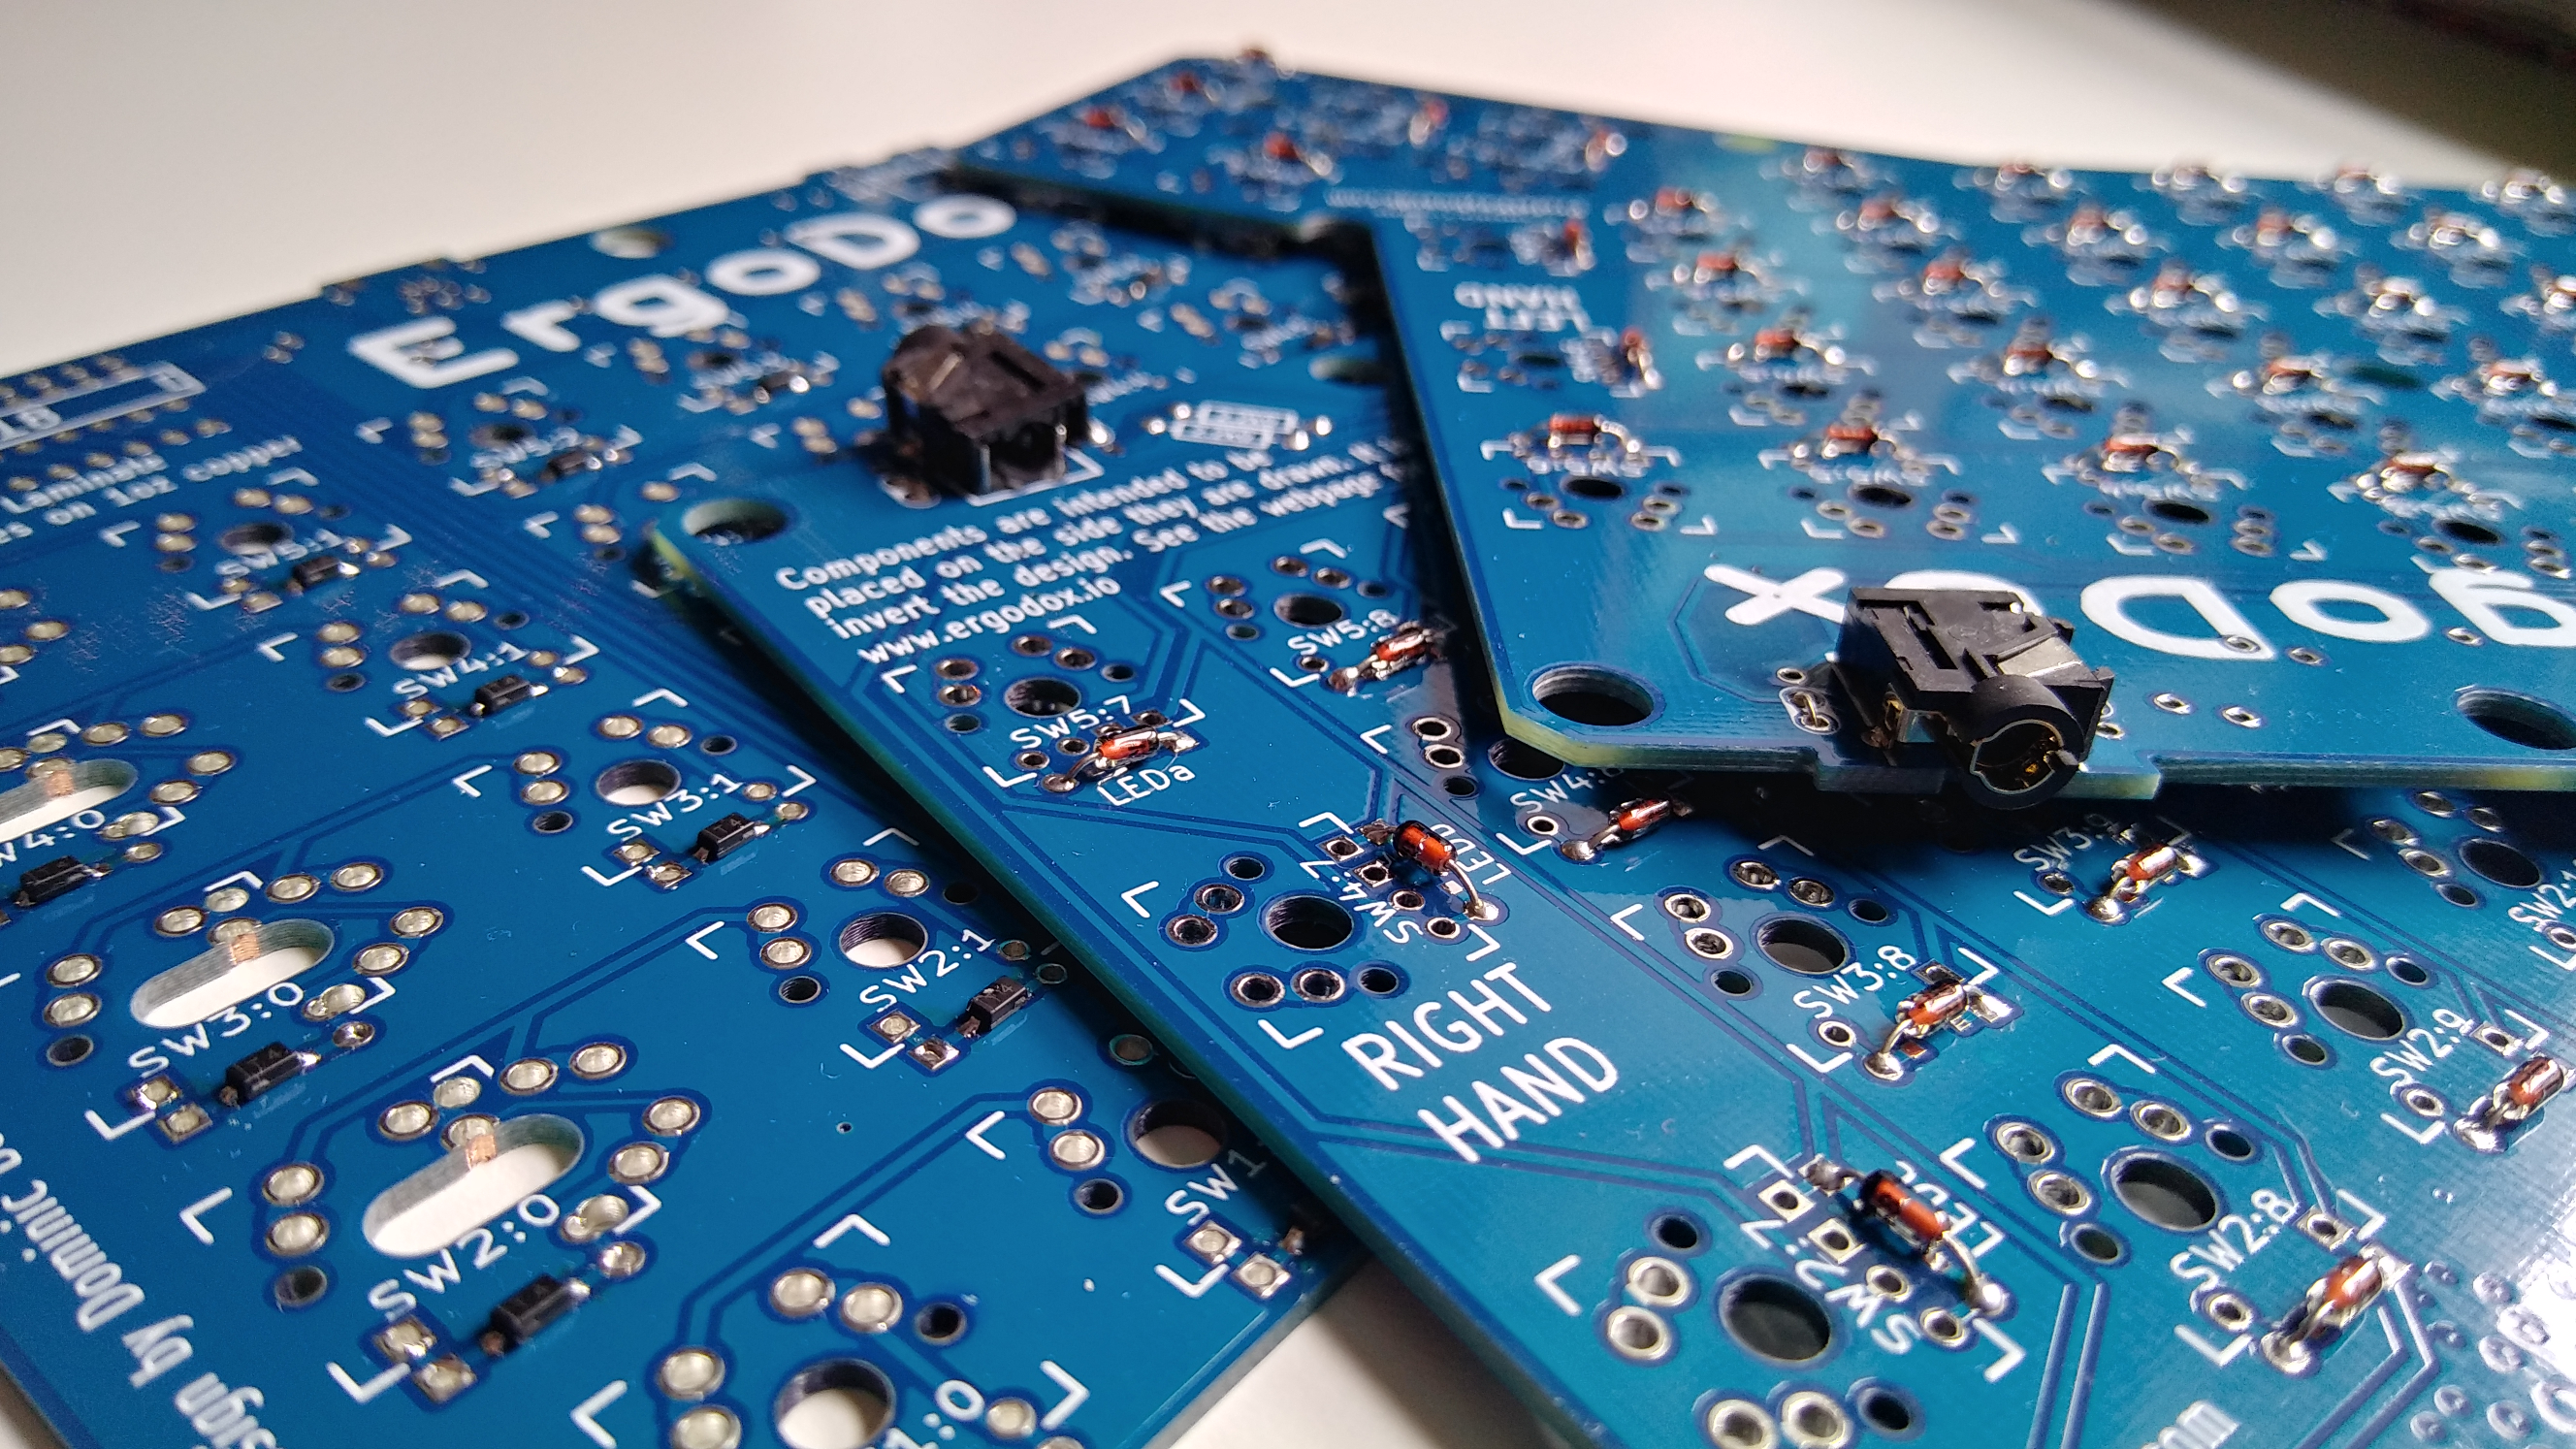
It all starts with the diodes. Every switch gets a diode because of the way keyboard controllers work to detect key presses. When every switch has a diode, there should never be any unintended keystrokes on the screen, a problem known as ghosting. You should also be able to press as many keys as you want at the same time, and they will all register correctly with none missed. If your keyboard does this, it has n-key rollover.
I could have had this keyboard done so much sooner if I had just calmly set aside the SMD diodes that came with my components kit and used through-hole from the start. But no, I had to try soldering 76 of them by hand without solder paste. It went pretty well considering my chisel tip and .32 diameter solder. Continuity checks indicated that I hadn’t managed to fry any of them with heat. But then I started to worry that they just weren’t well-soldered. And why start a build with 152 possible points of failure?
I got through one and a half boards worth before I talked myself into switching to through-hole. I’m glad I did, because I don’t mind soldering THT at all, and diodes are cheap in either form. And you know what else? The clear bodies of through-hole diodes just add to the a e s t h e t i c. Yeah, let’s go with that.
Flip. The Boards. Over.
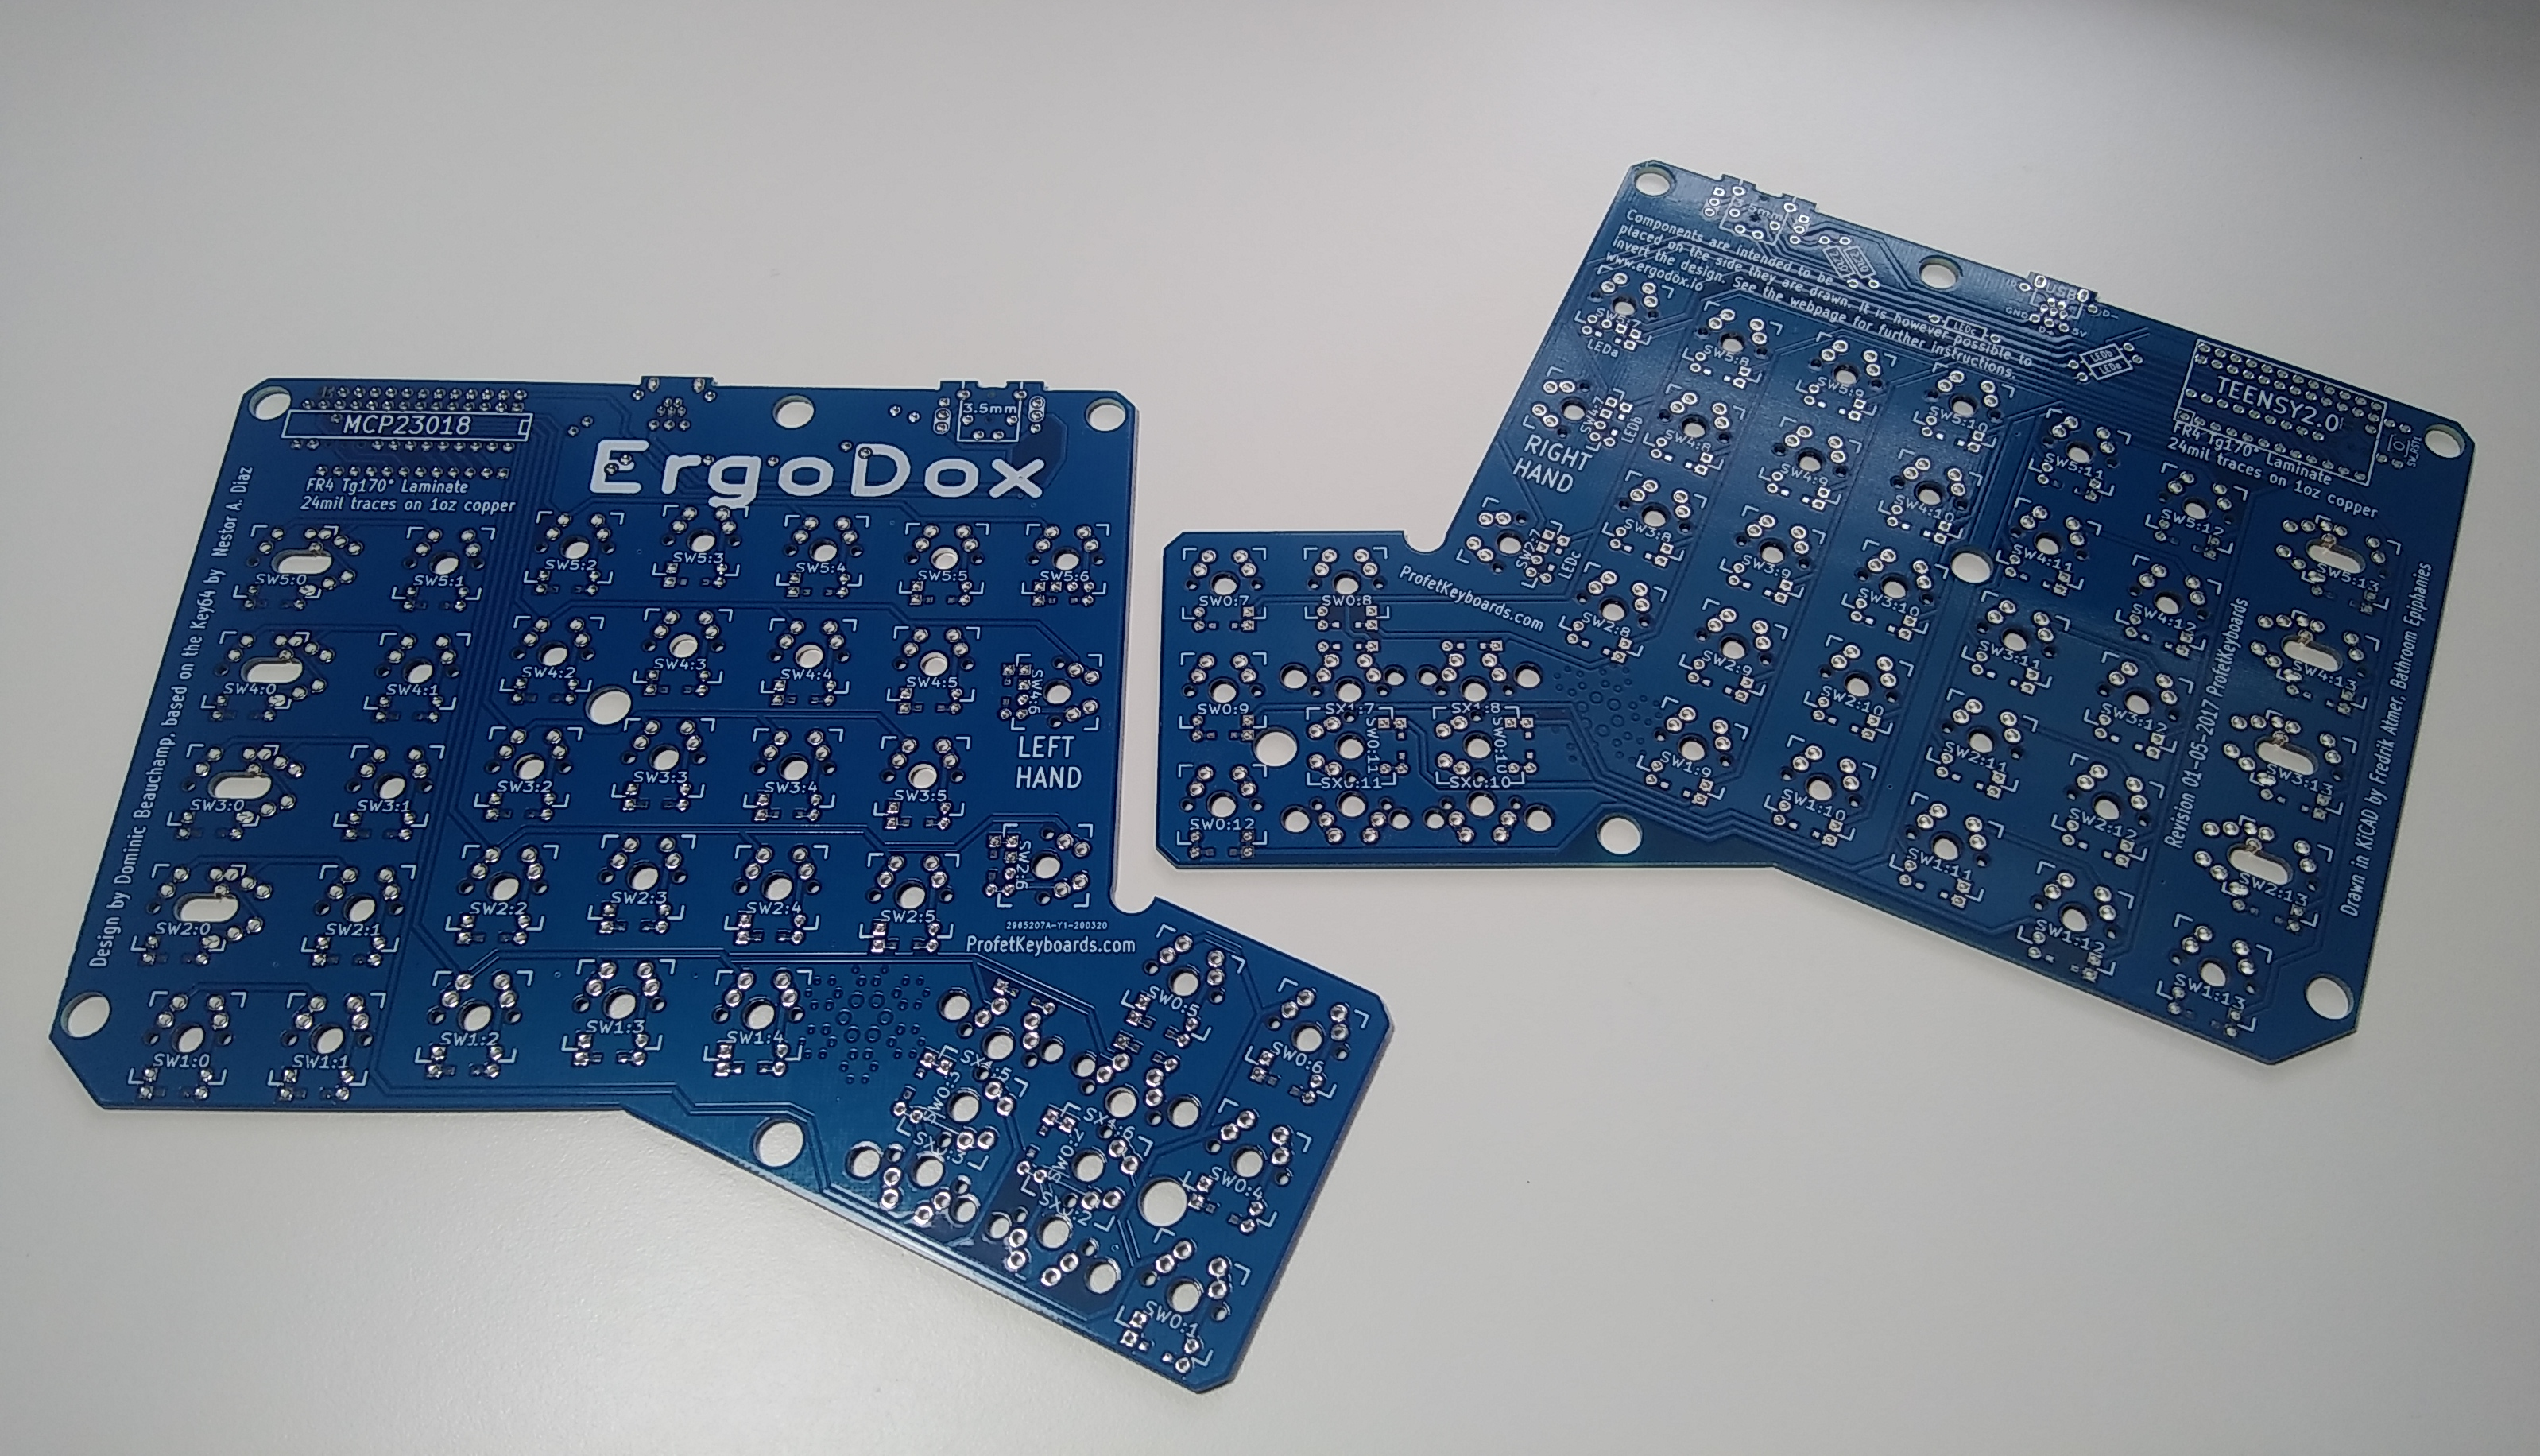 I wish I could insert siren emoji around this section. Because if you take anything at all away from this story, it should be this part. Remember back in the first post when I said that the PCBs for both halves are exactly the same, and that you use one side for the left hand and one side for the right?
Once the diodes are soldered, it’s of the utmost importance that you flip the boards over and swap them before moving on, because all the other components go on the other side. And I knew this going in. I watched this build video several times before I started, and even wrote down all the steps, including a note about what side of which board the components are supposed to be. And I still messed it up.
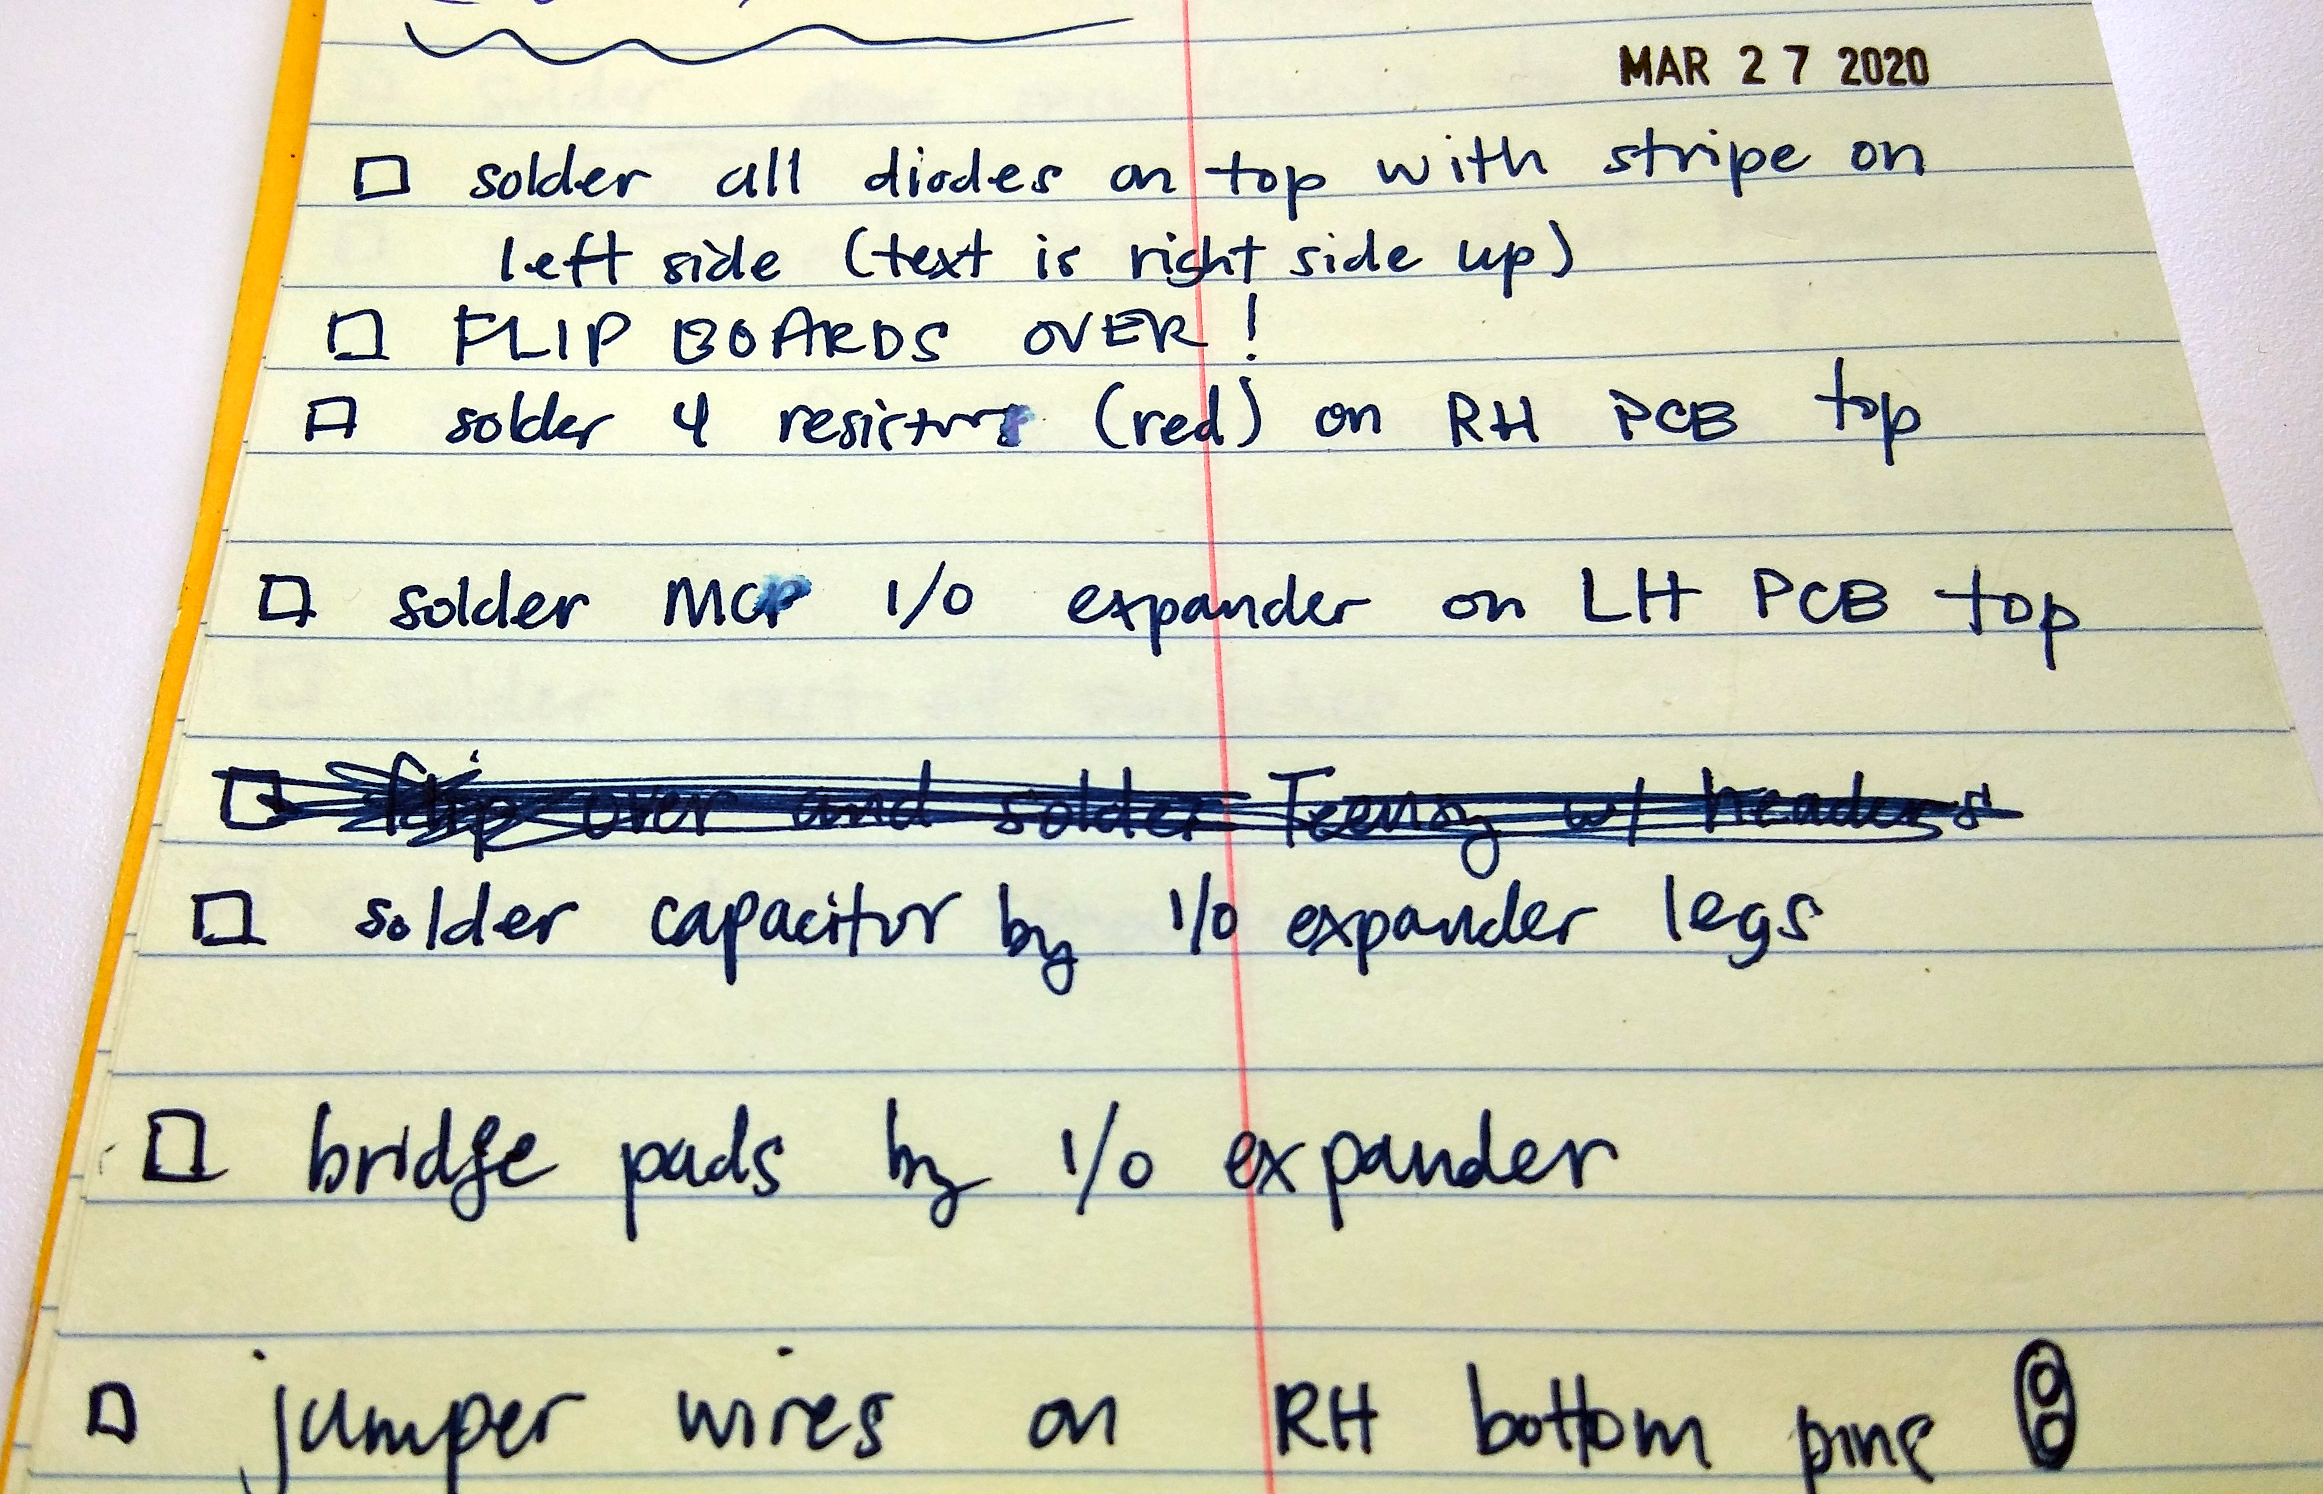
What can I say? I was in soldering mode, and excited to move on from the diodes. It was late at night. My notes with all the steps where I had FLIP BOARDS OVER explicitly written down were in another room, and I was too glued to the chair to get them.
Besides, I’d been over my notes and watched that build video about five times. By the time I realized what I was doing, I’d already soldered all five resistors and both TRRS jacks on the wrong side. The resistors were no big deal, but the TRRS jacks were impossible to desolder without ruining them, or the boards, or both.
So my words of wisdom to you are this: get four pieces of masking or other low-tack tape and label your boards explicitly. Don’t even call them ‘top’ and ‘bottom’, because those designations change. Write something like ‘LH switch insert side’ and ‘LH diode insert side’ to really drive the point home. Do yourself a favor and place these directly over the LEFT HAND and RIGHT HAND labels on the silkscreen.
The Rest of the Components
So at this point, I had covered one and a half boards with SMD diodes of questionable utility. When I decided to go through-hole, I de-soldered the half board, cleaned it up, and reused it. After I failed to flip the boards, I had two boards full of THT diodes, each with its TRRS jack on the wrong side. Fortunately, I had a total of five boards to work with when I started. I was now down to the last two.
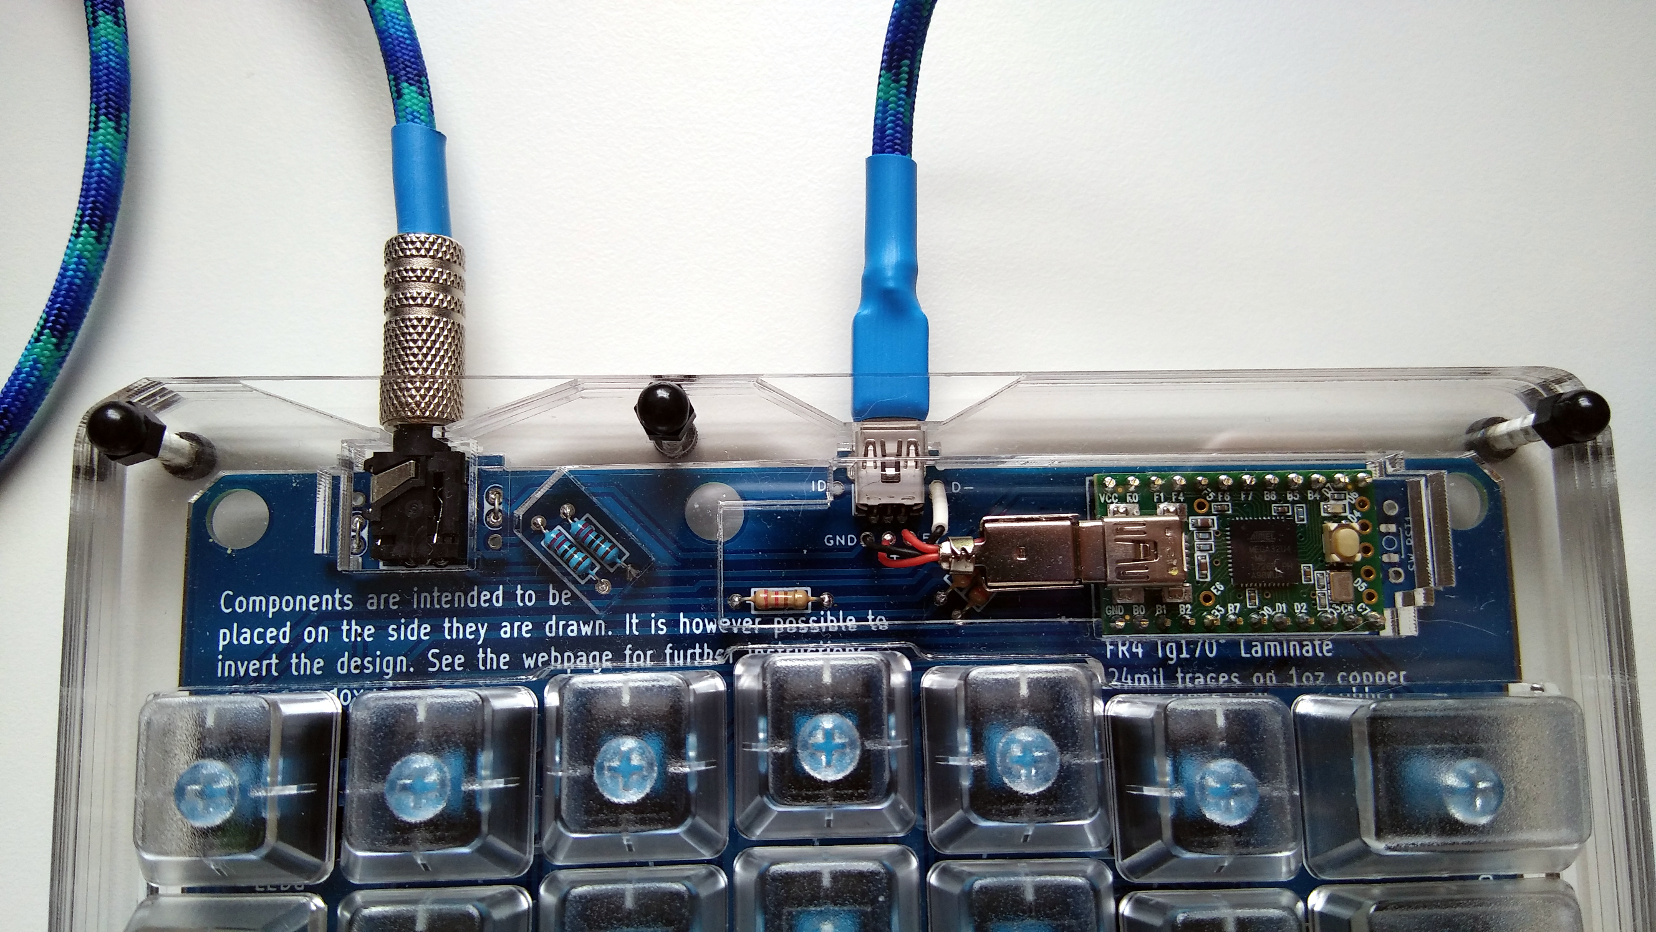
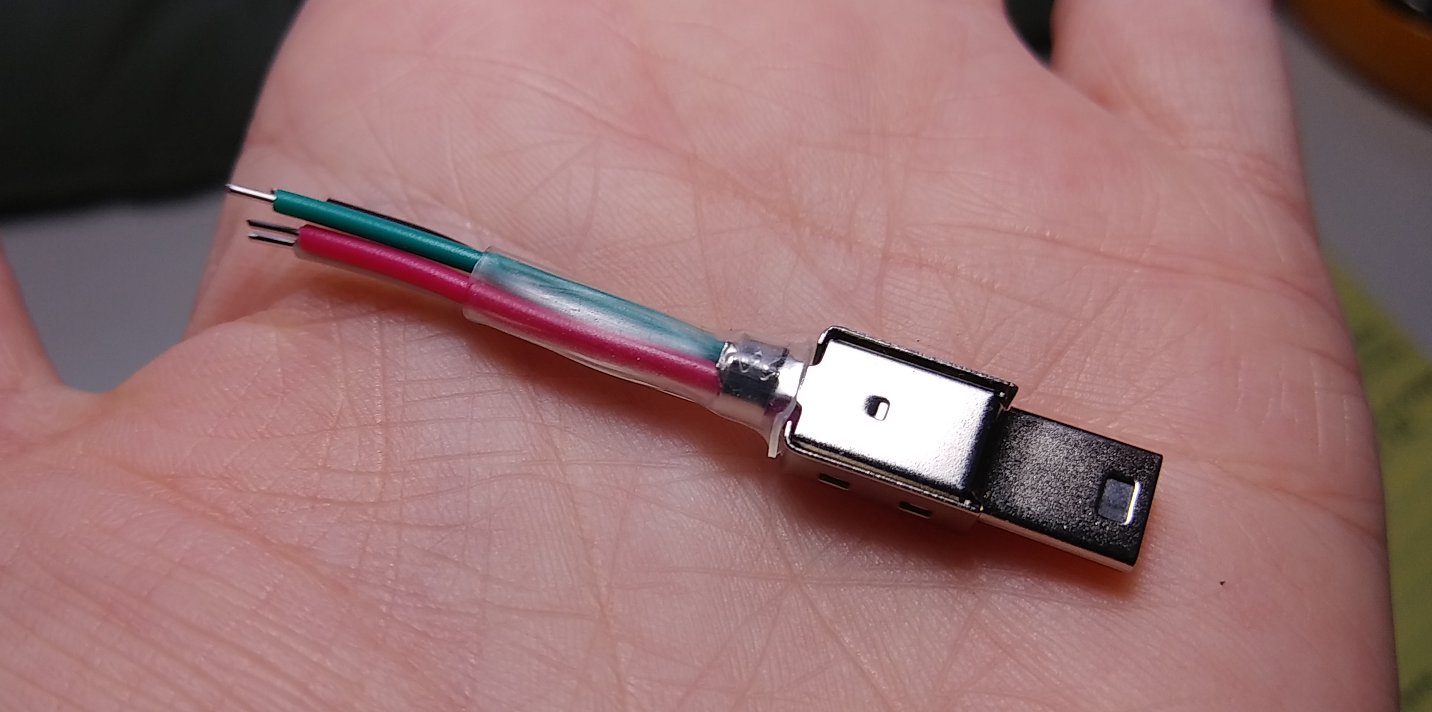
The rest of the build went pretty well. After the diodes come the five resistors. Then the I/O expansion chip and its little capacitor buddy on the slave side, followed by the TRRS jacks, the Teensy, and the mini-USB extension from the Teensy to the edge of the board. The rest is easy compared to wiring up the mini-USB extender.
Hello, World?
I didn’t expect it to work perfectly the first time, but I thought it would at least do something. In retrospect, I should have done the first test with bona fide USB and TRRS cables, but I was excited about the ones I’d made.
The Teensy should go into blink mode, but it did nothing at all. I had it plugged into a powered USB hub with individual switches for each port, and my first clue was that the port’s light went off when it was supposed to come on. I unplugged the USB extender and found that I must have had the mini-USB diagram rotated 180° or something, because only one of the wires was in the right place.
After I fixed that and switched to a factory-made USB cable, I tried again. Both halves of the keyboard worked, but not for very long. I tried all the mini-USB cables in the house, bought three new ones, and got the same weird results. I also tried different circumstances, like leaving the slave half disconnected, turning off all other HID (I have a lot of HID plugged in) and then bypassing the hub altogether. It still didn’t work reliably.
Unstable Cable
When I finished making the TRRS cable, I tested continuity across the four conductors and everything checked out. One morning I found a mini-USB cable with a ferrite bead and figured, why not try it? I put both halves on the desk, but didn’t connect them together. It worked the first time, so I turned the USB port off and on a couple of times, and yanked and replaced the plug itself a few times for good measure. Every time, the three layer-indicating LEDs came on and it worked fine.
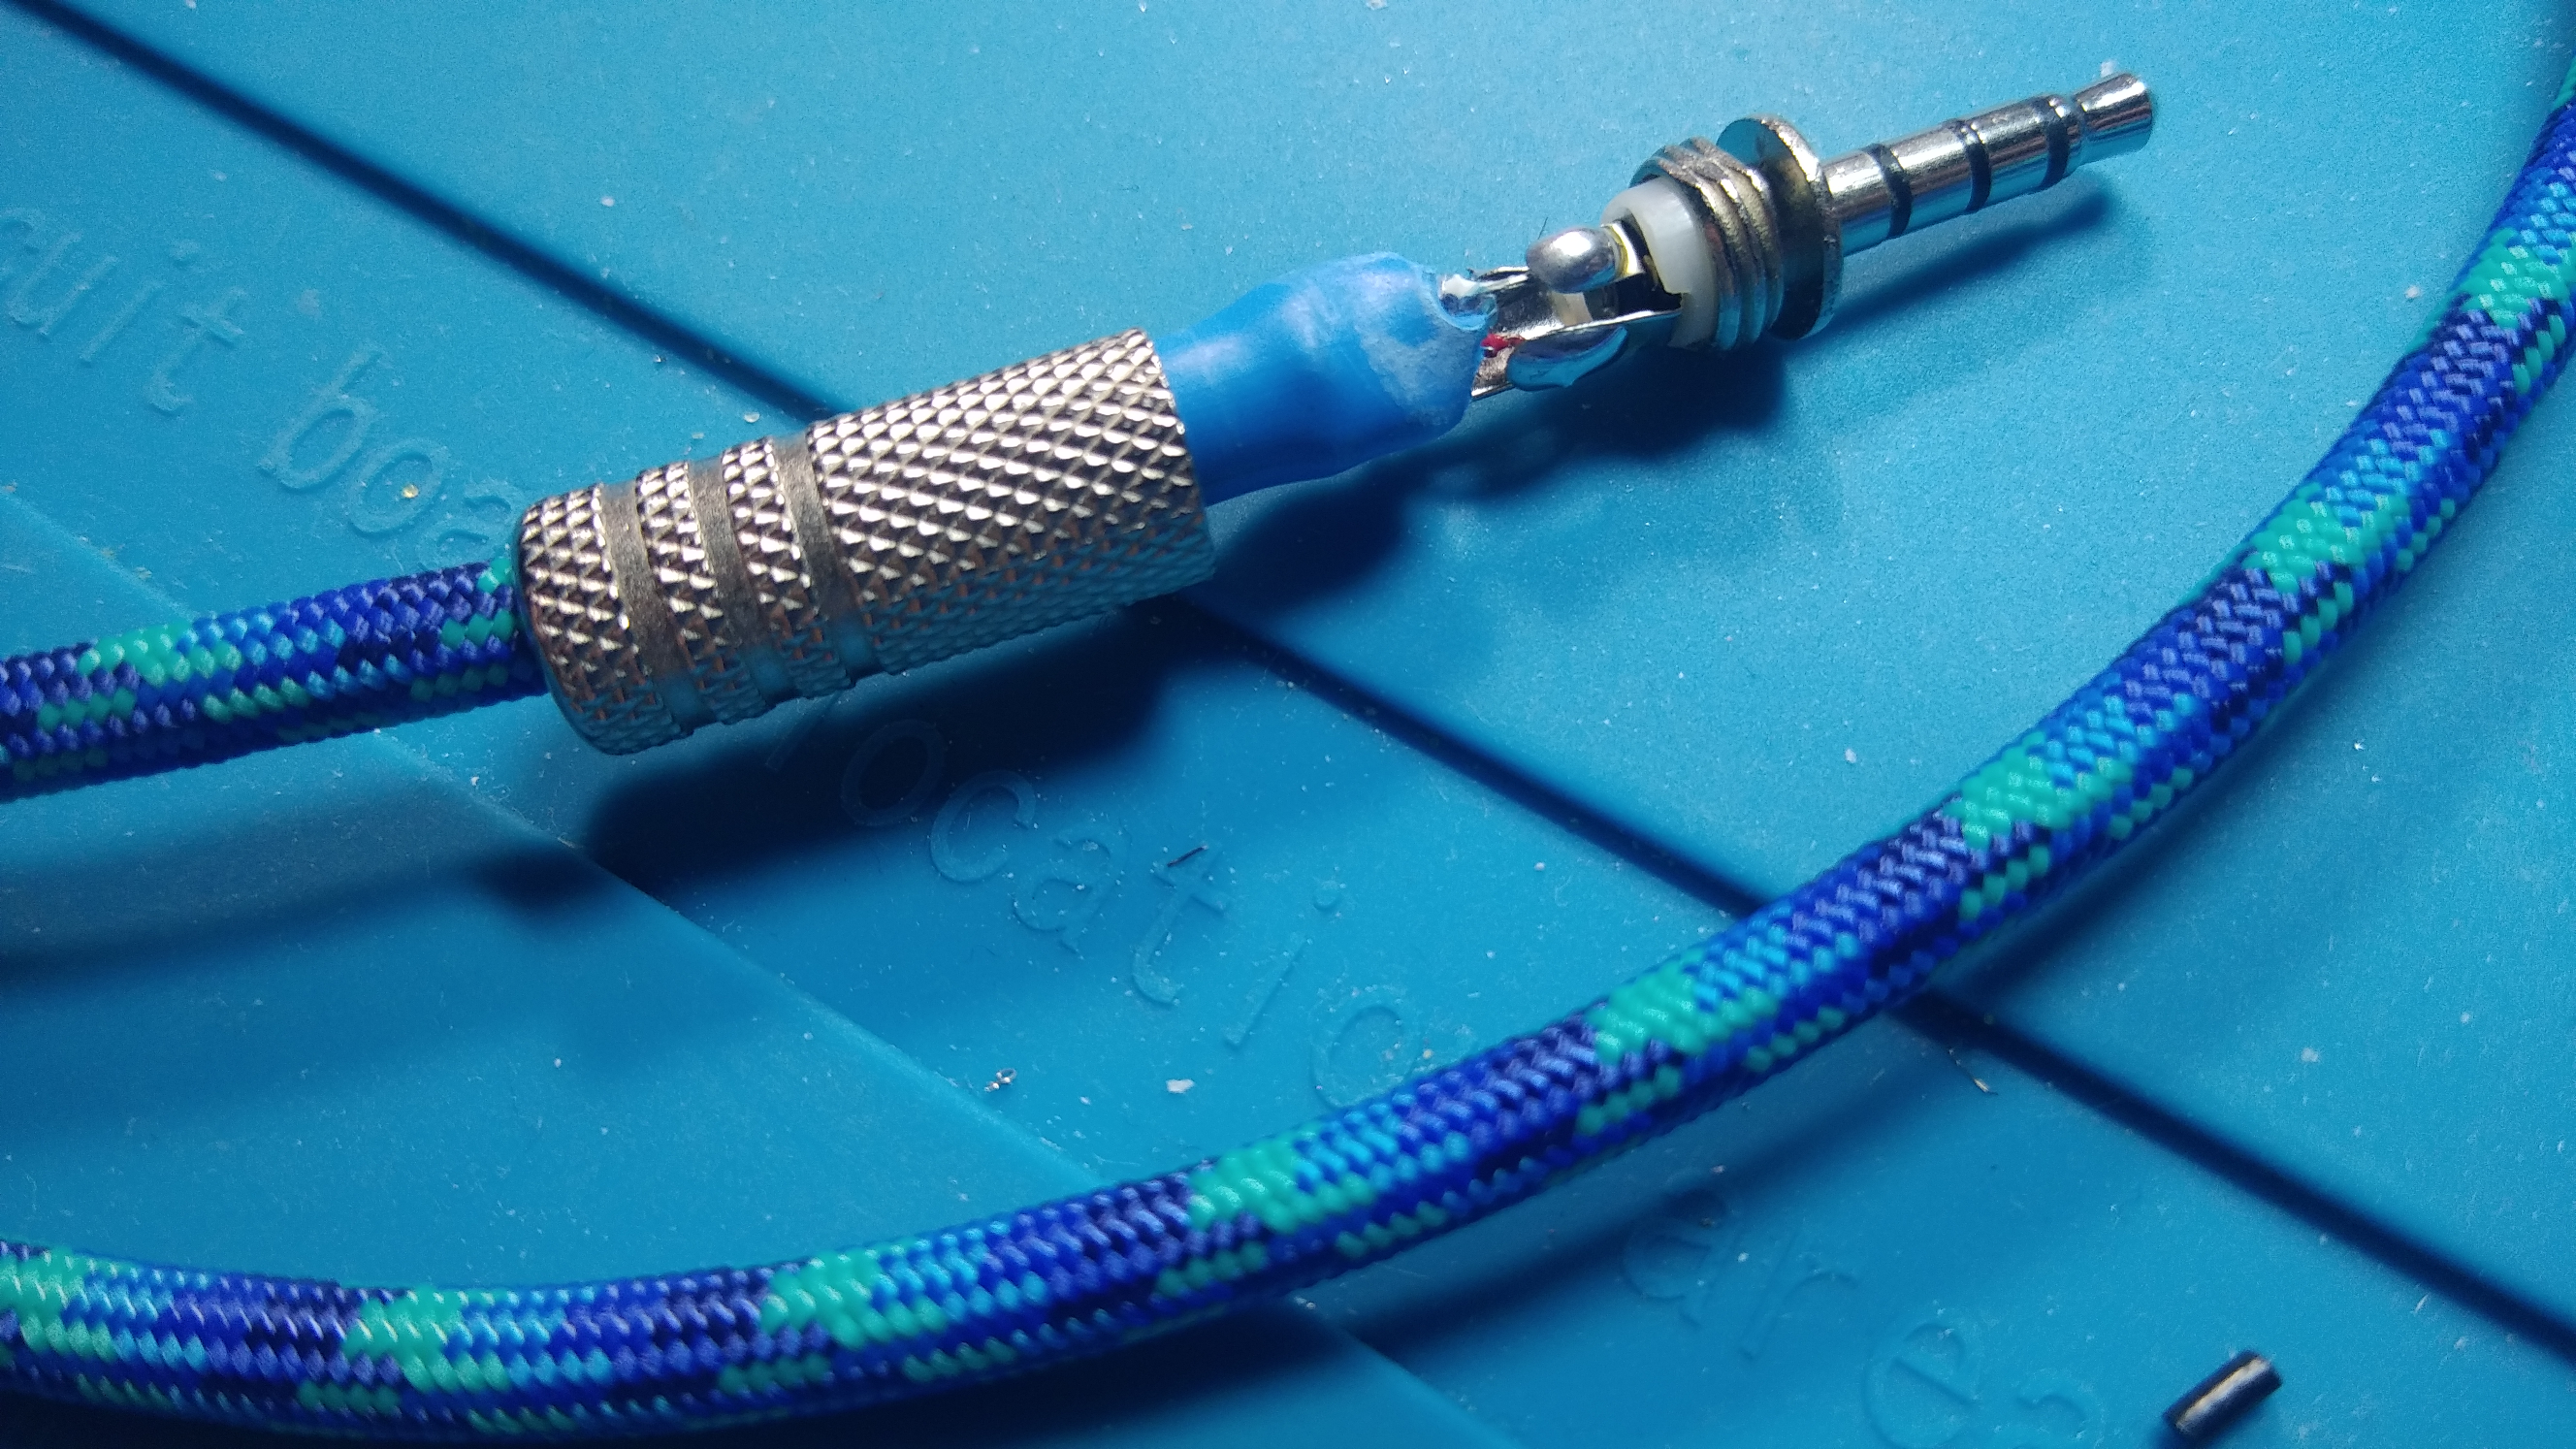
Then I plugged the TRRS cable I made into the master half, and the Teensy rebooted. A-ha! Finally, I decided to go get the only other TRRS I have — the aux cable from my car. When I plugged that one in, the Teensy didn’t react, so I did some more testing. It was at this point that I realized my mistake: not cross-checking all the conductors, as in holding a probe to the tip on one end, and probing both rings and the sleeve of the other end. And that was exactly the problem. After beep testing to confirm, I unscrewed one end of the cable and found three of the four conductors were touching. Making your own cables is fun, but it isn’t easy, and it’s an opportunity to add bugs.
It’s exciting to build tools — you want to keep going because it’s fun, but you also want to be done so you can use the thing. This paradox can lead to problems. There were times I wanted to break the boards in half, but I’m glad I kept at it. Even if I don’t end up using this keyboard much, I have something much better than a standard rectangle to use while I hot rod the Kinesis.


Ergo (therefore) dox (documents)
Therefore, it’s about time you documented this!
B^)
For anyone who’s interested in keyboards of this style but isn’t necessarily interested in this model (and there’s a great variety of them now), or is just interested in customizing the layout or features of a keyboard like this, check out the /r/ErgoMechKeyboards subreddit. It’s pretty new but there’s loads of good discussion and resources there already.
I learned of the subreddit because I recently mounted my laptop to my headboard so that I can use it while lying on my bed (with the screen above my face), and I’ve been wanting to build a fully split keyboard so I can have my hands down by my sides. I’m currently using a Goldtouch ball-jointed keyboard on my lap, and it’s okay but not quite as ergonomically positioned as I’d like. As well, the keys on it are annoyingly horizontally staggered like they are on most keyboards, despite that being unergonomic and unnecessary since the days of mechanical typewriters. Some kind of custom split keyboard would solve both of those issues, and let me more easily apply some kind of personally-optimized key layout as well. (QWERTY, of course, was also designed for mechanical typewriters, to reduce typebar jams, though not by slowing down the typist as is commonly believed. But we can do better now.)
Forgot to link to it: https://www.reddit.com/r/ErgoMechKeyboards/
We’ve all been there. At least you didn’t break the record of 14. :)
https://hackaday.com/2014/12/11/fail-of-the-week-teddy-top-and-fourteen-fails/
Just silkscreen the orientation and the chirality on the PCB…
Hi Kristina,
Thank you for a wonderful article. I think we all secretly have these projects, where thing goes stupendously wrong. Like most people, I bury mine under a sprinkling of shame, it’s so refreshing to read someone else be so open about one of theirs.
If you haven’t soldered a component in the wrong orientation or on the wrong side of the PCB, you probably need to do more projects.
Also, “rework” is just part of the process and having the right tools helps a lot. You didn’t say why it was nearly impossible to remove the TRRS jacks without ruining them. I suspect it’s because a jack has multiple soldered pins (including the frame) and even after desoldering each them thoroughly the residue solder around each pin prevents you from removing the jack. For this situation I’ve found that ChipQuik (used to remove SMD’s) works incredibly well and keeps the solder molten enough to remove the jack easily.
Why so many people like mechanical keyboards? I am developer, like to write as fast as I can and spefically bought a full-size keyboard with laptop-like keys. Small travels distance on full-sized keyboard feels like pure speed, before I fully adjusted it felt like my fingers were faster than my thoughts. Whenever I have to type on those “normal” or even “mechanical” keyboards, it feels like a step back to mechanical typewriters (yeah, maybe your fingers will be able to punch through solid wood, but after years of using this you get RSI). For me, the best keyboard I’ve ever owned is A4TECH KV-300H (I’m on my second one at work, will buy another one for home for new desktop).
Generally? Sturdier construction and feedback. Try pushing on your membrane scissor switch keyboard, it’ll flex. Now try pushing a key in the middle just enough for it to activate reliably but without going beyond and pushing your finger against the backplate making it flex. Now do the same thing while pushing on the keyboard, your activation point should have moved.
With a mechanical keyboard it generally won’t flex as there’s a heavy steel backplate so the keys won’t move. The activation point will stay the same every time and with some switches you can ‘hover’ there for really fast typing, feedback helps you find that point. If you find them too hard to press you can get keys that require less force or travel.
I’ve got an IBM Model M and a Logitech K750 as backup. My fingertips hurt a little when using the K750 as I end up prodding the backplate on every keypress.
> Generally? Sturdier construction and feedback. Try pushing on your membrane scissor switch keyboard, it’ll flex.
Oh, so essentially heavy fingers? My keyboard does not flex in normal usage. I don’t want to push it so hard that it flexes. I like gently tapping keys, with minimum of force. I plan on making my own keyboard someday and experimenting with even shorter travel and easier to press keys.
I’d say activation point more than purely heavy fingers. Imagine a keyboard made of sponge, you can’t tell when a key has been pressed except by letters appearing on screen so you press harder and harder until that happens. Mechanical keyboards (at least my buckling springs) start off easy to press, get hard when you reach the activation point and then are medium from there. Membrane keyboards tend to be hard to start depressing and then suddenly give way until you hit backplate and activate the key. If you really got used to your keyboard and that curve you could press hard then much lighter as it begins to buckle but I never did, so full force right into the backplate every time.
If you like short travels try a macbook pro made from 2016 to 2019. Those keyboards have a really short travel and require a lot of force to activate. I didn’t get along with it but want to experiment with touchscreen keyboards since they have no travel yet I seem to get along with them on phones.
I had a really nasty rubber dome once, I had it on a secondary system, didn’t notice how bad it was for serious typing until I had it a while. It was stiff, and the keys needed pressing all the way down into the backplate. They didn’t register from bottoming out, you had to mash the rubber disk into the PCB. You started off just firming up your press but in a few minutes you were really whacking at it, then in half an hour you’d feel it in your joints.
Hey, I’m no big fan of mechanical keyboard either though I’ve never tried a good one I guess.
For now, I have a type matrix 2030 with a bepo layout (french layout) and I find it quite good with its laptop like switches. I’d still like to diy my own keyboard in a near future, and a lot of them use mechanical switches.
So +1, I’m curious if someone has a better experience with them compared to laptop like keyboard.
In addition to the sturdy construction mentioned by Max it is for me more a question of choice, there are numerous different types of key switch available with all sorts of weight required to activate as well as all sorts of haptic feedback to the fingers.
I use Ergodox keyboards like Kristina has written about here, there’s no way a manufacturer would produce such a keyboard on a mass production scale. I’ve never used a ‘standard’ mechanical keyboard, they’ve all been programmable and I’ve really gotten used to the freedom that gives me. Mostly the freedom to never need to move my hands from the home row.
Why “post mortem?” It literally means “after death” and is normally used in a development environment to refer to an analysis of a failed project. It doesn’t sound like yours failed – you have a functional keyboard that you can use.
In a development environment you’re encouraged to do a post mortem of all projects to you can find out what went well as well as what went badly. That gives you the opportunity to find fixes for issues you encountered along the way, and also carry forward things really helped you.
Perhaps “post mortem” isn’t the most appropriate phrase to describe the technique, probably “retrospective” would capture the feeling better, but that’s already something else in the development environment.
How can anyone stand using a keyboard with a numeric keypad?! It makes the mouse sit far to the right and moving your arm back and forth can cause RSI/carpel tunnel syndrome.
I actually want a laptop keyboard with built in mouse pad. Like an old ibm laptop.
Also, why do I never get notified of replies anyone?!
Did you miss this?
https://hackaday.com/2020/05/26/breathing-new-life-into-old-school-thinkpad-keyboards/