A monoblock split keyboard with the all-important num pad.

Back-to-the-Office Ergo Brings A Bit Of Home Sweet Home

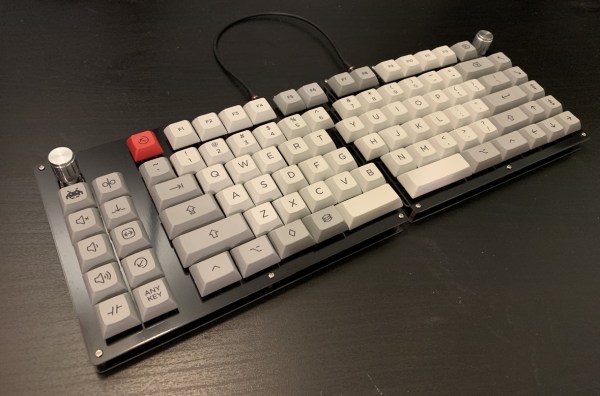
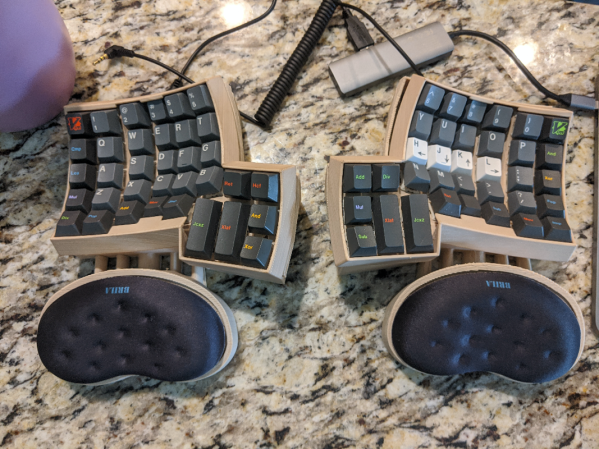
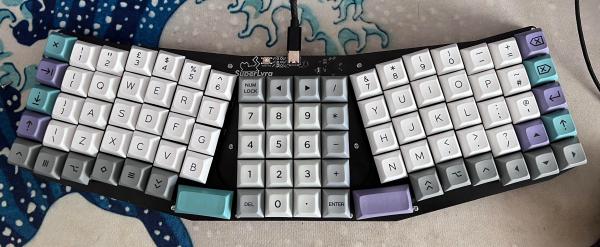
We sure do love a good one-piece split keyboard, and it’s not just because you never have to worry about the halves drifting too far apart throughout the day, though that’s a big plus. For one thing, the angles are always just right without having to mess with anything, so muscle memory gets you back to the home row every time. Usually, the only thing missing from these mono-block splits is the num pad. Well, not on the SuperLyra.

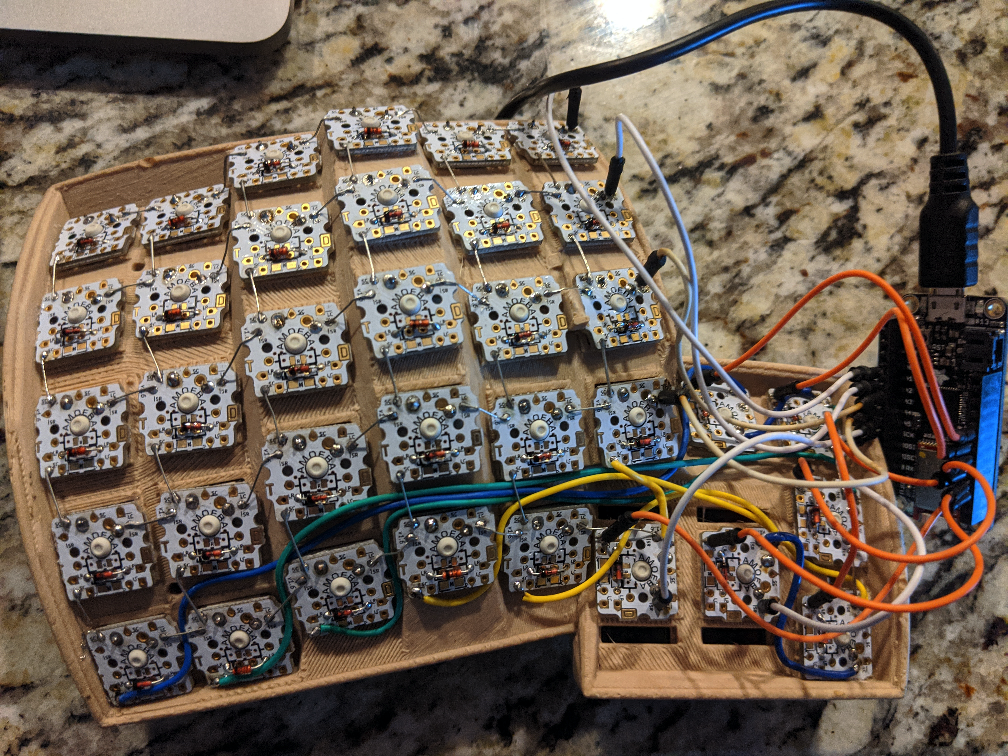
This is [Malevolti]’s back-to-the-office build, and it’s sure to start a few conversations. While we don’t have a lot of details, there will be plenty forthcoming on the Black Cat Plasticworks website. As soon as next year, [Malevolti] plans to sell fully-assembled SuperLyras, kits, and bare-bones PCBs. We really appreciate that it allows for either MX-type switches or Chocs, depending on the hot swap sockets installed.

As much as we love the Maltron-esque num pad in the middle, we imagine that it would be more comfortable to use if it were canted at 45° angle relative to the user’s dominant hand. Fortunately, some enterprising redditor had the same idea. They’ve already mocked this up in Photoshop and are inviting comments on another thread.

Want to go split, but don’t know which is right for you? Check out this Split Keyboard Finder.

Fat Bottomed-Keebs, You Make The Clackin’ World Go Round

Depending on the circles you run in, it can seem like the mechanical keyboard community is all about reduced layouts, and keebs without ten-keys are about as big as it gets. But trust us, there’s plenty of love out there for the bigger ‘boards like [Ben]’s tasty fat-bottomed keyboard. Man oh man, what a delicious slab of throwback to the days when keyboards doubled as melee weapons.

More specifically, this is a 199-key modified Sun Type 5 layout. It runs on two Teensy 2.0s — one for the keyboard matrix, and one for everything else. [Ben] made the metal enclosure entirely by hand without a CNC or laser cutter. While I don’t personally care for linear switches, I have mad respect for these, which are vintage Cherry Blacks pulled from various 1980s AT/XT boards. That 10-key island on the left is dedicated to elementary macros like undo/redo, cut/copy/paste, and open/close/save.

We absolutely love the gigantic rotary encoders, which give it a bit of a boombox look. There’s even reuse involved here, because the encoder knobs are made from jam jar lids that are stuffed with homemade Sugru. [Ben] can use them to play PONG on the LCD and other games not yet implemented on the everything-else Teensy.

Here’s another Sun-inspired keeb, but this one has a reverse 10-key layout that matches the DTMF phone dial.

Print Your Way To Keyboard Stability

Keyboard key stabilizers, or stabs as they’re known in enthusiast circles, do exactly what you’d expect — they stabilize longer keys like the Shifts and the space bar so that they don’t have to be struck dead-center to actuate evenly. Stabs work by flanking the key switch with two non-functional switch actuators linked with a thick wire bar. Some people love stabs and insist on stabilizing every key that’s bigger than 1u, while other people think  stabs are more trouble than they’re worth for various reasons, like rattling.

[Riskable 3D Printing] has been working on a parametric, printable stabilizer system for Cherry MX caps that uses small disk magnets to keep the wire in place. As you can see in the video (embedded after the break), the result is a crisp clacker that doesn’t rattle. The magnets stabilize the wire, so it snaps back quite nicely.

Although the print is an easy one, [Riskable] says the design process wasn’t as cut and dried as it seems. The center points of the stabilizer stems aren’t supposed to be in the center of cutouts, even though it looks that way to the naked eye. After that, the pain point has shifted to the wire, and getting it as straight as possible before making the necessary bends. [Riskable] is going to make a straightener to help out, and we suggest something like this one.

Clacker hacking is quite the rabbit hole, especially when combined with 3D printing. We recently saw a completely 3D-printed macro pad, springs and all.

Continue reading “Print Your Way To Keyboard Stability”

Tired Of Regular Keebs? Might Be Time To Split

No matter how much geek cred your old vintage keyboard pulls, it’s not worth suffering through wrist pain or any other discomfort while using it. Especially now, when there are so many points of entry into the rabbit hole world of DIY mechanical keebs.

Once the wrist pain started, [Ben Congdon] switched from a big old Apple keeb to a Kinesis Freestyle — it’s basically a regular keyboard, but in two halves that can be placed far enough apart that [Ben]’s wrists are straight while typing. Comfortable as that split rectangle may be, it’s just not that cool looking, and he was ready to build something new, as long as it had enough keys.

[Ben] settled on building a Keebio Sinc, a new board which comes mostly soldered already and supports a handful of layouts. In the spirit of leaving doors open, [Ben] soldered in hot-swap sockets instead of permanently attaching the key switches to the PCB. This way, those Gateron reds can be easily switched out for something else, for instance should [Ben] want to try a little tactility down the road.

We think the Sinc is a cool offering precisely because it is such a full keyboard. Not everyone is ready to jump into 60% layouts or thumb clusters, and it’s nice to have options. This is entry-level ergo and DIY all at once. What’s not to like? Even if you want to go for something small and ortholinear, there are options. Here’s a build we saw recently that starts with a breakaway PCB that lets you choose between small and smaller.

Via reddit

Inputs Of Interest: ErgoDox Post-Mortem

In the last installment, I told you I was building an open-source, split, ortholinear keyboard called the ErgoDox. I’m doing this because although I totally love my Kinesis Advantage, it has made me want to crack my knuckles and explore the world of split keyboards. Apparently there are several of you who want to do the same, as evidenced by your interest in the I’m Building an ErgoDox! project on IO. Thank you!

Well boys and girls, the dust has settled, the soldering iron has cooled, and the keycaps are in place. The ErgoDox is built and working. Now that it’s all said and done, let me tell you how it went. Spoiler alert: not great. But I got through it, and it keyboards just like it’s supposed to. I’m gonna lay this journey out as it happened, step by step, so you can live vicariously through my experience.

Continue reading “Inputs Of Interest: ErgoDox Post-Mortem”

Bluetooth Takes Keyboard From DIY To Super Fly

They say you should never cheap out on anything that comes between you and the ground, like tires, shoes, and mattresses. We would take that a little further into the 21st century and extend it to anything between you and work. In our case, ‘buy nice or buy twice’ includes keyboards and mice.

[Marcus Young] is a fan of ortholinear ergonomic comfort, but not of cables. He gave [adereth]’s dactyl keyboard some wings by using a Bluetooth micro, and the Pterodactyl was born. Of course, the two halves still use a TRRS cable to communicate, and wires are required to charge batteries, but it’s the principle of the thing.

That’s not all [Marcus] did to make the dactyl his own — it also has a modified full-fat base that gives him all the room in the world to wire up the keyswitch matrix compared to the original streamlined design.

Instead of the usual Teensy, Pro Micro, or Proton-C, the pterodactyl has a Feather 32u4 in its belly. [Marcus] is clacking on Holy Panda switches which we’ve been meaning to try, and individual PCBs for each switch, which seems like it might negate gluing the switches in place so they survive through keycap changes. Check out [Marcus]’ write-up to see what he learned during this build.

This isn’t the first modified dactyl we’ve seen flying around here, and it won’t be the last. Here’s one with a dual personality — both halves can work together or alone.

Via r/mk

A Macro Keyboard In A Micro Package

Remember back in the early-to-mid 2000s when pretty much every cheap USB keyboard you could find started including an abundance of media keys in its layout? Nowadays, especially if you have a customized or reduced-sized mechanical keyboard, those are nowhere to be seen. Whenever our modern selves need those extra keys, we have to turn to external peripherals, and [Gary’s] Knobo is one that looks like it could’ve come straight out of a fancy retail package.

The Knobo is a small macro keypad with 8 mechanical Cherry-style keys and a clickable rotary encoder knob as its main feature. Each key and knob gesture can be customized to any macro, and with five gestures possible with the knob, that gives you a total of thirteen inputs. On top of that, the build and presentation look so sleek and clean we’d swear this was a product straight off of Teenage Engineering’s money-printing machine.

The actions you can do with those inputs range from simple media controls with a volume knob all the way to shortcuts to make a Photoshop artist’s life easier. Right now you can only reprogram the Knobo’s Arduino-based firmware with an In-Circuit Serial Programmer to change what the inputs do, but [Gary] is currently working on configuration software so that users without any programming knowledge will be able to customize it too.

Knobs are just one of those things that everyone wants to use to control their computers, much like giant red buttons. Alternative input devices can range from accessibility-designed to just downright playful. Whatever the inspiration is for them, it’s always nice to see the creativity of these projects.

Continue reading “A Macro Keyboard In A Micro Package”